
Google Pixel 7 Pro リアカメラアセンブリの交換
はじめに
手順 1 に進むこの修理ガイドはiFixitテクニカルスタッフによって執筆されたものであり、Googleによって承認されたものではありません。修理ガイドの詳細はこちら。
この修理ガイドを参照して、Google Pixel 7 Proのリアカメラアセンブリを交換します。
注:このガイドは、5G mmWaveアンテナを搭載したGE2AEモデルを使用して作成されています。ミリ波アンテナを搭載していないモデルをお持ちの場合は、この手順の部分をスキップしてください。
安全のため、デバイスを分解する前にバッテリー残量を25%以下に放電してください。これにより、修理中に誤ってバッテリーを損傷した場合の火災の危険性を軽減できます。電池が膨張している場合は、 適切な方法で処分してください。
注意: Pixel 7 Proにはクラス 1 レーザーが搭載されています。分解すると、目に見えない赤外線レーザーにさらされる可能性があります。
修理後の防水性能の保持は、接着剤の塗布方法にもよりますが、デバイスのIP(防水防塵性能)等級が失われます。
この修理を完了するには、交換用の接着剤が必要です。
必要な工具と部品
修理キット
キットには、修理ガイドを完了するために必要な全ての部品とツールが含まれています。
パーツ
ツール
もっと見る
-
-
スクリーンのシーム(隙間)部分: このシームがスクリーンとデバイス本体を乖離します。このシームはこじ開けないでください。
-
ベゼルのシーム部分:スクリーンを保護するために設計されたプラスチック製のベゼルがフレームに接する部分です。ここはプラスチックのクリップで固定されています。ここをこじ開けてください。
-
取り外し手順の間、オープニングピックを正しい位置に差し込んでいるか確認してください。セーフティフレームからスクリーンを乖離するのではなく、デバイス本体アセンブリから分離してください。
-
スクリーンの周囲には、いくつかのプラスチック製のクリップがあります。万が一、スクリーンを取り外す際にピックが差し込めない場合は、ピックをスクリーンの下に深く差し込みすぎたことを意味します。
About the paragraph:
During the removal procedure, make sure to insert your opening picks in the right position to avoid separating the screen from its safety frame.
It was not clear to me what the safety frame was until I opened the phone; I was careful but while opening the phone I slid a pick between the screen and the frame, and they became separated in one corner, I wonder if this resulted to my screen being damaged after the repair.
An image that shows what the security frame is would be helpful.It is VERY difficult to get an angle into the frame and under the plastic bezel. Since this repair is for a screen, you don't have to worry about damaging it further because you will. I've done dozens of these repairs and have gotten ONE removed without further damage. Just an FYI. I also use 91% alcohol around the edges off the frame as well as heat (I have a hot plate set at 80*c that I lay it on after adding alcohol around the edges, place on hot plate for about 10 minutes, add more alcohol around the edges and then place on hot plate for another 5 minutes).
Thank you so much for the info about the degrees, amount of time, and when to apply alcohol! I really needed this info!!! Hallelujah!!
So what do we do if we DO separate the frame? Is there a way back from this?
-
-
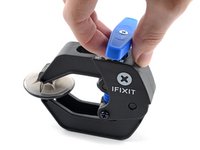
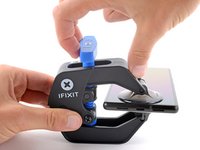
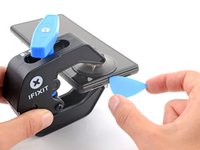
この手順で使用する道具:Clampy - Anti-Clamp$24.95
-
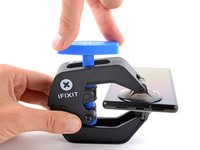
青いハンドルをヒンジ側(背面側)に引くと、クランプのアームが解除されます。
-
iPhoneの左/右側の端に向けてアームをスライドします。
-
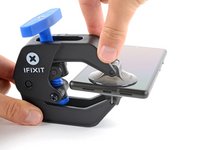
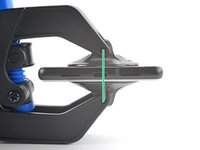
吸盤カップをiPhoneの下端付近に装着します。上部に一つ、下部に1つずつ取り付けます。
-
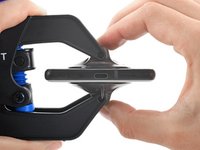
吸盤カップ両側をしっかりと締め合わせると、標的の場所にしっかりと装着させることができます。
The pixel 7 pro kit does not come with the clamp and may have to be purchased separately
juji juman - 返信
-
-
-
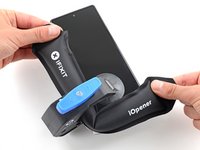
加熱したiOpenerをスクリーンに当て、下の接着剤を緩めます。iOpenerは3分以上当ててください。
-
-
-
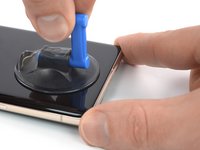
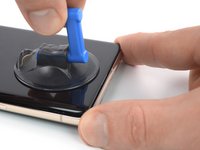
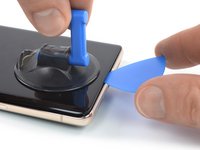
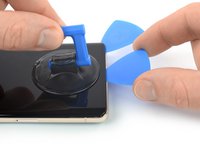
スクリーンが温まったたら、スクリーン下端に吸盤を当てます。
-
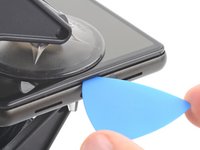
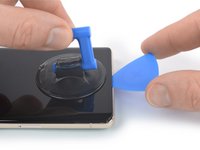
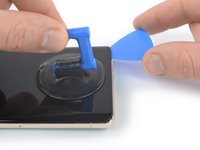
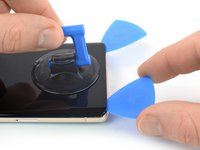
吸引ハンドルでスクリーンを安全フレームを含めて持ち上げ、スクリーンとデバイスの間に小さな隙間を作ります。
-
隙間にオープニングピックを差し込みます。
The crack on my screen is along the bottom, on a diagonal. I cannot get the suction cup to lift off the edge. I've tried more heat using a hair dryer, using tape, but nothing seems to work! The phone is only a few months old, could that be the issue? I'm really frustrated after trying multiple times throughout the day today.
I’m having the same issue unfortunately. I’ve superglued the suction cup and have it under weight. Going to wait 24 hours to see if it helps. Without a proper seal, there’s no way it’s going to lift. I made sure to leave about a half inch gap from the bottom of the phone to try and use the warming pad one more time
There are white line after one month only!!!
There are warranty or anything else
-
-
-
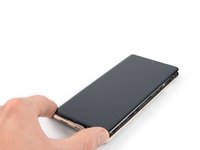
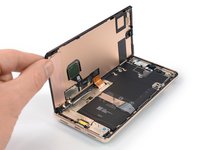
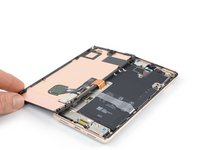
スクリーンケーブルはデバイス左端から半分弱のところにあります。ケーブルが破れないよう、ここには十分注意してください。
-
デバイス外周には多くのバネ接点があります。接点が曲がらないよう、これらの部分には十分注意してください。
I noticed some bending in the contact, particularly in the upper half right side. I believe I managed to straighten it out, but now it feels a bit loose. Despite this, I went ahead and fixed the screen over it, and everything seems to be functioning properly. However, I'm somewhat concerned about the implications of this. Should I be concerned about anything?
Same here, the upper half right side. while in the prosses of straightening it out i managed to break it! so now i want to know if my screen will work before i continue and put in, i'm afraid i'll just waste my new screen?
-
-
-
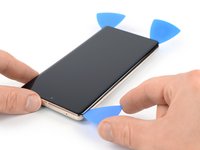
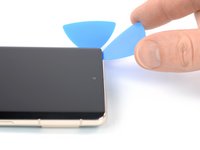
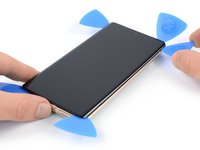
スクリーン右下コーナーにオープニングピックを差し込んで、接着剤をスライスします。
-
接着剤が再装着されないように、オープニングピックをその位置に残しておきます。
-
-
-
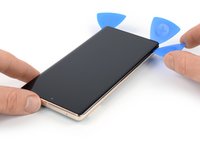
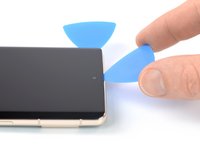
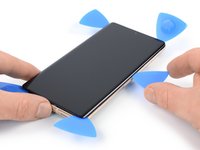
3枚目のオープニングピックをスクリーン左下の下側に差し込みます。
-
オープニングピックをデバイス本体左端にそってスライドさせ、プラスチッククリップと外して接着剤を切り取ります。
-
接着剤が再装着しないように、オープニングピックを左上コーナーに残します。
-
-
-
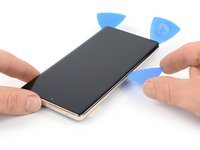
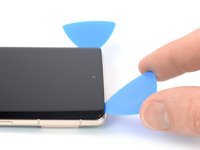
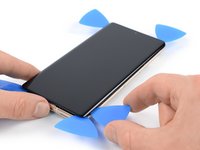
スクリーン左上隅に4本目のオープニングピックを挿入します。
-
オープニングピックをデバイス本体上端にそってスライドさせ、接着剤を切り取ります。
-
接着剤が再装着しないように、オープニングピックを右上隅に残します。
-
-
-
この手順で使用する道具:Tweezers$4.99
-
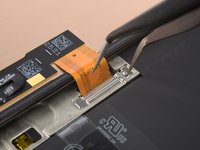
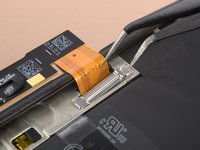
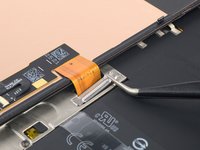
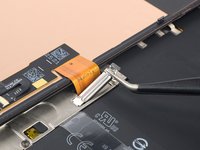
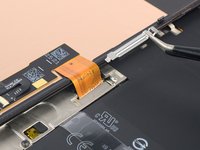
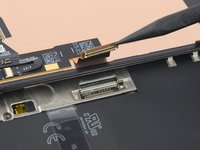
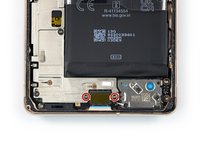
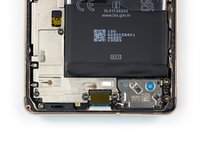
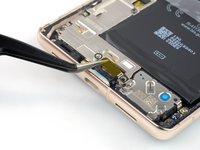
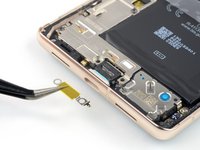
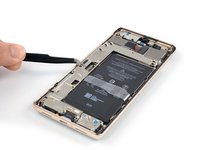
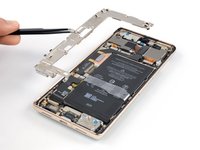
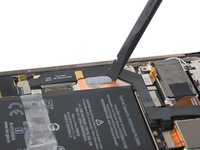
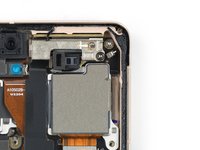
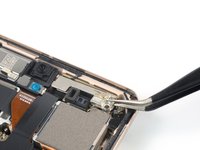
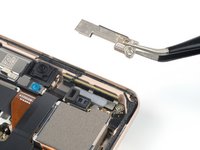
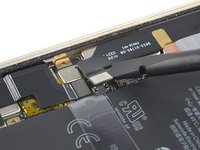
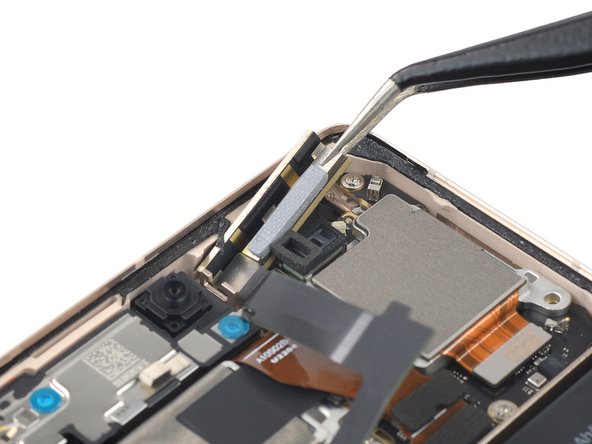
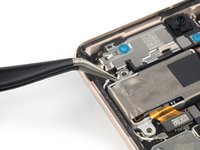
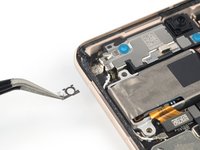
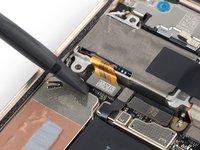
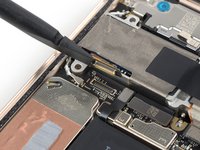
ディスプレイケーブルブラケット上端の開口部にピンセットの片方の腕を差し込みます。
-
ブラケットを内側に押し込んでから、上向きにこじ開けて外します。
This picture is a bit misleading and I ended up bending my bracket as a result. The picture shows the tweezers inserted in the bend of the bracket. If you insert it where the END of the bracket is, you'll have a much more natural way to remove it without much force! (this is just a little to the right of where it shows in the pictures...
-
-
-
-
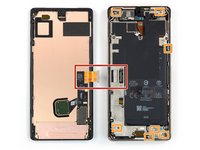
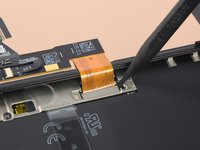
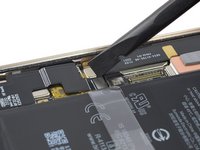
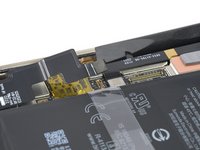
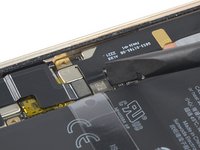
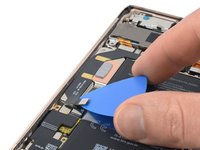
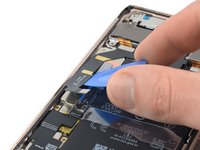
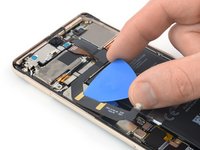
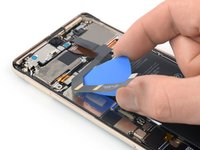
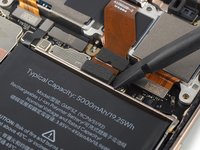
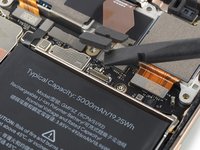
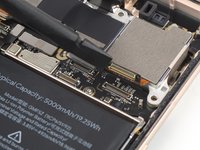
オープニングピックをミリ波アンテナケーブルの下にスライドして、奥まで滑り込ませます。
-
オープニングピックでマザーボードからミリ波アンテナケーブルを外します。
-
-
-
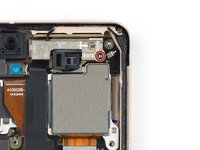
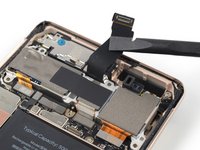
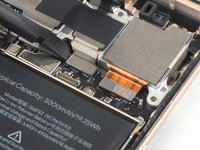
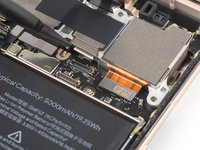
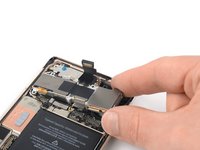
スパッジャーを使って、フロントカメラのケーブルをソケットからまっすぐ上に持ち上げて、接続を外します。
-
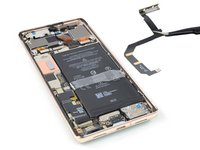
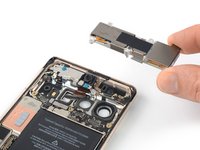
ケーブルを上に折り曲げて、リアカメラアセンブリを外します。
-
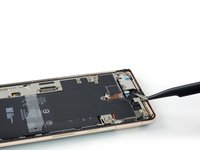
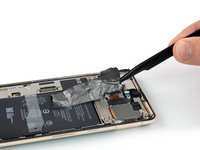
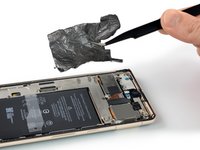
オリジナルのパーツと交換用パーツをよく見比べてください。交換用パーツに付いていない残りのコンポーネントや接着シールなどは、インストールする前に新パーツに移植する必要があります。
このデバイスを再組み立てするには、インストラクションを逆の順番に従って作業を進めてください。
Pixelのオンデバイス診断ツールで診断をする場合は、こちらのドキュメント(英語)を参照して下さい(注意:本項追記時点では、Pixel診断ツールは日本国内では使用できません)。
e-wasteを処理する場合は、認可済みリサイクルセンターR2を通じて廃棄してください。
修理がうまく進みませんか?ベーシックなトラブルシューティングを試してみるか、Google Pixel 7 Pro のアンサーコミュニティに尋ねてみましょう。
4 の人々がこのガイドを完成させました。
以下の翻訳者の皆さんにお礼を申し上げます:
100%
Midori Doiさんは世界中で修理する私たちを助けてくれています! あなたも貢献してみませんか?
翻訳を始める ›
1ガイドコメント
Thanks for the guide, I successfully replaced the back cameras with its help.
Unfortunately I damaged the screen somewhere in the screen removal steps, it now has a vertical white stripe of about 1/2 inch at the center; it happened somewhere between step 1 and step 10, I know because while sliding the pick across the right edge I accidently turned the phone back on and saw the stripe for the first time; it is unclear to me exactly what caused the damage.


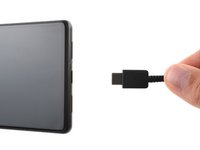





































































I am not able to power off. Broken screen does not respond. I have the battery fully discharged but would like to know before beginning my repair if I can plug in the charger to try the screen after replacement to verify all is functioning before reassembly.
Mary - 返信
Step 2 is VERY VERY IMPORTANT!!!!!!
I had to remove the adhesive and take out the plastic from the old screen, which was still on the phone and had to reapply it. It was a nightmare.
Please DON'T TAKE IT EASY
Kevin Döring - 返信