
iPhone SE 2022 スクリーンの交換

はじめに
手順 1 に進むこのガイドを参照して、iPhone SE 2022 のLightningコネクタアセンブを交換します。このアセンブリは下部マイク。アンテナコンバーターケーブル、Lightningコネクタを含みます。
この修理ガイドは、モデル番号 A2783 (インターナショナルモデル)を使用して作成されました。
Touch IDの機能を維持するためには、元のホーム/Touch IDセンサーを新しいディスプレイに慎重に移植することが重要です。ソリッドステートのホームボタンはAppleによってオリジナルのロジックボードとペアリングされています。そのため、これを交換すると機能しなくなります。
ご注意: Apple純正スクリーンと交換する場合でも、スクリーン交換後はTrue Tone機能が無効となります。
再組み立ての際に接着シールを交換しない場合、デバイスは正常に機能しますが、ほとんどの場合、防水機能は失われます。
デバイスを再組み立てする際に、部品を再接着するための交換用接着剤が必要になります。
必要な工具と部品
修理キット
キットには、修理ガイドを完了するために必要な全ての部品とツールが含まれています。

パーツ


ツール


もっと見る
-
-
油性ペンでオープニングピックの先端から3mmの位置にマークを入れます。
Got to step 2 and realized the fix kit doesn't include an opening pick! Looks like a guitar pick, and I have those lying around. Is that expected? Looks like the pick is used in many steps below. There's a little blue crowbar that isn't mentioned in the instructions. Perhaps that replaces the opening pick?
Hi! I can't see which guide you were using when writing this comment. Can you reply here with which guide and fix kit you used?
I see you posted this in Meta. I hope it's resolved soon! In the meantime, a guitar pick may work well enough for your repair.
what fix kit?
My fix kit didn't include an opening pick either
My AliExpress refurbished screen came with a pick that has a coin-like circle that pops out, so no modification was necessary
It's not an Ifixit KIT if it doesn't include everything. You'll need to order the opening pic separately. Or head to Walmart like myself and look for guitar pics. Hopefully, this will work just as well.
No pick in mine as well. It’s really not clear that you have to order this separately when ordering an IPhone SE 202/2022 screen repair kit. Is this the case?
Frustrated, I ordered a compact package where everything was encapsulated. Useless suction tools could not separate the screen. If it is unable to decouple the screen, then why sucking suction tools you have provided.
For my kit the triangle pick was stuck inside the box with the screen not with the other tools maybe it's also there for you
Y’all are getting far, FAR too detailed with some of this stuff…. Measuring and marking the pick that you won’t actually use to open the device?!? lol that’s kinda funny. Just heat it up, grab a spudger, and the back just pops right off! The iFixit tech need to stick to the KISS method more often, you know KEEP IT SIMPLE STUPID!!! Like l, for reals, I’ve been doing this stuff for YEARS and using iFixit guides regularly and this is just ridiculous at this point!
Will the phone still work if the sensor assembly on the back of the screen is damaged?
-
-
-
iPhoneの画面全体に、透明な梱包用テープを重ね合わせます。
-
次の手順でうまく吸盤が装着しない場合は、強力なテープ(ガムテープなど)を持ち手に折って、代わりにスクリーンを持ち上げてみてください。
-
-
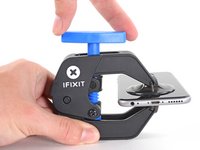
この手順で使用する道具:Clampy - Anti-Clamp$24.95
-
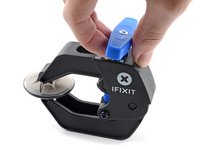
青いハンドルを後方に引き、リバースクランプのアームのロックを解除します。
-
iPhoneの左/右側の端に向けてアームをスライドします。
-
吸盤カップを、ホームボタンすぐ上のiPhoneの下端付近に装着します。上部に一つ、下部に1つずつ取り付けます。
-
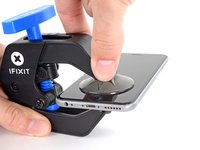
両側のカップをしっかりと押し付けて、取り付けたい位置に装着します。
-
-
-
青いハンドルを手前に引くと、アームがロックされます。
-
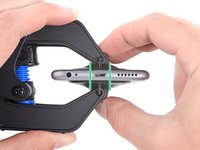
ハンドルを時計回りに360度回転させ、カップが両側をストレッチするまで回し続けます。
-
吸盤の位置が合っていることを確認してください。装着位置がずれ始めたら、吸盤を少し緩めてアームを装着し直してください。
-
-
-
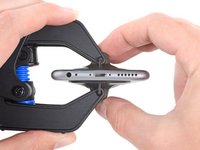
iOpenerを熱し、リバースクランプのアームに通します。
-
iOpenerをiPhoneの下端に重なるように折ります。
-
1分ほど待つと、粘着剤が剥がれ、隙間ができます。
-
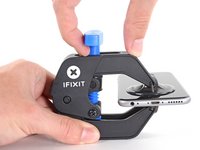
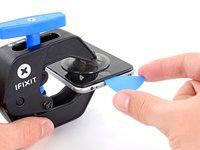
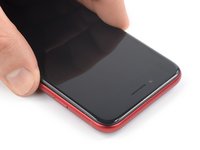
オープニングピックをスクリーンではなく、スクリーンとプラスチック製ベゼルの下の隙間に差し込みます。スクリーンには差し込まないでください。
-
次の2つの手順をスキップします。
It took a few tries to get this done -- with a broken screen the packing tape interferes with the suction cup hold. I eventually had to resort to a classic iSclack. Bear in mind that you don't need much of an initial opening, just enough to get a pick in. After a couple of minutes of the pick sitting there the surrounding adhesive will stretch and you'll be able to get two in for Step 9.
Neal Sofge - 返信
-
-
-
吸盤ハンドルを使用している場合は、次の2つの手順に従ってリアガラスを緩めます。
-
温めたiOpenerを用意し、スクリーンに少なくとも2分間当て、下の接着剤を柔らかくします。
-
-
-
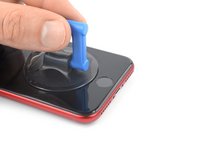
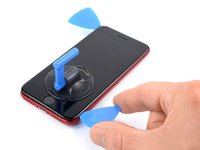
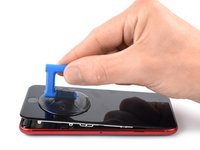
吸盤ハンドルをフロントパネルの下半分、できるだけホームボタンの近くに装着します。
-
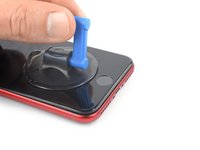
吸盤ハンドルでフロントパネルを持ち上げ、フロントパネルとフレームの間にわずかな隙間を作ります。
-
オープニングピックを、スクリーンのプラスチックベゼルの下 の隙間に挿入します。
-
-
-
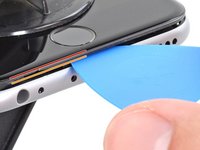
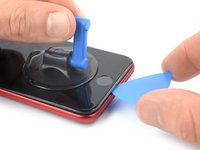
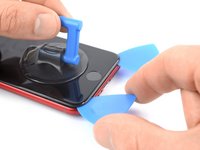
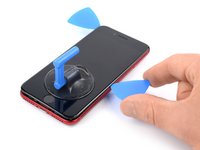
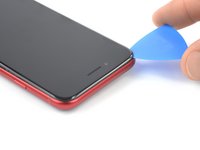
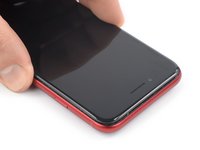
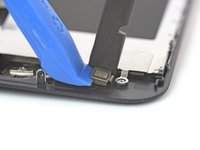
開口ピックを右下コーナーん差し込み、フロントパネルの接着剤をスライスします。
-
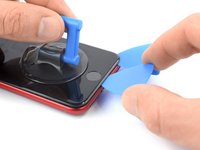
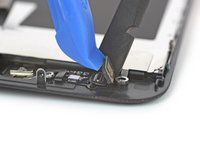
2番目の開口ピックをデバイスの下部端に差し込みます。
-
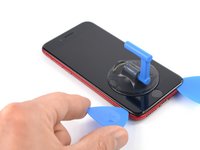
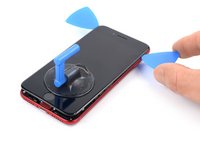
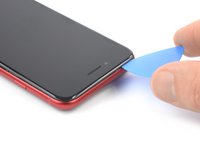
開口ピックを左下コーナーへスライドしながら、接着剤をスライスします。
-
接着剤が再装着しないように、開口ピックをその場に残します。
-
-
-
-
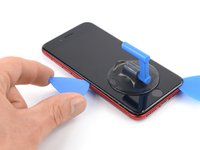
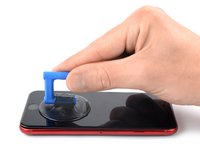
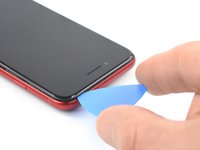
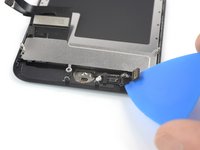
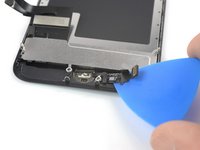
ディスプレイ左上コーナーの下に開口ピックをスライドします。
-
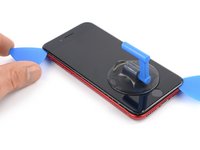
ディスプレイ下の開口ピックを左上の角からiPhoneの上端に沿ってスライドさせて、残りの接着剤を剥がします。
-
-
-
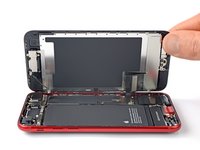
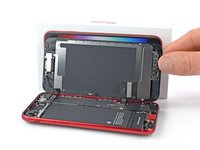
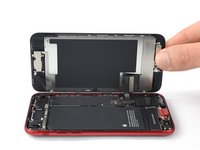
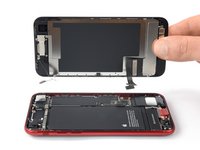
本のページをめくるように、ディスプレイの左側を持ち上げてiPhoneを開きます。
-
作業がしやすいように、iPhoneを開口をしたままディスプレイの後ろに衝立を置き、立てかけてください。
-
-
この手順で使用する道具:Magnetic Project Mat$19.95
-
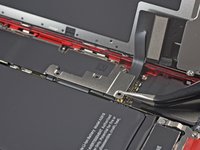
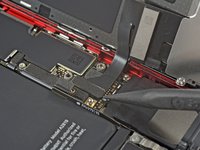
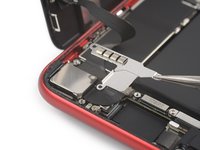
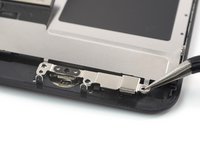
下部ディスプレイケーブルブラケットを固定している4本のプラスネジを外します。
-
長さ1.2 mmネジー2本
-
長さ 2.8 mmネジー2本
-
-
-
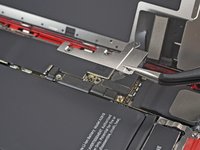
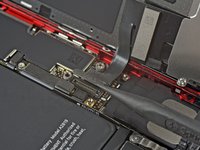
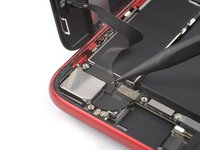
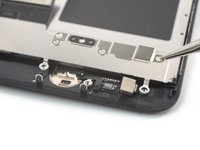
Home/Touch IDセンサーブラケットを固定している4本のネジを外します。
-
長さ 1.2 mm Y000ネジー3本
-
長さ1.1 mm Y000ネジー1本
-
-
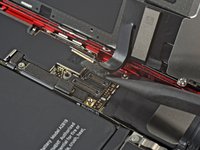
この手順で使用する道具:Tweezers$4.99
-
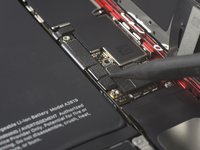
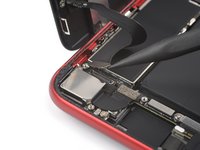
ピンセットを使って、Home/Touch IDセンサーブラケットを慎重につまみ外します。
-
-
-
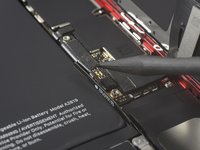
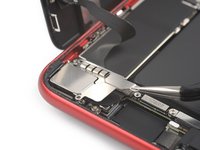
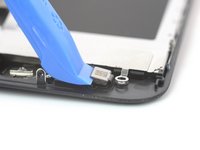
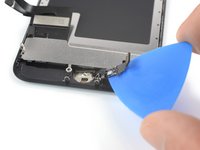
iOpenerを用意し、Home/Touch IDボタン側のスクリーン上に2分以上当て、そのケーブルの下にある接着剤を緩めます。
-
-
-
Home /Touch IDセンサーケーブルの下にある開口ピックを慎重にスライドさせて、ディスプレイパネル裏側から切り離します。
-
-
-
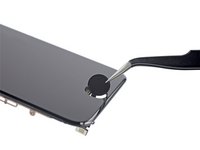
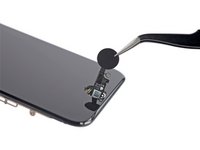
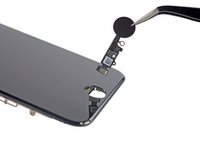
ピンセットを使って、ディスプレイの前面から持ち上げて、ホーム/タッチIDセンサーアセンブリを取り外します。
Do you know where I can get a replacement part
Sorry if this is a dumb question, but is there a guide to actually installing the part once these steps are all completed? I get the idea of going backwards, but it seems like there are places that adhesive must be applied, and perhaps some tips on how to do that correctly (or incorrectly! :D ) that might warrant spelling it our for us old folks.
I’ve got a SE3 here and got the part from Apple self repair! How ever that does not configure
-


可能であれば、新しい接着剤をインストールしてデバイスを密封する前に、電源を入れて、修理がうまくいったか点検をしてください。
デバイスを再組み立てする際は、これらの手順を逆の順番に従って作業を進めてください。
新しいスクリーンを固定するには、カスタムカットの両面テープをフレーム上に貼り、スクリーンを元の位置に戻すのが最適です。
e-wasteを処理する場合は、認可済みリサイクルセンターR2を通じて廃棄してください。
修理がうまく進みませんか?ベーシックなトラブルシューティングを試してみるか、このモデルのアンサーコミュニティに訪ねてみましょう。
可能であれば、新しい接着剤をインストールしてデバイスを密封する前に、電源を入れて、修理がうまくいったか点検をしてください。
デバイスを再組み立てする際は、これらの手順を逆の順番に従って作業を進めてください。
新しいスクリーンを固定するには、カスタムカットの両面テープをフレーム上に貼り、スクリーンを元の位置に戻すのが最適です。
e-wasteを処理する場合は、認可済みリサイクルセンターR2を通じて廃棄してください。
修理がうまく進みませんか?ベーシックなトラブルシューティングを試してみるか、このモデルのアンサーコミュニティに訪ねてみましょう。
19 の人々がこのガイドを完成させました。
以下の翻訳者の皆さんにお礼を申し上げます:
100%

Midori Doiさんは世界中で修理する私たちを助けてくれています! あなたも貢献してみませんか?
翻訳を始める ›


6 件のコメント
HOLA
Cambié la pantalla del iphone se 2022 , pero no me funciona la nueva pantalla. al volver a poner la original que solo estaba quebrada pero funcionaba, ahora ya no funciona.
no funciona. al parecer es otra pantalla. no da imagen
la pantalla 2020 no me funciono tampoco en un se 2022.
i real need my phone fix for school im only 12
Sorry if this is a dumb question, but is there a guide to actually installing the part once these steps are all completed? I get the idea of going backwards, but it seems like there are places that adhesive must be applied, and perhaps some tips on how to do that correctly (or incorrectly! :D ) that might warrant spelling it our for us old folks.
^ I second that, if I'm going to guy it, I would like to know what all the steps are spelled out.