
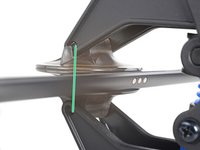
iPad 5 LTE フロントパネルアセンブリ

はじめに
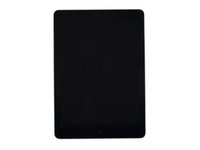
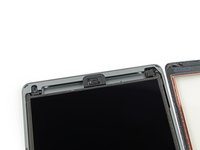
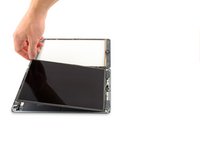
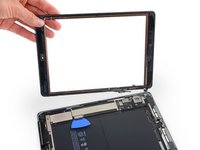
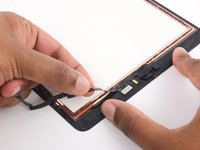
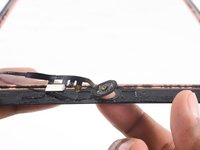
手順 1 に進むこのガイドを使って、iPad 5 LTEのフロントパネルの交換をします。
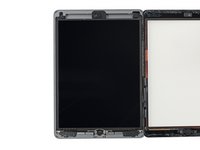
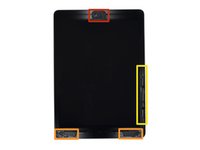
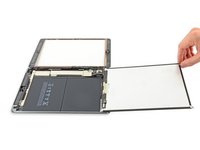
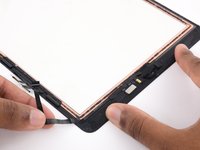
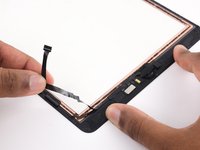
ホームボタンのTouch IDセンサーはロジックボードとペアになっています。このガイドではホームボタンの取り外しが含まれます。そのため、Touch ID機能を保持するには、新しいフロントパネルアセンブリにオリジナルのホームボタンを移植する必要があります。ご注意ください。
このガイドのパーツはWi-Fiモデル用にしようされています。内部はLTEモデルとは若干異なりますが、手順はどちらのモデルも同じです。
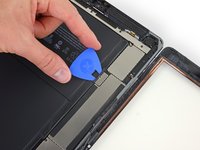
警告: このガイドに記載されているバッテリーの絶縁方法は時代遅れであり、ロジックボードのバッテリーピンに永続的な損傷を与える可能性があります。この方法でバッテリーを分離する場合は、すべての警告に注意し、非常に作業を進めてください。バッテリーを分離せずに修理する場合は、バッテリーをショートさせたり、デリケートな回路パーツを損傷することがあります。不可欠な場合(ネジを外すときなど)を除いて、メタル製の工具の使用は避けてください。
必要な工具と部品
修理キット
キットには、修理ガイドを完了するために必要な全ての部品とツールが含まれています。

パーツ


ツール


もっと見る
-
-
鍋を十分な量のお湯で満たして、iOpener を完全に沈めます。
-
お湯を沸かして熱くなったら火を止めます。
-
iOpenerを熱湯の中に約2−3分間沈めます。iOpener全体が完全に浸かっているか確認してください。
-
トングなどを浸かって、温まったiOpenerをお湯から取り出します。
-
タオルでiOpener全体を拭き取ります。
-
iOpenerの準備は整いました。iOpenerを再度温める必要がある場合は、お湯を沸騰させて、火を止めてからiOpenerを2-3分間浸してください。
-
-
-
ディスプレイガラスにひびが入ってしまった場合、割れてしまった部分が広がらないようにガラス表面上にクリアテープを貼るなどして、怪我がないようご注意ください。
-
iPadディスプレイ上にクリアタイプのテープを何重にも貼り、全体を覆います。
-
ここに書かれている手順にできるだけ従ってください。しかしながら、ガラスが一旦割れてしまうと、作業を続けていくにつれてひびが広がってしまう可能性があります。この場合、ガラスを取り出すためにはメタル製工具を使用する必要があります。
-
-
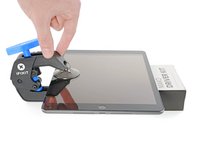
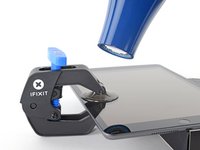
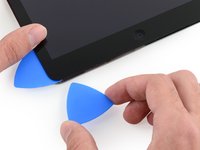
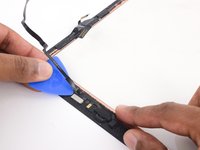
この手順で使用する道具:Clampy - Anti-Clamp$24.95
-
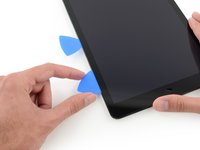
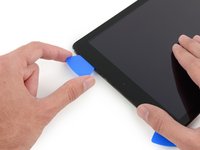
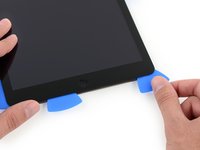
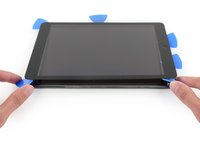
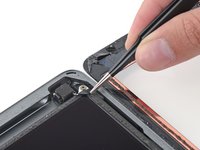
青いハンドルを後方に引き、リバースクランプのアームのロックを解除します。
-
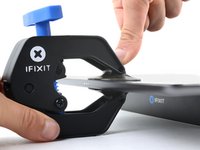
青いハンドルをヒンジ側に引くと、オープニングモードが解除されます。
-
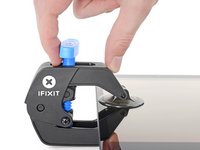
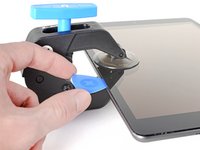
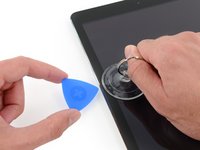
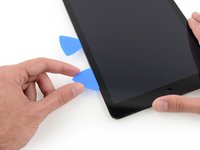
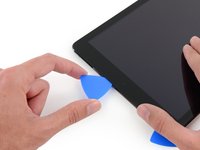
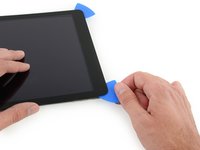
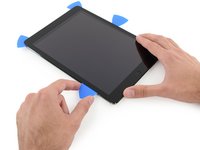
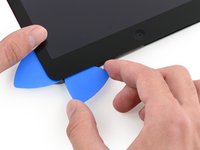
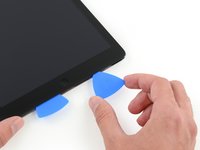
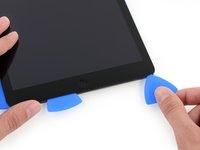
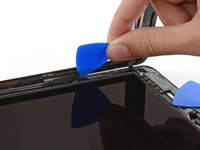
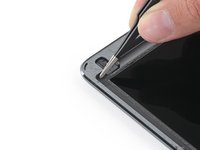
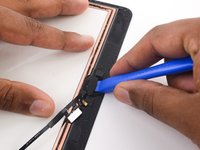
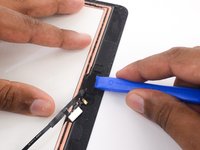
吸盤を左端の中央付近に配置し、上下に1つずつ装着します。
-
リバースクランプの下部をしっかりと固定し、上部カップをしっかりと押し下げて吸盤を装着ます。
-
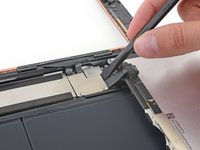
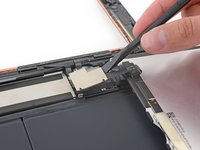
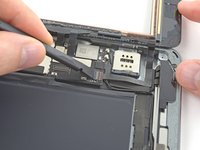
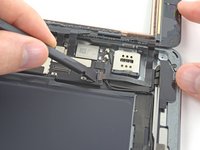
-
-
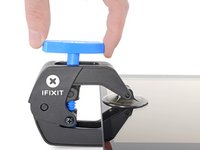
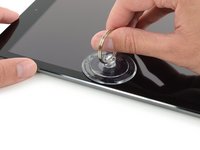
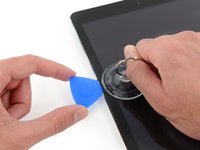
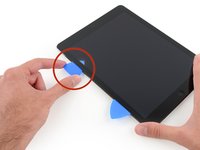
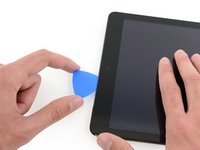
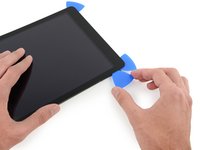
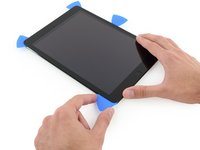
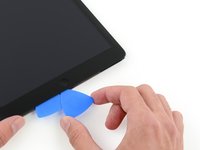
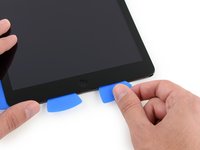
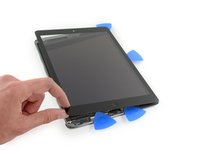
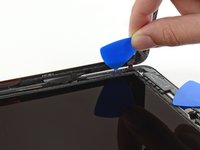
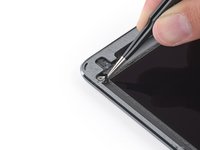
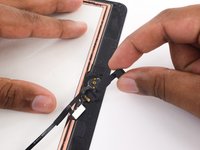
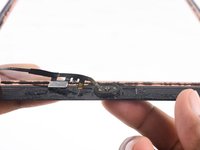
温めた側の真ん中から少し上辺りに、吸盤カップを取り付けます。
-
しっかりと吸盤がスクリーンに装着されるにはカップがスクリーン上に完全に平らに付いているか確認してください。
-
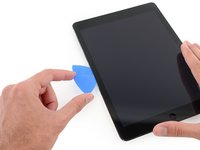
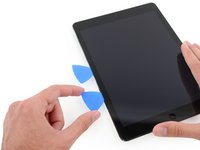
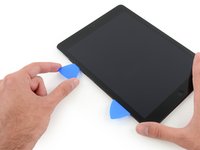
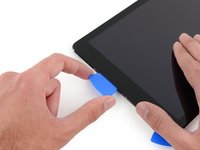
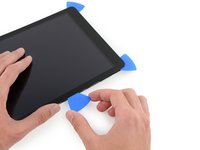
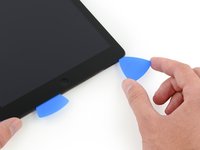
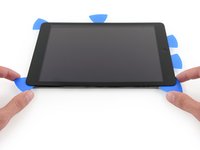
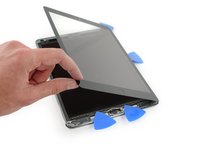
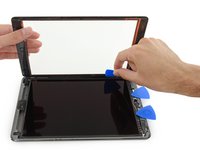
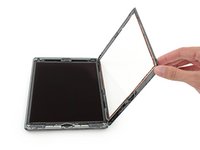
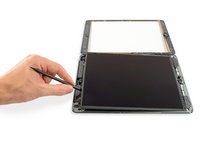
iPadを片手で押さえながら、背面ケースをフロントパネルのガラスから離すために吸盤カップを上部に向けて引っ張りあげます。
-
iPadのスクリーンの破損がひどい場合は、透明なパッキングテープで表面を覆うと、吸盤がうまく接着します。 または、強力なテープ(ダクトテープなど)を使用して、ハンドルに折りたたんでください。
-
-


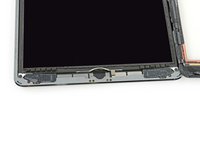


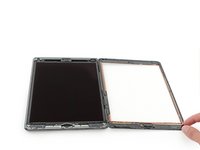


デバイスを再組立する際は、これらのインストラクションを逆の順番に従って作業を進めてください。
デバイスを再組立する際は、これらのインストラクションを逆の順番に従って作業を進めてください。
35 の人々がこのガイドを完成させました。
以下の翻訳者の皆さんにお礼を申し上げます:
100%

Midori Doiさんは世界中で修理する私たちを助けてくれています! あなたも貢献してみませんか?
翻訳を始める ›


6 件のコメント
I was able to complete this repair although the screen on the iPad that I was trying to repair was completely shattered and I ended up having to just take it out in chunks. A little more detail about best practices in that situation would be good. I also am having some issues with the home button not being quiet right after the repair and now that I am seeing that I would have purchased a replacement for the adhesive holder piece when I got the screen. It is working fine for now and I plan to just be careful with it so I don’t have to pull the display again and risk messing up the screen adhesive and having to order another set of that again too.
It didn´t work for me. I did this repair 2 times.
At the first try, the front glass was not totaly fixed, so I I used 10 strong clamps to get a better connection, but the glass was not really fixed and broke again with a new one.
So I tried twice. I cleaned everything very well, waited half an hour before I put the glass on the ipad. I put it on a flat surface on top with some haevy gear for 24 hours. After only some days the glass lost connection at the right down side where the cables are. So the display got a crack again.
I asked ifixit to fix this.
They told me: This is my fault.
Most likely you did not route the display cables down into between the housing and the lcd this is tricky if done right and the chassie is not bent and no debre is left the screen should adhear no problem. I have done many of these with no issues.
I like the instructions for how to get the new panel on "do this all in reverse, completely useless. I want to know how to glue the home button back onto the new panel, where to run each wire now that the tape is all removed, how to get the new screen on, seems half done. Can we just update it to have reassembly instructions. also the kit no longer comes with that tool and it says "skip ahead to alternative" and there is none, and the suction cup is 100% useless, it does not suck at all, no matter how perfect the glass is under it or how hard you press it on, you can just blow on it and it will move, no force at all required and it immediately comes off. Just forget the toolkit, but the screen and watch some youtube videos, this guide and toolkit are useless.