
Huawei P20 Pro ホームボタンと指紋センサーの交換

はじめに
手順 1 に進むこのガイドではHuawei P20 Proの指紋認証センサーを含む、ホームボタンを取り外して、交換する方法を扱っています。
Huawei P20 Proを開口すると、デバイスの 耐水用シールにダメージを与えてしまいます。接着シールを交換しない場合、通常通り機能しますが、耐水性能を失ってしまいます。
ご注意: このガイドは、オリジナルフレームとマザーボードをそのままの位置に残して、ディスプレイのみを交換する方法です。しかしながら、このデバイスの交換用スクリーンには新しいフレーム(別名:筐体)がプレインストールされているものがあります。この場合、作業が異なり、デバイスの内部パーツを移植しなければなりません。このガイドを参照して作業をする場合、正しいパーツを入手しているか確認してください。
Huawei P20 Proを開口すると、デバイスの 耐水用シールにダメージを与えてしまいます。接着シールを交換しない場合、通常通り機能しますが、耐水性能を失ってしまいます。
一度外したバッテリーの再利用は絶対にしないでください。潜在的な危険性が潜んでいます。新しいバッテリーに交換してください。
デバイスを再組み立てする前に、バッテリーの残量を25%以下まで放電してください。バッテリーが膨張している場合は、デバイスを温めないでください。膨張したバッテリーは大変危険です。保護メガネを装着して、特別に注意しながら作業を進めてください。作業に自信がない場合は、修理の専門家にご相談ください。
デバイスを再組み立てする際には、デバイスを再装着するための交換用接着剤が必要です。


-
-
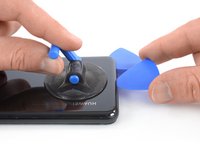
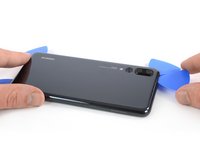
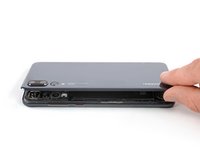
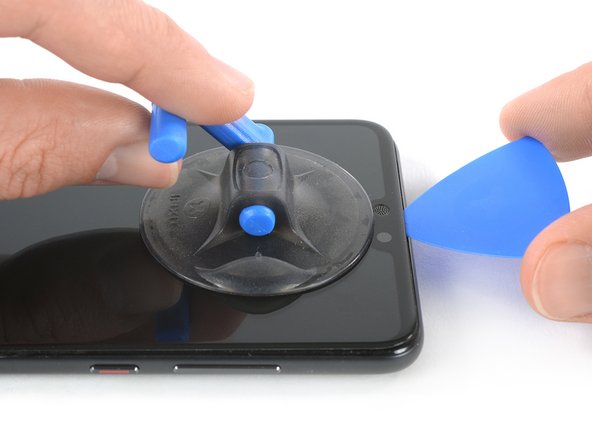
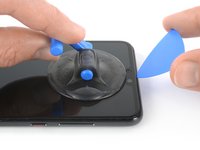
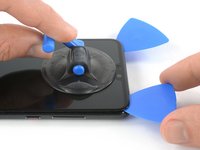
デバイスの下側端に近いリアガラス上に、吸盤カップを押し込んで装着します。
-
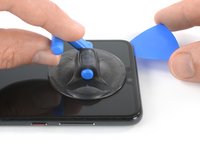
吸盤カップで下側端を持ち上げます。リアガラスとフレームの間に、わずかな隙間を作ってください。
-
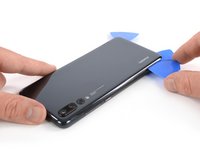
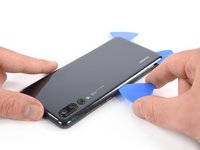
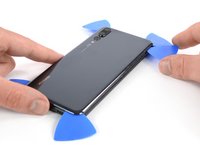
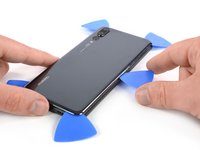
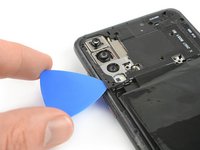
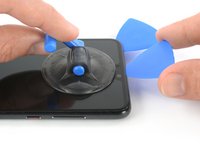
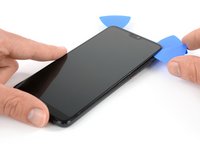
開口ピックを隙間に差し込んで、下側右端に向けてスライドします。接着剤が再装着しないよう、その場所に開口ピックを挟んだままにします。
if the back cover is not broken, i’d suggest NOT to use an opening pick as if the phone was not heated enough, you may crack the glass on the edges. better use the iPlastix, it is thinner and less stressful for the glass.
I have to agree that is is much easier to start opening from the side. Do read the rest of the guide though, to make sure you won’t hit something when opening it from the side.
Jacob Cain - 返信
-
-
-
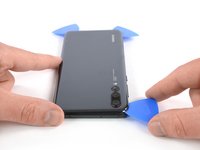
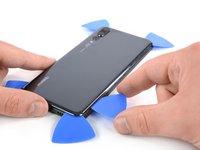
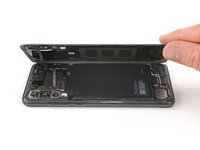
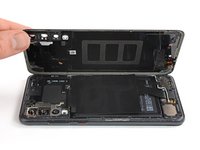
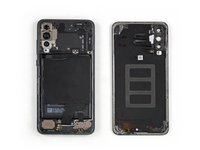
リアガラスを取り出します。
Das mit den Klebstreifen funktioniert nicht. Ich habe die Tube E6000 in die Dichtungen eingeklebt und so das Smartphone wieder zusammengesetzt.
-
-
-
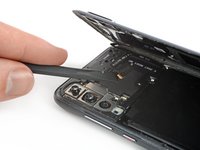
マザーボードカバーを取り外します。
Porque cuando desconectas el nfc no vuelve a funcionar?
a teraz to zopakuj po vychodňarsky
-
-
-
-
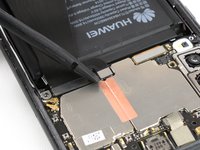
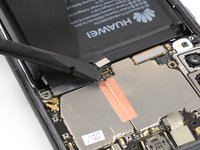
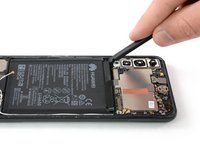
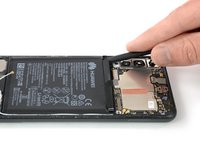
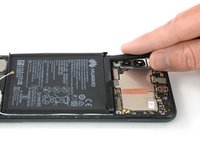
スパッジャーの平面側先端を使って、バッテリーフレックスケーブルを持ち上げて、接続を外します。
Das Flachbandkabel kann einen Zentimeter zu lange sein. Ich musste ihn 2 mal falten, um beim Einbau die Steckerbuchse wieder zu treffen.
-
-
-
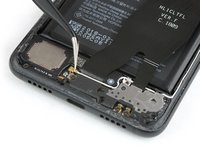
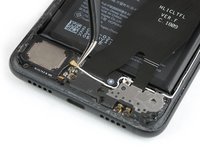
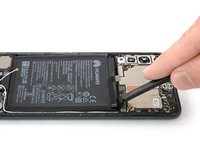
iOpenerを使って、バッテリーの下に留められた接着剤をほぐします。少なくとも2分間ディスプレイにiOpenerを置きます。
-
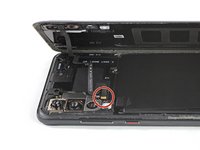
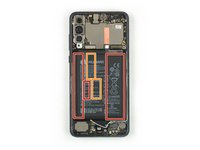
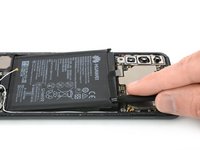
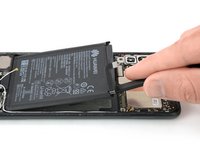
次の手順では、バッテリーの接着剤が塗布されている赤で示された箇所にスパッジャーを挿入します。
-
ディスプレイフレックスケーブルが通っているオレンジ色の箇所に触れないでください。
-
-
-
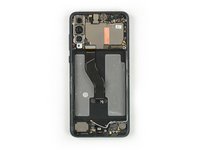
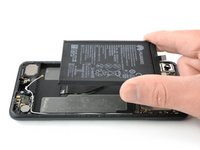
バッテリーを取り出します。
Bonjour, le "ôter la batterie " m'a fait rigoler, trois fois chauffer le Iopener pour ramollir la colle et malgré tout, la batterie était tellement bien accrochée qu'elle est maintenant déformé, plier et même percée donc bonne à jeter, j'avais pas prévu de la remplacer mais j'y suis contraint 😑
Merci encore pour ce tutoriel génial 👍
-
-
-
iOpenerを使って、ディスプレイに少なくとも2分間載せてください。下に留められた接着剤が柔らかくなります。
-
ここに翻訳を挿入する
-
ここに翻訳を挿入する
Bonjour l'équipe, je ne comprends pas pourquoi, l'Iopener n'est pas plus large, ses dimensions ne correspondent à aucun téléphone moderne et la tenue en température est faible, en plus il ne supporte pas les chauffe à répétition.
Peut-être pourriez vous suggèrer le décapeur thermique et nous donner des indications sur les températures à atteindre et les températures maximale...
Simple suggestions😉
-
-
-
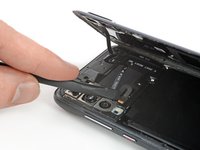
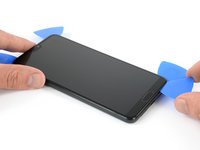
スクリーンが熱くて触れない程度まで温まったら、吸盤カップをデバイスの上部端に取り付けます。
-
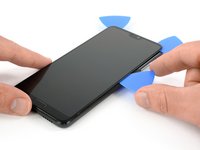
吸盤カップを上向きに引いて、ディスプレイガラスとプラスチックベゼルの間に開口ピックを差し込みます。開口ピックを左側上の角に向けてスライドしながら、接着剤を切開します。
There will be 2 gaps one under the screen glass(the one you should open) the secod notch down is where a fragile plastic frame is. Stay away from it and use the upper notch
-
-
-
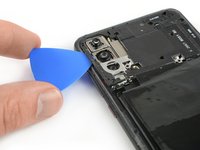
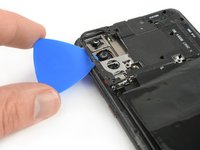
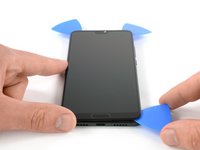
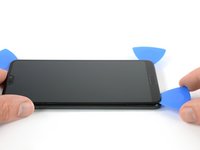
4番目の開口ピックをデバイス右下コーナーに差し込みます。
-
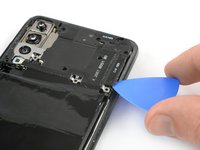
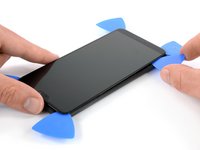
ホームボタンにダメージを与えないように、開口ピックの先端のみ、デバイス下側端に沿ってスライドしてください。
-
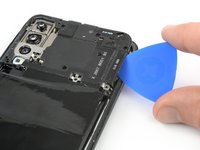
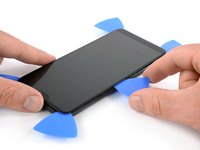
接着剤が再装着しないよう、開口ピックをデバイス左下のコーナーに残します。
C encore moi, j'ai fini par pouvoir insérer un médiator après de nombreuses reprises à 25 centimetres de mon décapeur thermique réglé au minimum après 10 minutes de chauffe et en insérant au préalable sur 3 MM un cuter très petit, si ça peut vous servir 😉
J'ai juste fait la place d'insérer mon 1er médiator et le reste à été tout seul, colle bien ramolli
-
-
この手順で使用する道具:Tweezers$4.99
-
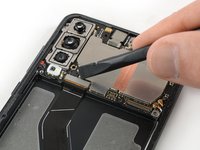
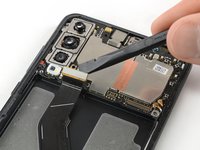
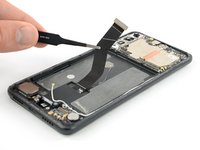
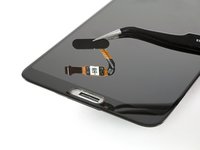
ピンセットを使って、フレームからディスプレイフレックスケーブルを剥がします。
-
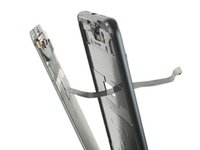
ディスプレイフレックスケーブルをフレームの隙間から引き抜いて外し、ディスプレイを取り出します。
after this part, even after heating the screen it didn’t come apart in one shot, i had my digitizer, led, and protective all apart and still no access to remove the display flex cable, tore a cable connecting to the screen and now my phone is trash. somehow you managed to bypass this part and magically go to the part where you can see the home button? not happy. “Remove Display” you make it seem so easy yet this is the part that destroyed my phone. Please include the step 33b that we need, thanks
-
-
-
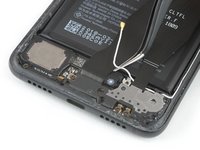
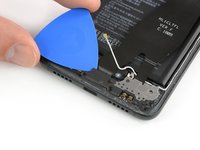
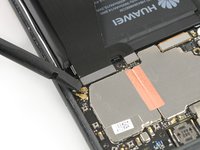
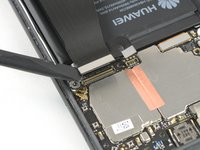
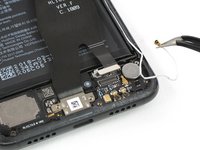
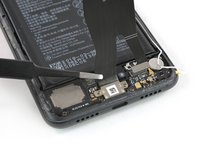
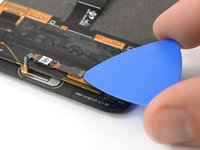
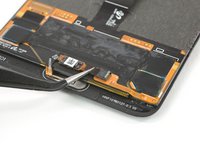
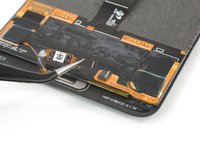
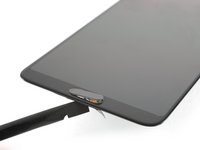
スパッジャーをホームボタンの裏側に差し込んで、スクリーンから外れるまで、正面側に向けて押し出します。
-
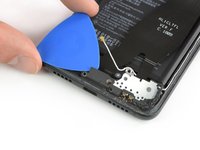
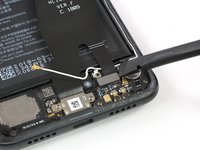
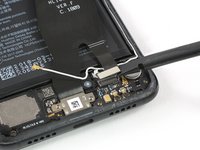
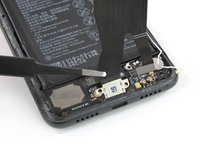
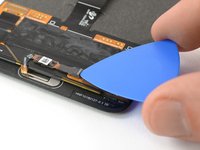
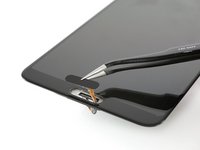
慎重にホームボタンを摘んで、フレックスケーブルをスクリーンの間から取り出します。
-
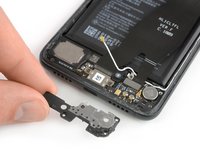
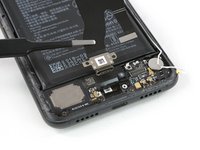
ホームボタンを取り出します。
Wie komme ich den Homebutton wieder fest.
Nach der Reparatur hängt dieser leicht nach vorne raus. Brauche ich einen speziellen Kleber oder geht auch klassischer Sekundenkleber von UHU?
Sleepy Lex - 返信
-


スクリーンをカスタムカットされた両面テープで再装着するベストな方法です。古い接着剤を全て剥がして、スクリーンの裏側に新しいテープを装着します。それからフレームにディスプレイケーブルを慎重に通します。スクリーンの位置を揃えてから、しっかりと押して装着します。
デバイスを再組み立てする際は、これらの手順を逆の順番に従って作業を進めてください。
可能であれば、新しい接着剤を付けて、デバイスを密封する前に、デバイスの電源を入れて修理作業がうまくいったか確認してください。
e-wasteを処理する場合は、認可済みリサイクルセンターR2を通じて廃棄してください。
修理が上手く進みませんか?トラブルシュートのヘルプには、アンサーコミュニティを参照してください。
5 の人々がこのガイドを完成させました。
以下の翻訳者の皆さんにお礼を申し上げます:
100%

Midori Doiさんは世界中で修理する私たちを助けてくれています! あなたも貢献してみませんか?
翻訳を始める ›


11 件のコメント
Hello, is p20 fingerprint sensor same as p20 pro and can u switch them betwin models? Thanks for answer.
Is it really needed to dissemble all the phone? The more I look at tutorial, the more it seems you can just unglue the screen (while it's still attached to the phone) and remove the fingerprint scanner. I'm I wrong?
Christo Bd - 返信
Hi Christo,
the display cable of the Huawei P20 Pro is held in place by adhesive underneath the battery. Not removing the battery and loosening the adhesive underneath the cable will result in damage to the display and/or display cable when trying to lift the screen. At the same time the glued cable will hold the display in place and it won’t be possible to lift the display high enough to open the ZIF connector of the fingerprint without causing critical tension to the cable. However it can be possible to do it the way you were mentioning but this will require some experience with smartphone repairs and a good amount of instinctive feeling.
Leider ist mit beim Herausdrücken des Sensors der Metallrahmen mit herausgefallen. Diesen bekomme ich jetzt nicht mehr fest. Was mache ich denn jetzt? :(
Hi Thorsten, Ich vermute mal, dass der Metallrahmen auch mit Klebstoff von hinten am Display befestigt ist. Wenn du sagst, dass du ihn nicht mehr fest bekommst, liegt es daran dass es nicht mehr klebt oder der Klebstoff verformt ist. Falls noch gut in FOrm kann es schon genügen ihn warm zu machen und wieder ran zu drücken. Ansonsten muss man womöglich den alten Klebstoff entfernen, die Stelle reinigen und neuen Klebstoff anbringen. Zum Reinigen benutzt du am besten Isopropanol (>90%). Als Klebstoff bietet sich dieses doppelseitiges Klebeband an (könnte evtl aber auch zu schwach sein zwecks des Drucks auf den Button) oder ein Klebstoff wie der E6000. Allerdings ist es schwer zu sagen wie die Stoffe sich mit dem Display vertragen. Auf jeden Fall viel Erfolg mit der Reparatur.
Habe den Rahmen erfolgreich mit dem T7000 Kleber befestigt. Hat sich eh erledigt, da sich beim Ausbau des Displays an der unteren Kante des OLED ein Riss gebildet und das Display nun nicht mehr angeht. 270€ für ein neues Display lohnt sich nicht. :(
Thorsten -
Super Anleitung, vielen Dank!
Bei dem P20 pro meiner Frau wird der Fingerprint Sensor heiß.
Ist das ein bekanntes Phänomen bei defekten Sensoren?
I followed this manual, thanks for explaining all of this! Unfortunately my phone does not work any more. Hoping somebody knows what needs to be replaced:
When I charge it, charging light is on and it vibrates when I connect the cable as normal. It does go very warm around the port and also doesn't show charging progress. No screen image at all.
When I try to turn it on, the screen flickers in a couple of lines, then the backlight is on for a couple of seconds, then off again.
All the alarms still go off, with no way to turn them off because there is no screen image.
Because the alarms are still working I'm not completely sure the phone is off. My guess is that it is not booting, I think the alarms still work even though it is off, but not sure.
Thanks for any help!
I don't recommend removing the battery and display, it is possible to remove and install a new the finger print sensor only by removing the speaker (disconnecting the battery is also a good idea). It is a bit tricky to fiddle the flexprint through the hole and then below the bar of the frame to plug it into the connector, but it is possible and you don't risk to destroy the display during disassembly.
In order to replace the fingerprint reader/home button, you need to remove the display and battery. You might be able to leave the battery in place, but the display has to be removed.
Hello, I have replaced the sensor, but the OS is not recognising it. Does the fingerprint sensor needs to be paired with the mainboard? I tried wiping the cache and factory reset, but without success. Thanks for any help!
Ich hatte keinen iOpener. Daher hab ich das P20 Pro für ein paar Minuten auf eine Wärmflasche gelegt. Die Klebeschicht konnte relativ schnell gelöst werden.
David T. - 返信
Bonjour à toute l'équipe, déjà un grand merci pour votre travail, j'adore vraiment l'état d'esprit.
J'en suis à l'étape 1 et comme ma vitre arrière est cassé, la ventouse n'adhère pas.
Donc plan B, comme suggéré malheureusement ma cyanolite ne semble pas adhérer sur le verre, j'essaie avec une bonne colle à chaussure car Trés solide et je laisse sécher la nuit en légère pression, j'espère avoir un minimum de prise afin de glisser les médiators mais le verre est bien brisé et j'ai un peu peur que ça parte en morceaux, croisons les doigts 🤞
Je vous dirais pour la suite 😉
Salut à l'équipe, vous faites un travail formidable, merci beaucoup
cyp cabs - 返信
@cypcabs avec grand plaisir ! Bravo pour l'ingéniosité en tout cas ! J'espère que vous avez pu ouvrir votre Huawei avec succès entretemps.
Claire Miesch -