はじめに
この修理ガイドはiFixitのテックライティングスタッフによって執筆されたもので、Googleによって承認されたものではありません。iFixitの修理ガイドのクオリティーについては、 こちらを参照してしてください。
このガイドを参照して、Google Pixel 5 バッテリーの交換をします。
デバイスを解体する前に、バッテリーの残量を25%以下まで放電してください。充電されたリチウムイオンバッテリー は引火の原因となったり、アクシデントで穴を開けてしまうと爆発の恐れがあります。バッテリーが膨張している場合は、 適切な方法で処理してください。
この画像ではリアカメラが取り外されていますが、バッテリーの取り外し作業で必須の作業ではありません。
必要な工具と部品
-
-
スクリーンの継ぎ目: この縫い目は、スクリーン他の本体部分から分離します。この継ぎ目はこじ開けないでください。
-
ベゼルの継ぎ目: スクリーンを保護するためのプラスチック製のベゼルとフレームが接する部分です。プラスチックのクリップで固定されています。ここをこじ開けてください。
-
-
-
青いハンドルをヒンジ側に引くと、オープニングモードが解除されます。
-
吸盤は、スクリーンのホームボタンのすぐ上に、前面と背面側に1つずつ装着します。
-
カップを押し下げると、目的の部分に吸引力が加わります。
-
-
-
温めた下部端に近い位置に、吸盤カップをしっかりと装着します。
-
一定の強い力で吸盤カップを引き上げて、バックパネルとフレームの間に隙間を作ります。
-
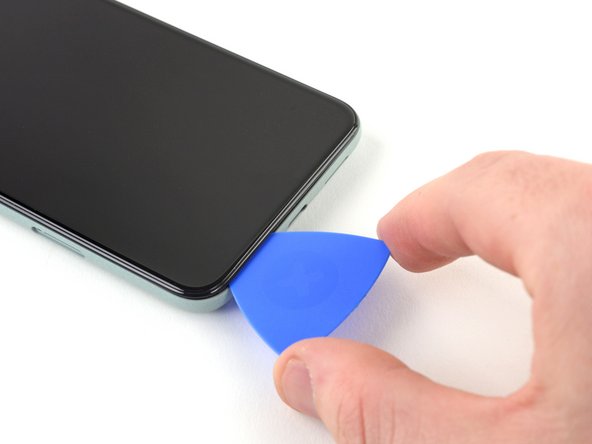
開口ピックの先端を隙間に差し込みます。
-
-
-
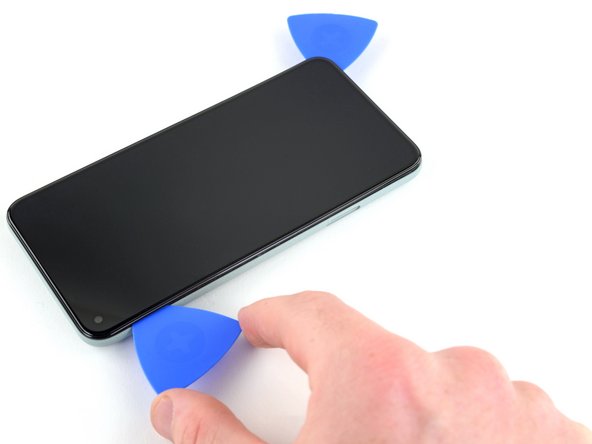
差し込んだ開口ピックを、スクリーン下部に沿って前後にスライドしながら、接着剤を切開します。
-
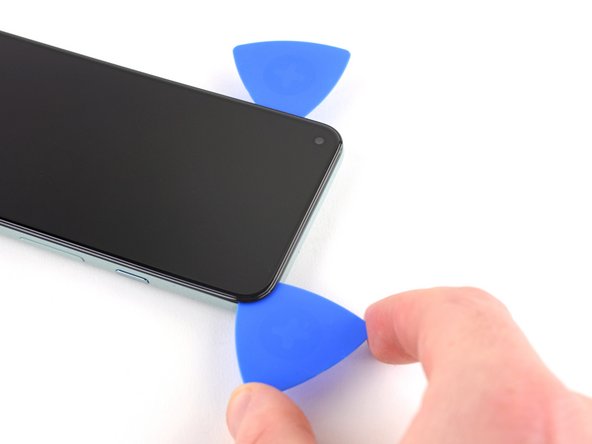
接着剤の再装着を防ぐため、ピックを右下コーナーに残したままにします。
-
-
-
-
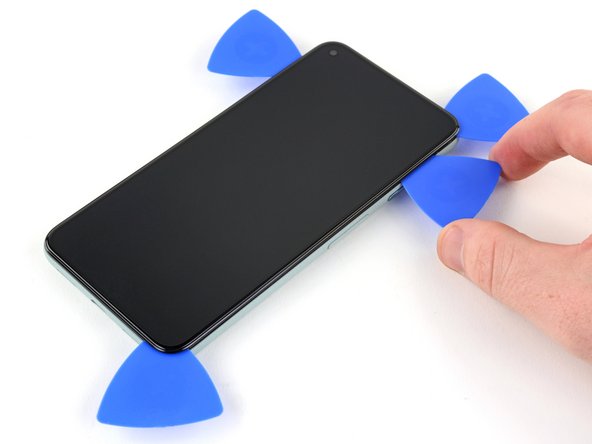
開口ピックを使って、ススクリーンの左上コーナーから左端を数ミリ程度持ち上げます。これにより、クリップがケースに戻らないようにすることができます。
-
スクリーン右側を持ち上げると、本のようにデバイスを開くことができます。
-
-
-
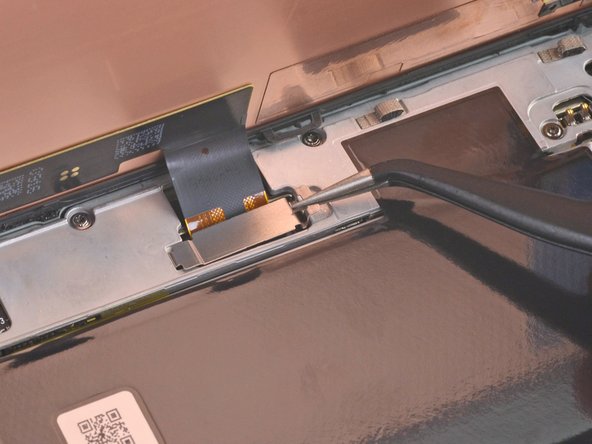
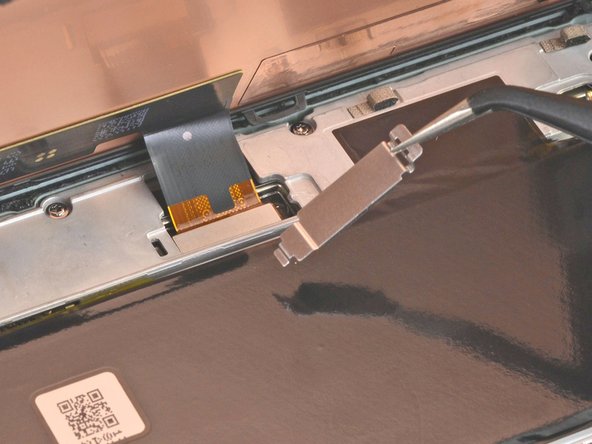
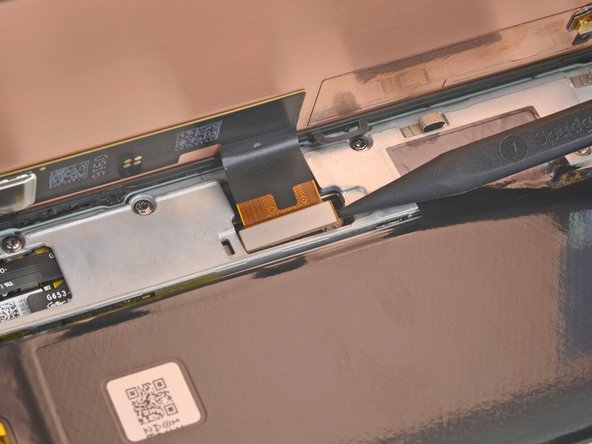
ピンセットを使って、スクリーンのフレックスケーブルを固定しているスクリーンコネクタカバーを摘みます。
-
クリップをコネクタ側に押し込むと、ラッチが外れます。
-
-
-
-
T3トルクスドライバーを使って、充電プレートカバーをミッドフレームに固定している4.6mm長ネジを2本外します。
-
-
-
ピンセットを使って、ミッドフレームの右側を持ち上げます。
-
ミッドフレームを取り出します。
-
デバイス上部にあるスペーサーは、ミッドフレームを取り外すときに落ちる可能性があります。このスペーサーは再組み立てのために忘れずに保管してください。 マザーボード交換ガイドの画像を参照してください。
-
-
-
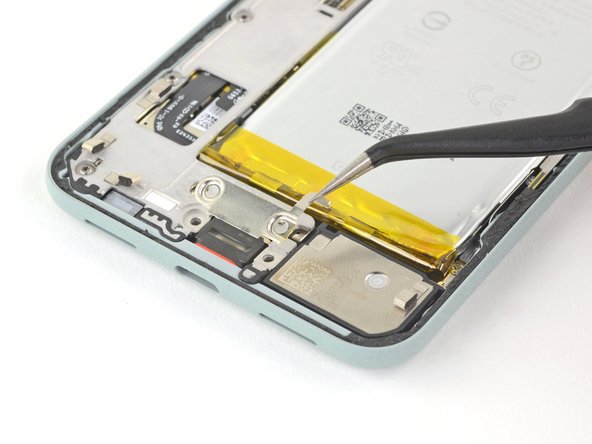
先が鋭利でないピンセットを使って、バッテリーの右上端にある黒い粘着性のプルタブを摘みます。指で摘めるまで、ピンセットで引き出します。
-
プルタブが途中で折れてしまわないように、低い角度でゆっくりと一定の力でプルタブを引っ張ります。
-
プルタブが切断してしまった場合は、ピンセットで残っている接着剤の部分を取り出し、引っ張り続けます。
-
-
-
開口ピックをバッテリー左側端の隙間に沿って挿入します。
-
開口ピックを使って、バッテリー上部と下側に残っている接着剤を切開します。
-
バッテリーをこじ開けられない場合は、イソプロピルアルコールを接着剤に数滴追加してください。この作業では、プラスチックカードでも対応できます。
-


このガイドを完成後、パフォーマンスの最適化のために、新しくインストールしたバッテリーを キャリブレーションしてください。
オリジナルのパーツと交換用パーツをよく見比べてください。交換用パーツに付いていない残りのコンポーネントや接着シールなどは、インストールする前に新パーツに移植する必要があります。
このデバイスを再組み立てするには、インストラクションを逆の順番に従って作業を進めてください。
e-wasteを処理する場合は、認可済みリサイクルセンターR2を通じて廃棄してください。
修理が上手く進みませんか?ベーシックなトラブルシューティングのページを参照するか、このモデルのアンサーコミュニティに尋ねてみましょう。
65 の人々がこのガイドを完成させました。
以下の翻訳者の皆さんにお礼を申し上げます:
100%

これらの翻訳者の方々は世界を修理する私たちのサポートをしてくれています。 あなたも貢献してみませんか?
翻訳を始める ›

31 件のコメント
While this is an excellent guide, like the others here, I find the ending statement of "To reassemble your device, follow the above steps in reverse order." very much a throw you in the deep end type of scenario. Figuring out how to place the adhesives that come with the kit was very much a trial and error thing. They are not quite intuitive and I was unable to find any answers anywhere. In my first attempt, the two strips for the battery, are a mess. You never get a visual of how or where they are since you remove them by pulling tabs in Step 21.
Here's the deal with them. Two protective layers, a clear oversized layer on one side, and blue cut to the exact shape on the other. Both sides are sticky. Once you figure out the placement, apply the adhesives by peeling the clear protective layer first. Line it up and firmly press. When ready to adhere to the other side, the blue layer is removed by 2 tabs that are part of the layer. Pull 1 tab and carefully peel it away and it should come away in 1 or 2 pieces.
Very frustrating that a year and a half later the tutorial has not been fixed to include the information you've given, or any more information at all.
It's clear that this tutorial is not complete when multiple replies have had issues with vibration, screens, and other functions, along with pieces that got left out upon reassembly. I had better hopes for ifixit since they offer a complete kit and boast they have tutorials. I thought the experience would be higher quality.
lupa -
To put it back together I recommend watching Google Pixel 5 Battery Replacement from 5:46 onwards. This video as an accompaniment in general to this guide I found super helpful as it's an actual video of this repair.
Seeing someone actually perform this exact repair in realtime is very helpful as well as some techniques not mentioned in this guide.
I performed a screen and battery replacement with the help of this video so I really recommend watching it.
Clear instructions and photos. I would agree the 'do in reverse order' instruction is too vague. Thanks to Jesse for the clarifying information on the adhesives and to Marcel for the video link - both of these additional instructions helped immensely. New phone battery installed and phone is in working order!