はじめに
お持ちのデバイスにカスタム加工された両面テープを装着する場合は、このガイドに従って作業を進めてください。両面テープはスクリーン、バックカバー、バッテリーなどに取り付けます。作業を始める前に、修理ガイドを最後まで読んでください。
注意:デバイスの修理ガイドに接着剤に関する指示がある場合は、そちらの指示に従って下さい。
デバイスを分解した後に保証されたIP(保護等級)を保証するには、大規模で専門的な機材を必要とします。このガイドでは一般家庭でできる範囲で最善な結果を得るためのコツや技術を紹介しています。
重要なことですが、全てのデバイスや接着剤は同じではありません。ある作業手順が上手くいくか行かないかは対象のデバイスや作業の出来によって変わります。多くの場合、工場生産時ほど上手く密封はできないので、ご自分で修理した後はデバイスを厳しいコンディションにさらさないように気をつけて下さい。
Samsung Galaxy Sシリーズは こちらのガイドを参照してください。
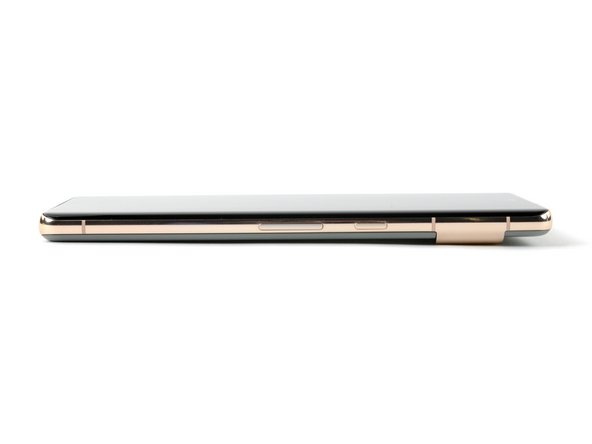
iPhone全般モデルは こちらのガイドを代わりに参照してください。
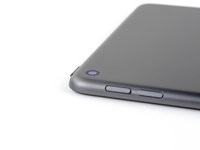
iPad 全般モデルは こちらのガイドを代わりに参照してください。
通常のTesaテープを使用する場合は こちらのガイドを代わりに参照してください。
必要な工具と部品
-
-
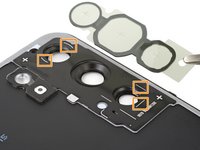
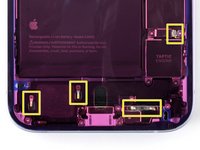
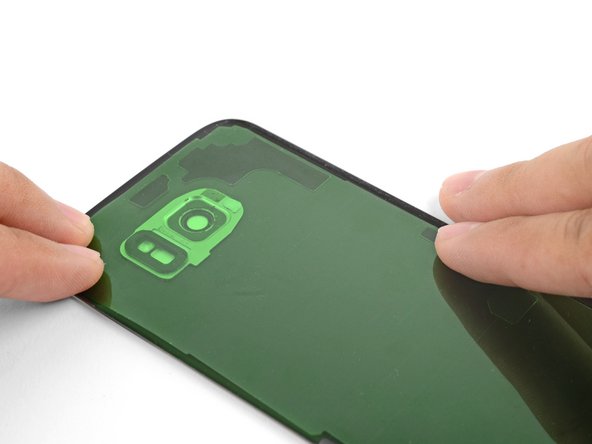
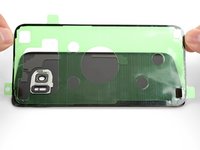
プレカットされた両面テープを眺めて、各ストリップの目的用途を把握してください。
-
スクリーンもしくはバックカバー用両面テープ。通常、デバイスの形状をしています。
-
バックカバーのサポート用両面テープ。こちらはバックカバー側に押さえ込まれるコンポーネントの形状と合致します。
-
バッテリー用両面テープ。通常、デバイスのバッテリーの形によく似た長方形です。
-
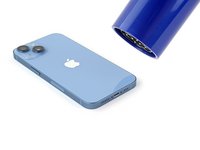
コンポーネント用両面テープ。これらはカメラや指紋センサのような様々なコンポーネントの形状に合わせて形取られています。
-
-
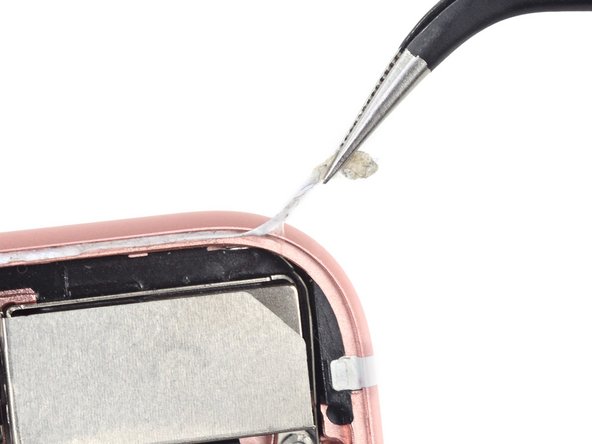
この手順で使用する道具:Tweezers$4.99
-
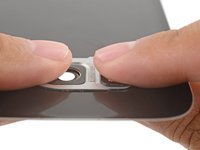
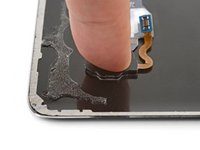
指やスパッジャー、プラスチックの開口ツールもしくはピンセットを使って、古い接着剤の塊を取り除きます。
-
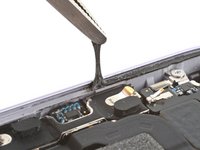
ディスプレイパネルもしくは70%以上の高濃度イソプロピルアルコールを使って、メタル表面に残っている接着剤を取り除きます。糸くずのでないマジッククロスやコーヒーフィルター等で一方方向に向けてワイプします。
-
-
-
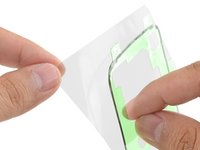
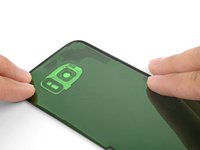
両面テープをしっかり装着するための準備が整ったら、無色のライナーを剥がします。
-
両側レイヤーの中央部分を、慎重に剥がします。まずU字の切り欠き部分から初めてください。(U字がある場合)
-
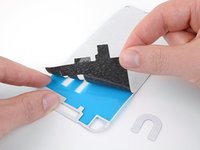
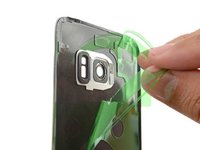
剥がしたら、残りの紙ライナーも全て外して、接着面の下側全体を露出します。
-
-
-
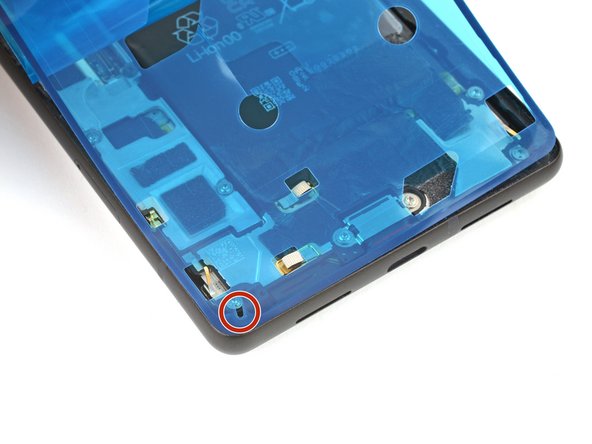
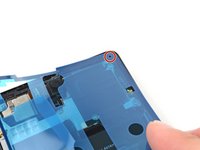
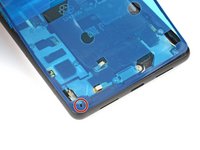
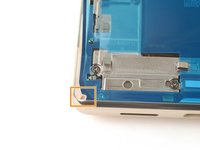
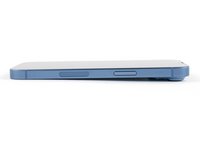
両面テープの位置を決める際は、位置決め用がデバイスのフレームにある穴と同じ位置にあるか確認しましょう。
-
両面テープによってはフレームの穴や形状に合わせた独特の切り欠きがあることがあります。
-
-
-
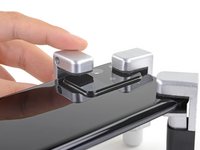
この手順で使用する道具:Screen Vise Clamps 6-Pack$15.99
-
スクリーンバイスクランプはスクリーンや背面カバーを固定するのにとても便利です。こちらのガイドに従ってお使いください。
-


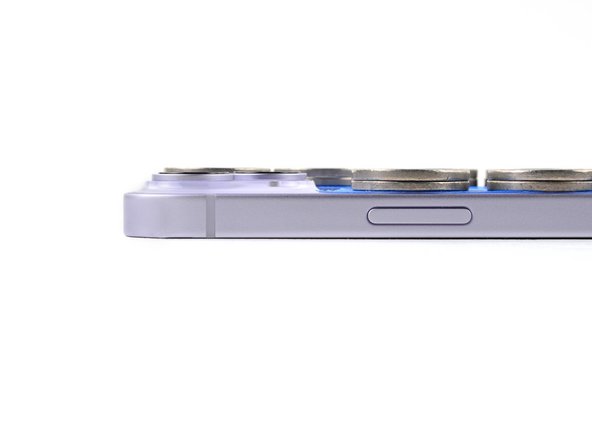

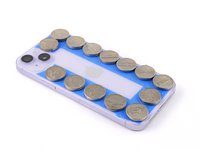
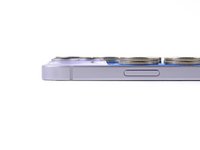


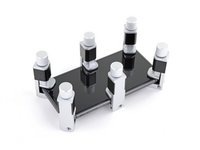
正しく装着できれば、長期間にわたって使用できます。
修理を一度すると、デバイスの耐水性能を完全に回復できないかもしれません。デバイスを液体にさらさないようご注意ください。
正しく装着できれば、長期間にわたって使用できます。
修理を一度すると、デバイスの耐水性能を完全に回復できないかもしれません。デバイスを液体にさらさないようご注意ください。
106 の人々がこのガイドを完成させました。
以下の翻訳者の皆さんにお礼を申し上げます:
100%

これらの翻訳者の方々は世界を修理する私たちのサポートをしてくれています。 あなたも貢献してみませんか?
翻訳を始める ›


9 件のコメント
Diese Anleitung sollte im Akku-Tausch Tutorial verlinkt sein und auch in der Produktbeschreibung. Ich habe diesen Artikel erst gefunden, nachdem ich die Rückseite schon befestigt hatte (zum Glück richtig).
Although obvious to anyone who has used this type of strip, I didn't realize it until my first experience gluing a screen into my phone: the adhesive is ONLY the black goo attached to the strips. Once you peel off the clear side, place the strip and then peel off the coloured side, all that's left is the black goo, hopefully exactly where it needs to be. Mine could be carefully re-aligned with tweezers as necessary before setting the screen into place.
What's the popular recommendation regarding how long to leave weight on these pre-cut adhesive strips?
It merely says 'a few hours'?
Is it okay to check on it or is it like opening the oven door?
It's okay to check, and 2 hours is usualy plenty enough.
If you have any OLED display, DO NOT put books on it!!! Unlike LCDs, some Hard OLEDs cannot handle the pressure. If you have bought a display from ifixit they will also not warranty it and consider it user damage!!! That last section need to put in a warning for OLEDs.
Great point, wished i would have read this earlier... :(
Ruined a pixel 3a screen after replacing a battery and placing some books on the screen for the adhesive as instructed.
Screen now has to be replaced since it's leaking / purple as a result of the books pressure.
MHacking -
i'm replacing a front screen and wondering about the order of putting the adhesive strip on the screen back, attaching ribbon cable from new screen to phone, then taking off coloured side of the adhesive strip, or should i take of coloured side, then attach ribbon cable, then place screen with glue onto phone frame?
obviosuly if one puts the ribbon cable on before taking off coloured side of adhesive, then one would be stuck with fiddly job of manouevering the coloured paper around the screen (or cutting the coloured thing, whereas if one takes of coloured paper, then one has to try and attach ribbon cable without messing up the adhesive now on the edges of the screen....
oh wait, it also isn't obvious whether one puts first side on phone or on new screen....help! (this is pixel 3a screen replacement with ifixit template)
endlich wieder freie Luft zum atmen hatte mir samsung flip angeschafft und damit in die Android Falle geraten.
vor lauter schreck hab ich mir ein neues z2bestellt 348,00€
und meinen 4 moto´s ein fünftes hinzugefügt
meist sind es ja Kleinigkeiten z.B ist bei einem der SD slot kaputt iss ja nicht schlimm mit dem Elleful Stick hat man auch sensible Daten
u.a. weg wenn internetzugang läuft bei der Werkseinstellung um rauszukriegen was nicht klappt
wer was braucht kann über mail belezebub10.jul@gmail.com kommunizieren.
hans
As other comments have noted: applying the new adhesive might be the hardest part. I actually found that the small pieces are actually easier to do contrary to other reviews (I think one whole sheet would actually be significantly harder). Also note some holes on the adhesive pieces line up with screws on your phone and other holes seem to just be random lol. Last thing to note about the adhesive pieces is that everything doesn't have to align perfectly as much as my OCD would like, as long as the adhesive doesn't stick out the screen/ frame and most of the edges are glued, the phone screen will stay in it's case!
Matt Staff - 返信
If you're installing a screen, you might need to cut out a hole on the backing so that you can attach the first side, and attach the screen ribbon connector through the hole before removing the second backing.
Asela Gunawardana - 返信
I don't understand how one-sided adhesive is supposed to make the screen stick on. It needs to be double-sided adhesive, not one-sided. One side has to stick to the back of the screen and one side has to stick to the frame. This display adhesive I have is one-sided, unless I'm doing something wrong.
Google Pixel 3a Display Adhesive - Genuine
Tim Davenport - 返信
I've got one for a Pixel 4a here, but the same general scheme should apply: They are double sided adhesive. One sticky side sticks to the clear plastic film and the other sticky side sticks to the colored plastic film. However, the packaging of them should have been better. They were just loosely thrown into the box and some of them came off their supporting film, sticking to the packaging and each other.
Art -