
iPhone 5cのバッテリーの交換

はじめに
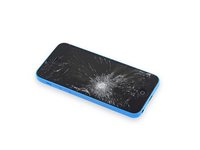
手順 1 に進むすぐに充電が切れてしまいますか?以前のようにバッテリー残量が長持ちしませんか?バッテリーが驚くほど膨張していますか?以前のように上手く充電できないですか?iPhone 5cのバッテリーを交換するにはこの手順をご利用ください。
この手順ではフロントパネルアセンブリを取り出します。これはディスプレイケーブルにダメージを与えないためです。本体からバッテリーを取り出す際、邪魔にならないようディスプレイを片手で固定できる方は、ディスプレイの取り出しをスキップしてバッテリーの取り出し手順から作業を始めてください。
この修理ガイドを完成したら、新しく装着したバッテリーのキャリブレーション]を行なってください。100%まで充電したら、そのままプラグに繋いだまま、さらに2時間充電状態にします。それから自動的にシャットダウンするまで放電させて、中断なく一気に100%まで充電してください。
必要な工具と部品
修理キット
キットには、修理ガイドを完了するために必要な全ての部品とツールが含まれています。

パーツ


ツール


もっと見る
ビデオの概要
-
-
ディスプレイガラスにひび割れがある場合、修理作業中の怪我を防ぐため、ガラス表面にテープを貼って破損箇所が広がらないようにします。
-
iPhoneの画面上に透明テープを貼り、表面全体を覆います。
-
-
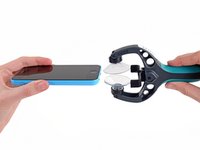
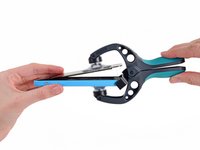
この手順で使用する道具:iSclack$24.99
-
iSclackのレバーを閉め吸盤カップを開きます。
-
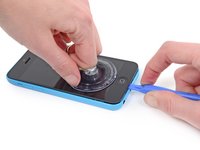
吸盤カップの間にiPhoneを挟みプラスチックの溝に本体の下部を差し込みます。
-
上部の吸盤カップはホームボタンより上に接着させてください。
-
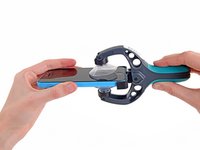
iSclackのレバーを開いて吸盤を閉じます。iPhoneの両面、中心部に吸盤カップをしっかりと押し当てます。
-
-
-
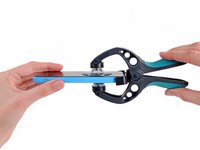
iPhoneを両手でしっかりと持ち、吸盤を引き離すようにiSclackの持ち手を閉めていきます。するとフロントパネルが背面ケースから持ちあがってきます。
-
iSclackはiPhoneを安全に開口できるようにデザインされていますが、ホームボタンケーブルにダメージを与える場合があります。
-
次の3つの手順をスキップして手順8まで進んでください。
-
-
-
iPhone を片手でしっかりと抑えながら、吸盤カップを少しずつ引き上げて、本体背面ケースからフロントパネルのホームボタン端を引き離していきます。
-
吸盤カップを上に持ち上げながら、プラスチック製の開口ツールで、ゆっくりと背面ケースの端からフロントパネルアセンブリを引き離します。
-
-
-
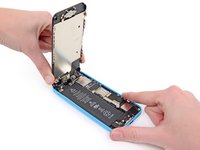
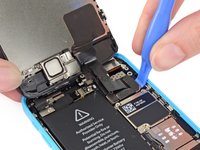
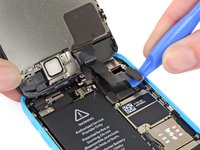
フロントパネルのホームボタン端を持ち上げて開き、本体上部付近のコネクターにアクセスします。
-
ディスプレイを約90度の角度で開き、作業中邪魔にならないよう、後ろに衝立を設置して固定します。
-
緊急の際は、衝立として未開封の飲料缶をご利用できます。
-
作業中、ディスプレイをしっかりと固定するためにゴムで留めてください。ディスプレイケーブルに余剰な力が加わるのを防いでくれます。
-
-
-
-
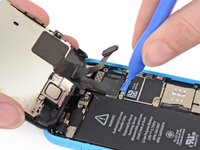
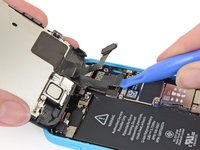
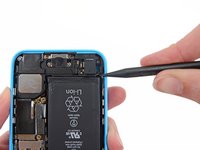
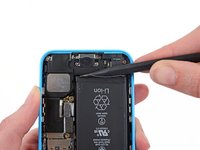
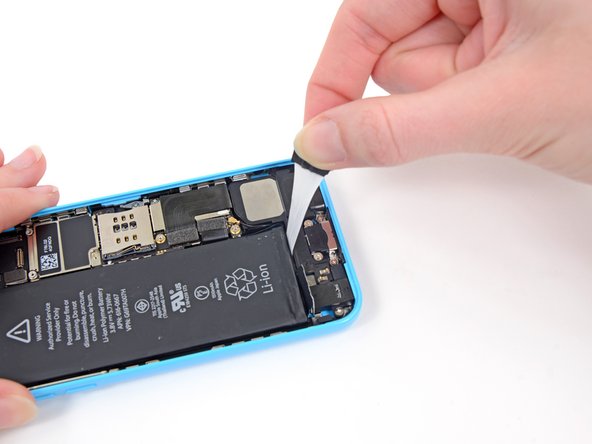
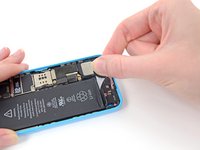
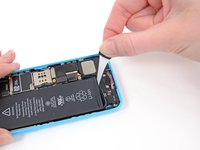
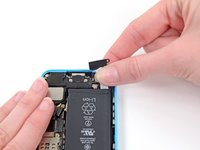
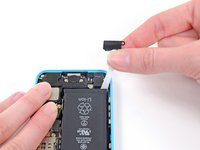
スパッジャーの平面側先端もしくは清潔な爪先で、ロジックボードのソケットからバッテリコネクターをこじ開けて外します。
-
ロジックボードのソケットをこじ開けるのではなく、バッテリコネクタのみをこじ開けるように十分注意してください。ロジックボードのソケットや基板をこじ開けると、ソケットが破壊されたり、基板上の近くの部品が破損したりすることがあります。
-
-
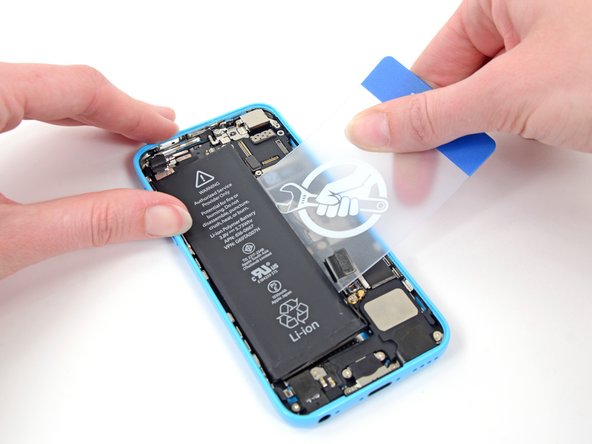
この手順で使用する道具:Plastic Cards$2.99
-
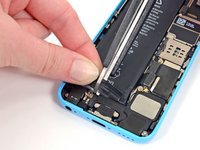
バッテリーの下に90%以上の高濃度イソプロピルアルコールを数滴垂らして、接着剤の周辺に注入して、接着力を弱めます。高濃度イソプロピルアルコールは溶剤として、残留物を残さず乾燥させるので、iPhoneを傷つけることはありません。
-
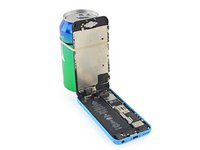
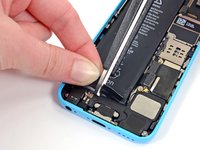
ロジックボードに近い側のバッテリーの下にプラスチックカードを慎重に差し込みます。
-
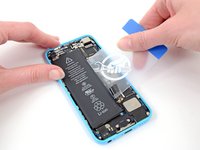
バッテリーの上部から下部に向かってプラスチックカードをスライドし、背面ケースの端に向かって押し込みます。
-
-
-
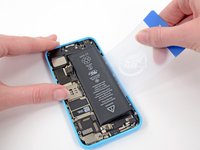
それでもバッテリーがケースに固着していて外れない場合は、 iOpenerを温める手順に従うか、ドライヤーを使ってリアケースにバッテリーを固定している接着剤を加熱してください。
-
iOpenerをカメラの右側端に沿って載せます。iPhone裏側とiOpenerの間の接触をよくするため、表面を拭き取ってください。
-
iOpenerバッテリーを取り出す前に約90秒間、このバッグを載せてください。
-
ヒートガンやヘアドライヤーを使用する場合は、iPhoneの裏側に熱をあて、若干熱くて触れない程度まで温めます。
-


交換用のパーツとオリジナルのパーツを見比べてください。残りのコンポーネントを移植する必要があるか、パーツを装着する前に接着剤の裏張りを取る必要があります。
デバイスを再組み立てする際は、これらのインストラクションを逆の順番に従って作業を進めてください。
不要になった電子廃棄物は 認証済みリサイクルセンターで処分してください。
修理が上手く進みませんか?トラブルシュートのヘルプには、アンサーコミュニティを参照してください。
交換用のパーツとオリジナルのパーツを見比べてください。残りのコンポーネントを移植する必要があるか、パーツを装着する前に接着剤の裏張りを取る必要があります。
デバイスを再組み立てする際は、これらのインストラクションを逆の順番に従って作業を進めてください。
不要になった電子廃棄物は 認証済みリサイクルセンターで処分してください。
修理が上手く進みませんか?トラブルシュートのヘルプには、アンサーコミュニティを参照してください。
497 の人々がこのガイドを完成させました。
以下の翻訳者の皆さんにお礼を申し上げます:
100%

これらの翻訳者の方々は世界を修理する私たちのサポートをしてくれています。 あなたも貢献してみませんか?
翻訳を始める ›

49 件のコメント
I am disappointed with the guide - not up to iFixit's usual standards. I got the iPhone open and the battery out just fine, but there were *three* missing hints that would have cut a half-hour from my re-assembly:
1) The connector cover has three short screws and one long one. The video doesn't show which is the long one, so I had to farble around to get the screws back. (The long one is the top-right one, near the hinge on the right side of the phone)
2) There are no hints on the video or in the box about putting the adhesive strips back in. I was trying to get the tab to fold over, but got all wrapped up in the strips. It took a lot of time to fix it, and I still don't know if it's important to fold the tab over or not.
3) There is no information about whether to retain the clear cellophane wrapper that comes on the battery. I took it off - hope that's right.
That said, all the tools were included in the kit, they work as advertised. And the phone's back together, and we'll see how it works...
In reference to your #1 point, this is very good example of why a SCREW-MAT or iCracked Part Chart come in very handy!
Especially in repairs like the 5s ... some screws look the same, but are .01" different ... enough to scratch/break the trace underneath on the logic board .... adding another $100 (and a week travel time by mail, if you cannot do the repair yourself), to your repair - to have it micro-soldered.
With Screw-Mats or iCracked Part Charts, every screw is placed on it's corresponding marker, so you know exactly which screw is which.
If you are in a pinch, and do not have a Screw Mat, you can draw little diagrams on a piece of paper or a dry erase surface, and mark out where each and every screw goes, as sometimes there is that .01" difference in screw sizes, that can really screw up (no pun intended) your repair.
Cheers!
iBroke -
They did mention the screw size in the guide here by color coding the MM. I agree with point two, but that's nitpicking. Lastly (the reason I commented), you did it right. The plastic should be removed so it is just like the orig battery, if you would leave the cellophane on, the adhesive would be stuck to it instead of the battery and making for a poorly secured battery.
Overall, the parts and kit were good, but this phone is not my favorite iPhone to work on. Getting that old battery out was extremely annoying compared to the 4, 4s, 5, and 5s that I've all done in the past.
On a side note, this is the first ifixit branded battery I've received and I've ordered a lot of parts from them over the years. They used to source what looked line 100% orig batteries. I avoid non original batteries like the plague, I don't care if it's a phone, laptop, or even my APC UPS devices. Ifixit has earned my trust over the years with all the parts and tools so I went ahead and installed it, I'm sure it's good.
Apple doesn’t sell original batteries to outsiders.
If you are buying an Apple-branded battery, it’s either a fake or used.
toni -
Hey Toni, check out our parts and warranty information!