はじめに
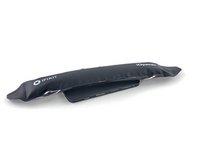
この iOpener]は電子レンジで加熱して、iPadなどのエッジに沿って接着剤に熱を伝えることができる断熱保温バッグです。
以下の基本的な手順に従って、黒色で中に液体が詰められているiOpenerをご使用ください。代わりに白色のiOpenerを使用される方は この使用ガイドを参照してください。
デバイスに合わせた詳細な使用インストラクションと修理に関しては、 iPadの修理ガイドを参照してください。
必要な工具と部品
-
-
-
鍋を十分な量のお湯で満たして、iOpener を完全に沈めます。
-
お湯を沸かして熱くなったら火を止めます。
-
iOpenerを熱湯の中に約2−3分間沈めます。iOpener全体が完全に浸かっているか確認してください。
-
トングなどを浸かって、温まったiOpenerをお湯から取り出します。
-
タオルでiOpener全体を拭き取ります。
-
iOpenerの準備は整いました。iOpenerを再度温める必要がある場合は、お湯を沸騰させて、火を止めてからiOpenerを2-3分間浸してください。
-
-
-
iOpenerの何も表示がない裏側を下にしてデバイスの接着剤を取り外したい部分の上部に当てます。適度な温度に温まり、 iOpener内部の液体が平らになっているか確認してください。
-
フロントパネルを開封する前に約90秒間、デバイスに iOpenerを当てます。
-
この時点で、プラスチック製の開封ツールを使って、スクリーン下をこじ開け始めます。どこをどのように作業を進めていくかはそれぞれの修理ガイドをご覧ください。
-


672 の人々がこのガイドを完成させました。
以下の翻訳者の皆さんにお礼を申し上げます:
100%


これらの翻訳者の方々は世界を修理する私たちのサポートをしてくれています。 あなたも貢献してみませんか?
翻訳を始める ›

47件のガイドコメント
I bought two of these, and I can't get an iPad 2 to open using the iOpener; I'm going to keep trying, but heads up, it's not as easy as 1-2-3. I'll update if I get it to work.
I used a flat toaster maker and turned it off and on as required, Fixed my Ipad mini ok.
Step 2 says to wait 5 minutes between reheating, step 4 says to wait 3 minutes.
Also, do you sell the "this is a microwave" stickers? xD
Mark Brown - 返信
Did you ever find out where to get those stickers? XD
That's just a label printer label using a fancier font, I think.
towo -