この翻訳は、ソースガイドの最新の更新を反映していない可能性があります。 翻訳の更新に協力してください。 または ソースガイドを参照してください。
はじめに
このガイドを参照して、Nintendo Switch Liteの消耗したバッテリーを交換しましょう。
Switch LiteはJISネジを使用していますが、急なときはプラスドライバーでも対応できます。iFixitのプラスビットはJIS規格のネジと相互互換性があるように設計されているので、ネジを剥がさないように十分注意してください。
デバイスを再組み立てする前に、バッテリーの残量を25%以下まで放電してください。バッテリーが膨張している場合は、デバイスを温めないでください。膨張したバッテリーは大変危険です。保護メガネを装着して、特別に注意しながら作業を進めてください。作業に自信がない場合は、修理の専門家にご相談ください。
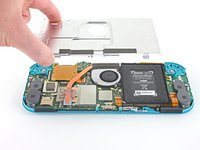
ご注意:この修理ガイドでは、放熱グリスの付いたヒートシンクがあるシールドプレートを取り出します。シールドプレートを再度取り付ける前に、放熱グリスを除去して、新しく塗布してください。
必要な工具と部品
-
この手順で使用する道具:Magnetic Project Mat$19.95
-
Y00ドライバーを使って、バックパネルを固定している6.3mmネジを4本外します。
 FixBotに聞いてみる
-
-
-
プラスドライバーもしくはiFixit PH000ドライバー で、バックパネルを固定している次のネジを外します。
-
デバイス上部の長さ3.6mmネジー2本
-
デバイス下部の長さ3.6mmネジー2本
-
-
-
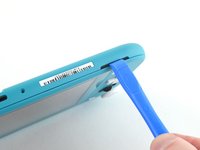
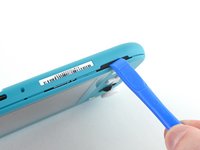
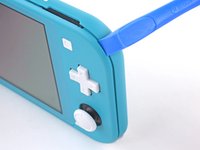
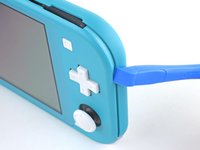
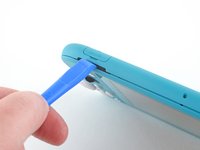
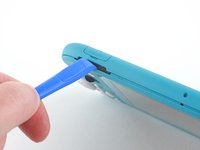
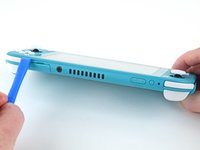
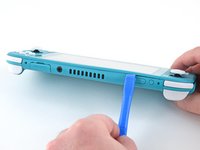
デバイス下部の左側スピーカーグリルの内側に、開口ツールを差し込みます。
-
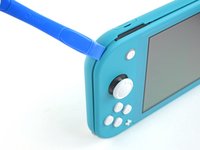
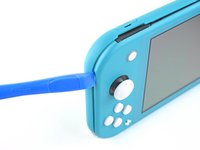
開口ツールをひねって、バックパネルを固定しているクリップを外します。
-
-
-
-
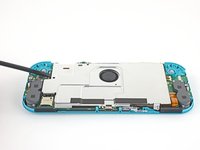
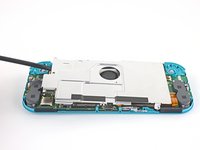
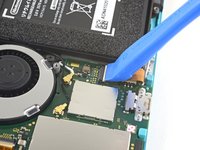
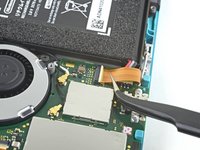
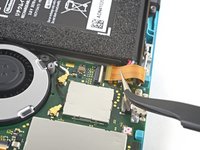
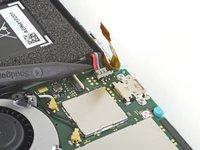
プラスドライバーもしくは iFixit PH 000ドライバーを使って、次のネジを4本外します。
-
長さ3.1 mmネジー3本
-
長さ4.5 mmネジー1本
-
-
この手順で使用する道具:iFixit Adhesive Remover$19.99
-
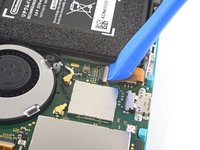
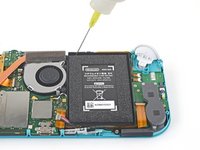
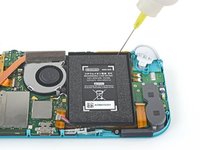
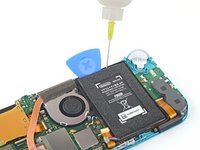
バッテリー上部端に沿って留められた接着剤を柔らかくするために、接着剤リムーバーもしくは高濃度 (90%以上)のイソプロピルアルコールを、数滴注入します。
-
-
-
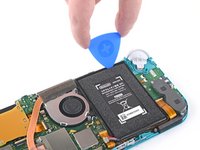
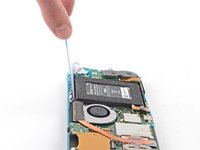
開口ピックをバッテリーとバッテリー壁の間の隙間に差し込みます。
-
開口ピックをバッテリーの底に向けて慎重に押し込みます。端に沿ってピックをスライドして、接着剤を切り込んでいきます。
-
-
-
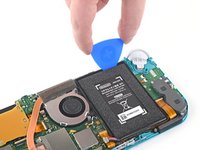
開口ピックをその場所に残して、さらに接着剤リムーバーもしくはイソプロピルアルコールをバッテリー壁内側に注入してください。
-
デバイスの上部端を上向きに傾けて、イソプロピルアルコールが接着剤を弱めるまで1-2分間待機します。
-
続けて開口ピックをバッテリー上部端に沿ってスライドさせながら、さらに接着剤を切り込んでいきます。
-
-
この手順で使用する道具:Plastic Cards$2.99
-
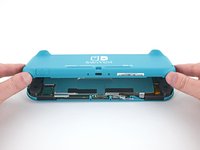
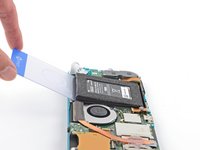
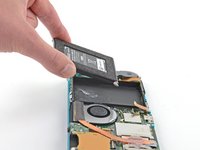
プラスチックカードを差し込める十分なスペースができたら、バッテリー下に差し込んで慎重にこじ開けます。
-
バッテリーを取り出します。
-
-
この手順で使用する道具:Microfiber Cleaning Cloths$3.99
-
接着剤リムーバーもしくはイソプロピルアルコールと マイクロファイバークロスでバッテリー内の接着剤を綺麗に拭き取ります。新しいバッテリーを装着する前の準備となります。
-
新しいバッテリーにプレインストールされた接着剤がついていない場合は、このガイドを参照して、バッテリー底側に接着剤を装着します。
-


このデバイスを再組み立てするには、インストラクションを逆の順番に従って作業を進めてください。
このガイドを完成後、パフォーマンスの最適化のために、新しくインストールしたバッテリーを キャリブレーションしてください。
e-wasteを処理する場合は、認可済みリサイクルセンターR2を通じて廃棄してください。
修理が上手く進みませんか?ベーシックなトラブルシューティングのページを参照するか、Nintendo Switch Liteのアンサーコミュニティに尋ねてみましょう。
56 の人々がこのガイドを完成させました。
以下の翻訳者の皆さんにお礼を申し上げます:
90%

これらの翻訳者の方々は世界を修理する私たちのサポートをしてくれています。 あなたも貢献してみませんか?
翻訳を始める ›

32件のガイドコメント
Hello!
I am preparing to repair my daughters nintendo switch light. It has stopped charging out of no where. I have all the tools, I just can't find the battery anywhere. Where would you recommend buying it from?
If you are still looking Ifixit sells one themselves Nintendo Switch Lite Battery
Thanks for the guide. Battery replacement kits are now available on Amazon: https://www.amazon.com/Nintendo-HDH-001-... (they weren’t in November! I was also looking for this during that time)
Unfortunately, the battery was much harder to remove than I expected. I did use a lot of isopropyl alcohol, but the adhesive they use really was giving me a lot of trouble. I should’ve wisened up and googled other adhesive removal methods or tried a new approach other than prying with the spudgers.
Well, now the LCD now has what looks like pressure damage in the bottom left where I’d imagine a lot of the prying pressure went. It is much more noticeable when the screen goes all-white, and not too bad with darker colors.
I don’t blame iFixit for my mistake of course, and it is really disappointing that Nintendo used the amount of adhesive that they did. But I hope this comment can serve as a warning to others attempting this repair to be more gentle even if it’s refusing to come off.
Yikes! Sorry to hear this. How did you pry with the spudger exactly? If you kept it around the top edge of the battery well then I would assume it wouldn’t damage the screen, but if you inserted the end of the spudger deeper in the battery well and used that point as the fulcrum, then I could see that putting a lot of pressure on the back of the LCD.
Craig Lloyd - 返信 共有
@craiglloyd I did an embarrassing amount of spudger prying pretty much everywhere along the top/bottom of the battery, I actually broke a few spudger tips in the process so that might reveal something about my approach…
But, I’m starting to think it may not be LCD damage after all, but rather some isopropyl alcohol caught behind the screen– During my prying, the Switch case was getting pretty heavily warped, so maybe some of the alcohol (that I definitely used in excess) slipped in and got sandwiched under the screen? I started to notice this since the blotches seem like they’ve moved over time. Here’s an image of the screen now https://imgur.com/DjYmFnJ (and the dark gray blotch along the leftside isn’t a shadow, white spots in bottom left I thought were pressure damage)
It’s still very usable / not noticeable on black colors and thanks again for the guide! I can give the screen more time to see if it improves at all, or maybe try going back in and trying to see it is trapped alcohol that can be released