メインコンテンツにスキップ

Nintendo Switch Lite バッテリーの交換

英語
日本語

手順 3を翻訳中

手順3
Nintendo Switch Lite Battery Replacement: 手順 0、 3の画像 1 Nintendo Switch Lite Battery Replacement: 手順 0、 3の画像 2 Nintendo Switch Lite Battery Replacement: 手順 0、 3の画像 3
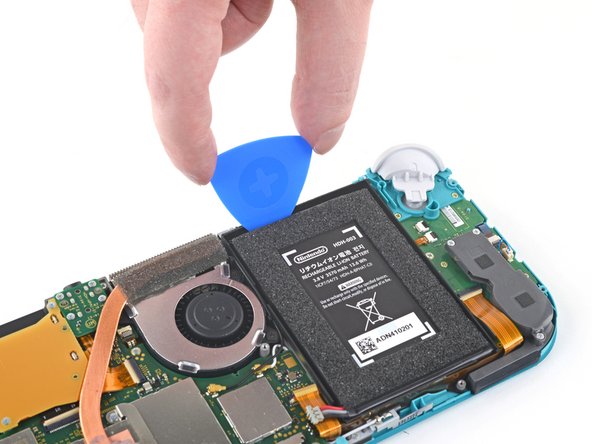
  • Insert an opening pick into the gap between the battery and the wall of the battery well.

  • Carefully dig the tip of the opening pick underneath the battery and slide it along the edge to begin slicing the adhesive.

  • Take care not to puncture or bend the battery with your tool—a punctured or bent battery may leak dangerous chemicals or cause a thermal event.

開口ピックをバッテリーとバッテリー壁の間の隙間に差し込みます。

開口ピックをバッテリーの底に向けて慎重に押し込みます。端に沿ってピックをスライドして、接着剤を切り込んでいきます。

ツールでバッテリーを変形させたり、穴をあけないようにご注意ください。破損したバッテリーから危険な化学物質が放出されて、火災の原因となることがあります。

クリエイティブコモンズのオープンソース著作権のもと、あなたの投稿は著作権の対象となります