この翻訳は、ソースガイドの最新の更新を反映していない可能性があります。 翻訳の更新に協力してください。 または ソースガイドを参照してください。

Huawei P10 ディスプレイの交換

はじめに
手順 1 に進むHuawei P10 スマートフォンのディスプレイを取り出して交換します。
ガラスがひび割れている場合は、目を保護するため保護メガネを着用してください。スクリーンにガムテープなどを装着するとデバイスをしっかりと握りやすくなります。
再組み立ての際は、必要な箇所に新しい接着剤を付けてください。


-
-
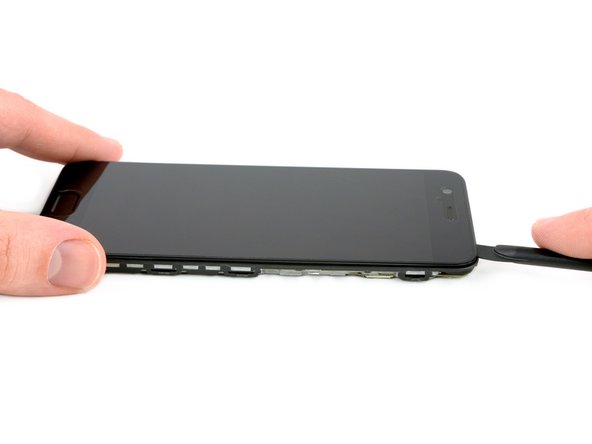
プラスチックの開口ツールをデバイス下側のディスプレイとケースの間に差し込みます。
-
慎重にケースからディスプレイをこじ開けます。
-
ディスプレイ下側の端をこじ開けたら、開口ツールを使って、両側の留め金(クリップ)を外します。
Hi! I cannot find a way to insert the plastic opening tool. Any suggestions on how I can create a gap to start. Everything seems quit rigid.
Also, where will I find your reply.
vbr/lars.skoldebring@gmail.com
Hi Lars, you might want to use a suction handle to lift the display and create a small gap to insert the plastic tool. If you don’t have a suction handle you can “build” a handle with tape that you stick onto the display in a shape similar to this —> __∏__ (also you may want to edit your post and remove your email address ;) )
Hi,
I’m stuck at this step for about two hours… There’s nothing I can do to open the case. Tried all kinds of opening tools and a suction handle. There is no gap at all between the display and the body. How can anything be inserted into a gap that practically does not exist? Please help.
Sorry to hear that. You could try and lift the display by using a suction cup and pull to create a small gap for a tool to get in.
-
-
-
デバイスを後ろ向きに開きます。
-
スパッジャーを使って、電源と音量ボタンのフレックスケーブルの接続を外します。
Thanks JaL, of course it is.
-
-
-
-
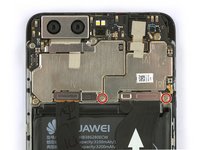
スパッジャーを使って、メインフレックスケーブルの接続を外します。
-
ピンセットを使って、アンテナケーブルの接続を外し、電源ボードに固定している留め具からケーブルを引き抜きます。
Warum soll das Antennenkabel gelöst werden? M.E. schafft dieser Schritt nur ein Risiko das Antennenkabel/den Stecker zu beschädigen.
Jan Bühler - 返信
-
-
-
スパッジャーを使って、ヘッドホンジャックとラウドスピーカーフレックスケーブルの接続を外します。
Ist das entfernen der Kopfhörerbuchse nötig? M.E. nicht - es besteht vielleicht ein geringes Risiko, diese beim Display entfernen zu beschädigen, aber vermutlich wird man diese eher lösen als beschädigen.
Jan Bühler - 返信
-
-
-
スパッジャーを使って、充電ボードを持ち上げます。
-
充電ボードを取り外します。
I didn’t remove the charging board (I didn’t look precisely enough and thought I had to remove the head phone socket which I put back again as it can stay in place) and it didn’t interfer.
Jan Bühler - 返信
Please also include that their might be a small piece of tape over the microphone on the new PCB.
My mic was not working "on ear" but it was working when on speaker.
Found that small piece of tape by comparing the 2 boards, removed the tape and problem solved. -
-
-
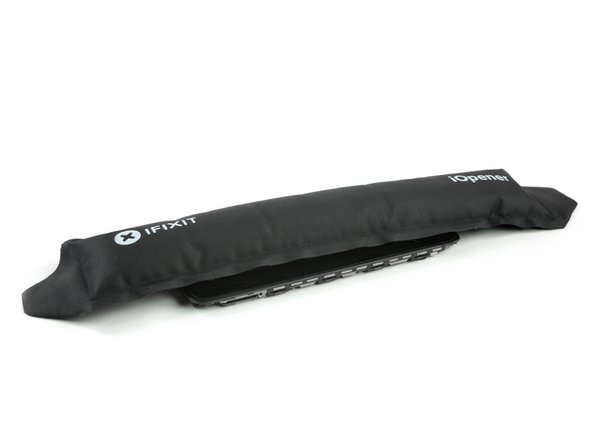
スパッジャーを使って、ラウドスピーカーを慎重にこじ開けます。底側に接着剤が付けられているため、若干粘着性があります。接着剤を柔らかくして、作業をスムーズにするには、温めたiOpenerを載せてください。
-
ラウドスピーカーを取り出します。
Welchen Klebstoff sollte man hier verwenden?
Hallo Funk Phenomenon,
um den Lautsprecher wieder anzubringen kannst du vorgeschnittene Klebestreifen bestellen. Solltest du hierfür keinen Anbieter finden, kannst du Streifen aus doppelseitigem Klebeband heraus schneiden.
-
-
-
アンテナケーブルを外していない場合は、ここで取り出してください。
-
ピンセットを使って、相互接続ケーブルを取り出します。
-
温めたiOpenerをデバイスに載せて、ディスプレイの接着剤を柔らかくします。特にディスプレイの上部と下部を中心に温めてください。
-
-
-
フレームからディスプレイアセンブリを注意深く引き離します。
-
ディスプレイアセンブリを取り外します。
Make sure that the flexible pcba is stuck to the screen!!
I noticed that my home button was not working after I connected the new screen. Turns out there were two pieces of double sided tape on the screen. I needed to remove the non-sticking layer and stick the flexible pcba to the screen for the home button to work.
Der Lautsprechergrill muss, sofern das neue Display keinen enthält, entfernt werden.
Ich habe da jetzt ein unschönes Loch - fiel mir beim Testaufbau nicht auf :-( (und bedeutet jetzt eine Stunde arbeit es ggf. zu fixen)
Jan Bühler - 返信
You need to transfer the speaker grill if the new display doesn’t have one.
Jan Bühler - 返信
-


デバイスを再組み立てする際は、これらの手順を逆の順番に従って作業を進めてください。
デバイスを再組み立てする際は、これらの手順を逆の順番に従って作業を進めてください。
23 の人々がこのガイドを完成させました。
以下の翻訳者の皆さんにお礼を申し上げます:
87%

これらの翻訳者の方々は世界を修理する私たちのサポートをしてくれています。 あなたも貢献してみませんか?
翻訳を始める ›


4 件のコメント
Any advice which adhesive to use? I’ve seen a russian replacement video, it looked like the guy was using some kind of silicone.
Little late but maybe this?
I used B-7000 glue. It enables you to release the screen when a second replacement is needed.
Assuming I purchase a screen off of ebay, and replace it using this method, will the touch id still work?
Das Honor 9 hat an der Unterkante keine Schrauben.
Wie ist das Honor 9 zu öffnen?
Michael Tuschek - 返信
Vielleicht beantwortet diese Anleitung deine Frage ;)
Tobias Isakeit -
Hi, my P10 does not have screws, just two tiny holes. Do I push in here to unfasten? Einar, Norway
Einar Ryvarden - 返信
Hi Einar Ryvarden,
in case you bought a used or refurbished phone, someone might have forgotten to put them back in. Since you have holes at the bottom edge next to the charging port this is likely. You can try to start with step 2 and see if you can lift the phone assembly (don’t forget to remove the SIM tray first). As far as I know there is no version of the regular Huawei P10 with no screws. However you there are none in the P10 lite and in the P10 plus, maybe one of the opening procedures for those phones might help you.
Dominik Schnabelrauch -