メインコンテンツにスキップ

Huawei Honor 9 Rear Glass Removal

必要な工具と部品

  1. Huawei Honor 9 Rear Glass Removal, Remove the Rear Glass: 手順 1、 1の画像 1
    • Switch off your phone.

    • Heat an iOpener and apply it to the back of the phone for around two minutes. This will help soften the adhesive securing the rear glass.

    • You might need to reheat and reapply the iOpener several times during the rear glass removal.

    • A hair dryer, heat gun, or hot plate may also be used, but be careful not to overheat the phone—the display and internal battery are both susceptible to heat damage.

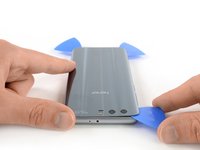
  2. Huawei Honor 9 Rear Glass Removal: 手順 2、 2の画像 1 Huawei Honor 9 Rear Glass Removal: 手順 2、 2の画像 2
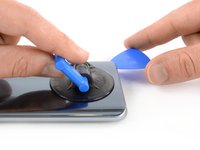
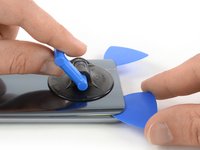
    • Secure a suction handle to the lower edge of the rear glass, as close to the edge as possible.

    • If the phone's rear glass is cracked, the suction cup may not stick. Try lifting it with strong tape, or superglue the suction cup in place and allow it to cure so you can proceed.

    • Lift the rear glass with the suction cup to create a gap between the glass and the frame.

    • Insert an opening pick into the gap.

    • If you have trouble, apply more heat to further soften the adhesive. Follow the iOpener instructions to avoid overheating.

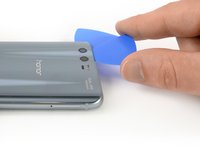
  3. Huawei Honor 9 Rear Glass Removal: 手順 3、 3の画像 1 Huawei Honor 9 Rear Glass Removal: 手順 3、 3の画像 2 Huawei Honor 9 Rear Glass Removal: 手順 3、 3の画像 3
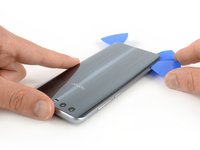
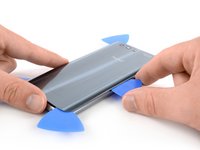
    • Slide the opening pick to the bottom right corner.

    • Insert a second opening pick and slide it to the bottom left corner.

    • Leave the opening picks in place to prevent the adhesive from resealing.

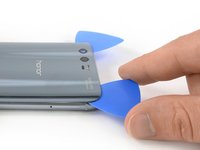
  4. Huawei Honor 9 Rear Glass Removal: 手順 4、 3の画像 1 Huawei Honor 9 Rear Glass Removal: 手順 4、 3の画像 2 Huawei Honor 9 Rear Glass Removal: 手順 4、 3の画像 3
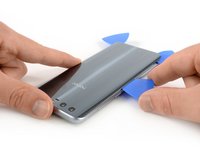
    • Insert a third opening pick at the bottom left corner.

    • Start to slide the tip of the opening pick from the bottom left corner along the side of the Huawei Honor 9 to cut the adhesive.

    • Leave the opening pick in its place at the top left corner to prevent the adhesive from resealing.

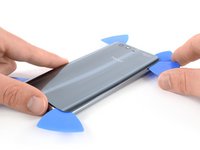
  5. Huawei Honor 9 Rear Glass Removal: 手順 5、 2の画像 1 Huawei Honor 9 Rear Glass Removal: 手順 5、 2の画像 2
    • If the adhesive gets hard to cut it is likely too cold. Use your iOpener to reheat it.

    • Insert a fourth opening pick under the top left corner of the rear glass.

    • Slide the opening pick along the top edge of the phone to cut the adhesive.

    • Leave the opening pick in the top right corner to prevent the adhesive from resealing.

  6. Huawei Honor 9 Rear Glass Removal: 手順 6、 2の画像 1 Huawei Honor 9 Rear Glass Removal: 手順 6、 2の画像 2
    • Insert a fifth opening pick at the top right corner of the phone.

    • Slide the opening pick along the right side to cut the remaining adhesive.

  7. Huawei Honor 9 Rear Glass Removal: 手順 7、 2の画像 1 Huawei Honor 9 Rear Glass Removal: 手順 7、 2の画像 2
    この手順で使用する道具:
    Tesa 61395 Tape
    $5.99
    購入する
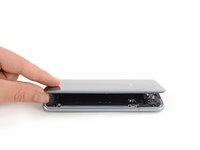
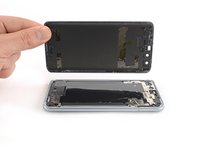
    • Carefully lift the rear glass and remove it.

    • Secure the new rear glass with pre-cut adhesive or double-sided adhesive tape.

    • After installing the rear glass, apply strong, steady pressure to your phone for several minutes to help the adhesive form a good bond, such as by placing it under a stack of heavy books.

終わりに

To reassemble your device, follow these instructions in reverse order.

Take your e-waste to an R2 or e-Stewards certified recycler.

Repair didn’t go as planned? Check out our Answers community for troubleshooting help.

作成者

2人の作成者と共同で作成されました。

Dominik Schnabelrauch

メンバー登録日: 11/23/16

202,809 ポイント

682のガイドは作成済み

チーム

iFixit iFixit人のメンバー

Staff

135 メンバー

16,732のガイドは作成済み

2 件のコメント

Bon tuto, mais la pièce de rechange n’est pas en vente… :( Comment puis-je me la procurer?

Roxane - 返信

yeah sooo

i did this in 2 minutes

without an iopener

you don’t need that

Dante - 返信

コメントを追加

統計データ:

過去 24時間: 2

過去 7 日: 7

過去 30 日: 18

今までの合計 3,090