
Google Pixel 3 XL 指紋センサーの交換

はじめに
手順 1 に進むこの修理ガイドはiFixitのテックライティングスタッフによって執筆されたもので、Googleによって承認されたものではありません。iFixitの修理ガイドのクオリティーについては、 こちらを参照してしてください。
このガイドを使って、Google Pixel 3 XL の指紋センサーを外して交換します。
指紋認証センサーを交換する場合は、機能を保つために指紋リーダーのキャリブレーション が必要です。
必要な工具と部品
パーツ


ツール


もっと見る
-
-
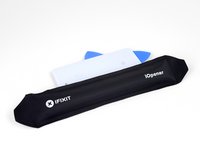
iOpenerを温めて、バックパネルの右端に約1分間載せます。
-
待機中、バックカバーの注意すべきエリアを確認してください。
-
強力な接着力エリアーデバイス底付近の接着剤には、大型パッチが使用されています。
-
指紋センサーケーブルーケーブルの下の接着剤をスライスして切開する際に、切断しないようにご注意ください。
-
-
-
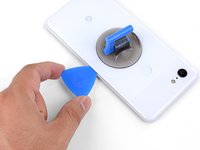
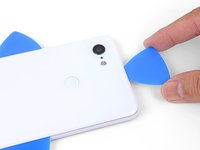
吸盤カップをバックカバーの温めた端の付近に取り付けます。
-
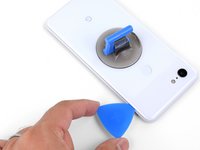
吸盤カップを強く一定の力で引き上げて、隙間を作ります。
-
デバイスの使用期間にもよりますが、この作業は難しいでしょう。作業が上手く進まない場合は、端を再度温めてから再試行してください。
-
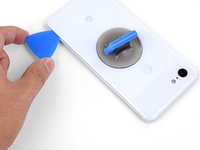
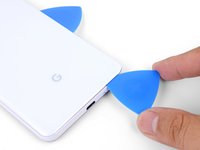
オープニングピックの先端を隙間に差し込みます。
-
-
-
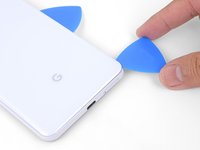
オープニングピックを右端に沿ってスライドして、接着剤をスライスしながら切開します。
-
接着剤は固まり、冷却されるとスライスが難しくなります。この場合、再度端を温めてスライスしやすくします。
-
端全体をスライスしたら、接着剤が再装着するのを防ぐため、オープニングピックを隙間に残しておきます。
-
-
-
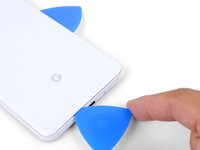
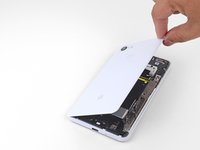
開口ピックを使って、下側右端コーナー周辺の接着剤を切開し、続けてデバイスの下側端全体に沿ってスライドします。
-
ピックを下側端に残して、接着剤の再装着を防ぎます。
-
-
-
-
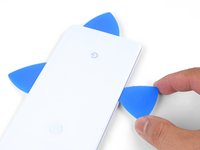
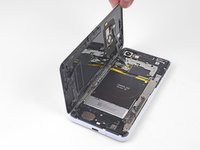
続けて、デバイス残りの端を温めて、スライドして接着剤を切開します
-
デバイス左側端に沿ってスライドする際はご注意ください。オープニングピックが詰まっている感じがしたら、指紋センサーに絡まっている可能性があります。ピックを隙間からゆっくりと取り出して、再試行してください。
-
デバイスの右側端と下側端付近で、接着剤が厚い部分についてもしっかりと切開してください。
-
-
-
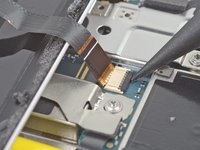
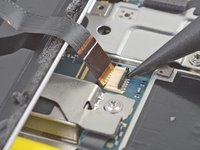
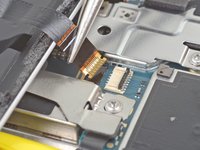
スパッジャーの先端を使って、指紋センサーのZIPソケット上の黒いロックバーを持ち上げます。
-
ケーブルのタブを、指先もしくはピンセットでつまんで、ゆっくりとフレックスケーブルをソケットからずらしながら外します。
-
-
-
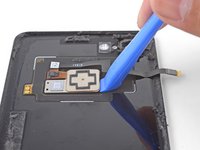
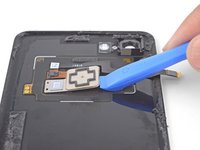
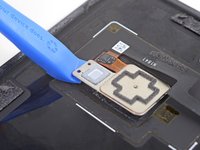
開口ツール先端を正方形の指紋センサーの下に差し込み、ゆっくりとこじ開けながらセンサーを緩めます。
-
続けて指紋センサーの周辺全体をこじ開けて、完全に緩んだ状態にします。
-


デバイスを再組み立てする際は、これらの手順を逆の順番に従って作業を進めてください。
修理が上手く進みませんか?基本的な [[Troubleshooting Problems After a Repair|トラブルシュートのページ|new_window=true]を参照するか、アンサーフォーラムを検索してください。
デバイスを再組み立てする際は、これらの手順を逆の順番に従って作業を進めてください。
修理が上手く進みませんか?基本的な [[Troubleshooting Problems After a Repair|トラブルシュートのページ|new_window=true]を参照するか、アンサーフォーラムを検索してください。
11 の人々がこのガイドを完成させました。
以下の翻訳者の皆さんにお礼を申し上げます:
100%

Midori Doiさんは世界中で修理する私たちを助けてくれています! あなたも貢献してみませんか?
翻訳を始める ›


4 件のコメント
Can you please tell me what the square flex circuit (with 2 square contacts) is for, which is surrounding the FP Sensor? Mine was damaged, when my back cover was cracked. I have replaced the back cover, and will be getting another FP sensor (as mine is inoperable), but that large square flex is also damaged. I have no idea what this is for? I thought it was connected to the NFC circuit, but the phone still charges wirelessly.
I think that is the NFC antenna, which is mainly used for contactless payment and ID systems. It’s not used for wireless charging, which is the coil on top of the battery. Depending on how it is damaged, your NFC function may still work—it may just have less range if the antenna’s damaged.
The link to the Google tool to get the Pixel 3XL phone to recognize the new fingerprint sensor only works for Pixel 6 and newer. Perhaps the tool accessed by the link previously supported the Pixel 3XL, but no longer does. Either a correct reactivation tool for the Pixel 3 should be provided or this guide should be taken down. As it stands, it seems useless to replace the sensor unless a way is provided to get the phone to recognize the new one. If there is an alternate way to activate the new sensor, the method should be provided in the guide.
No recalibration of a new sensor is required on the 3XL. You can replace a broken sensor with a new one and it should be properly detected by the phone.
No software should be necessary, though you will likely have to setup fingerprints again. When the fingerprint sensor is broken, the phone software may not detect it and Android will not even give you the options to configure fingerprints. Once a working sensor is installed, it should provide the options again.
This guide is wrong when it describes a recalibration for the 3XL, it is likely that this was cut/pasted from another device.