メインコンテンツにスキップ

Google Pixel 3 XL 指紋センサーの交換

ご注意:あなたは前提となるガイドを編集しています。あなたが行なう変更は、この手順を含むガイド全体に反映されます。

英語
日本語

手順 2を翻訳中

手順2
Google Pixel 3 XL Fingerprint Sensor Replacement, Pry up the fingerprint sensor: 手順 0、 3の画像 1 Google Pixel 3 XL Fingerprint Sensor Replacement, Pry up the fingerprint sensor: 手順 0、 3の画像 2 Google Pixel 3 XL Fingerprint Sensor Replacement, Pry up the fingerprint sensor: 手順 0、 3の画像 3
Pry up the fingerprint sensor
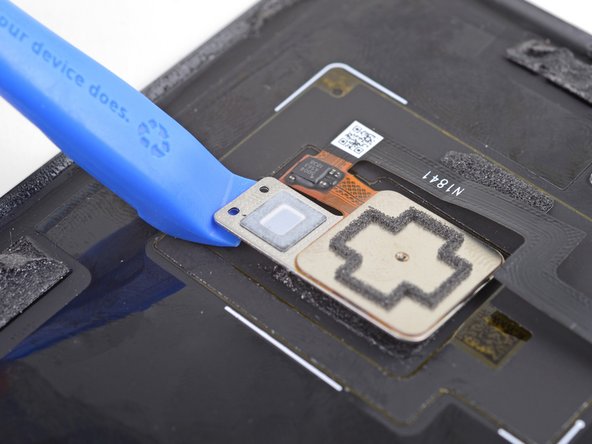
  • Insert the edge of an opening tool underneath the square portion of the fingerprint sensor and slowly pry up to loosen the sensor.

  • Continue prying around the perimeter of the fingerprint sensor until it is loosened.

開口ツール先端を正方形の指紋センサーの下に差し込み、ゆっくりとこじ開けながらセンサーを緩めます。

続けて指紋センサーの周辺全体をこじ開けて、完全に緩んだ状態にします。

クリエイティブコモンズのオープンソース著作権のもと、あなたの投稿は著作権の対象となります