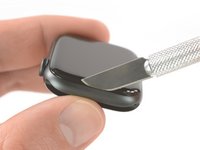
はじめに
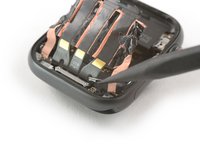
このガイドを使用して、Apple Watch Series 4のForce Touchガスケットを交換してください。
Force Touchガスケットを交換するには、まずディスプレイを取り外すことをお勧めします。 ただし修理経験が豊富で自信がある場合、スクリーンを取り外さずにForce Touchガスケットを取り外すこともできます。
ディスプレイの交換後のペアリングの問題を回避するために、Apple WatchをwatchOS 5 以降(およびペアリングされたiPhoneを iOS 12 以降)に更新してください。
ディスプレイを交換すると、Apple Pay で障害が発生する可能性があります。障害の可能性を減らすために、交換前に全てのApple Payアカウント情報を削除して、新しいディスプレイを取り付けた後、再入力してください。
このガイドでは、標準のGPSのみのバージョンの手順を示していますが、セルラー/ LTEバージョンにも対応できます。
必要な工具と部品
-
-
修理を始める前に、デバイスをチャージャーから外して、電源を切ります。
-
タッチスクリーンが破損していて、電源を切れない場合は、こちらの代用方法で電源を切ります。
-
-
-
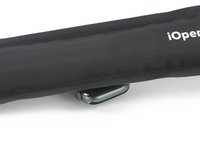
iOpenerを準備して(もしくはヘアドライヤーやヒートガン)Watchのディスプレイに留められた接着剤を柔らかくするため、ディスプレイ表面にのせて温めます。
-
スクリーンが完全に温まり、ケースを固定している接着剤が柔らかくなるまで、iOpenerをデバイス上に少なくとも2分間置きます。
-
-
-
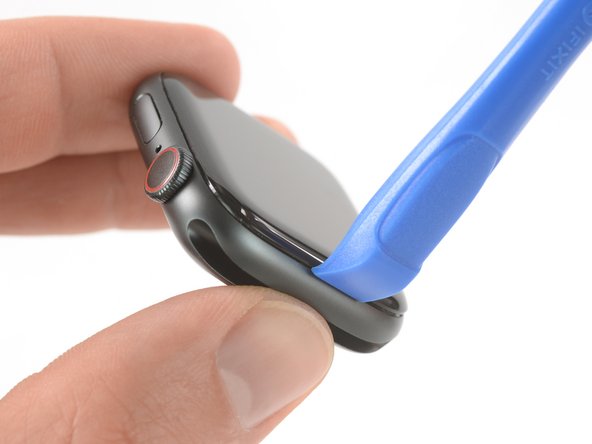
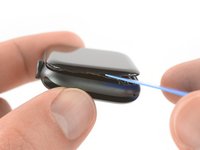
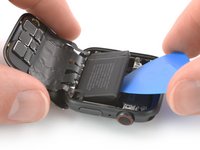
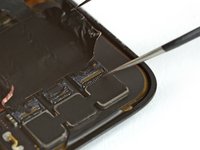
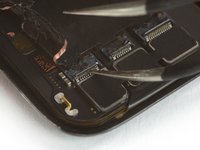
ディスプレイと外ケースの間の薄い隙間にカーブしたブレードの先端を載せます。 デジタルクラウンに最も近いディスプレイの短辺側から始めます。
-
隙間にしっかりとまっすぐ押し込みます。
-
差し込んだら、ブレードを傾けながらディスプレイを少し持ち上げます。
This part is REALLY hard! Even after using the iOpener to warm the watch I had to use A LOT of force to get the blade in between the glass and the case. Be very careful when prying the display. I applied way too much force and my blade shot into the case under the display. I don’t think I damaged anything, but I did replace the force touch gasket to be sure.
I have a stainless steel case, not sure if that makes a difference, and was unable to do this without breaking the screen. Be very careful. Followed instructions but could not get the screen to release no matter how hot I got the watch.
I am moderately experienced at opening Apple devices having replaced batteries in several iPhones, iPods, and an iPad. I could not get the watch open with the x-acto knife blade as shown. I found other sites showed using a 0.1mm thick tool. I bought one and found it relatively easy to open the watch. It has the advantage of going in horizontal rather than vertical so it went between the glass and the force sense gasket. Force sense gasket wasn't disturbed at all. iFixit should add this type of tool to their offering.
-
-
-
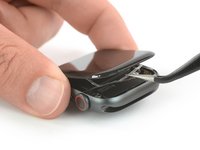
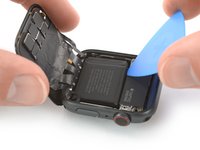
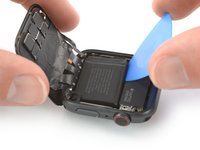
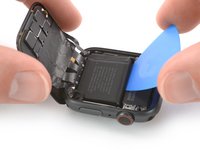
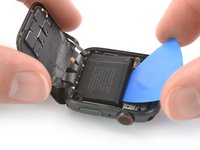
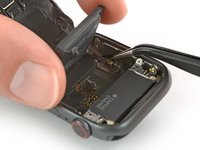
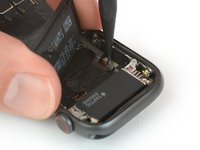
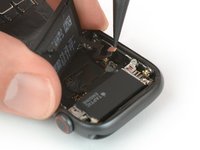
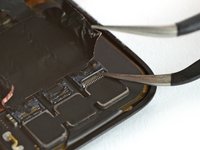
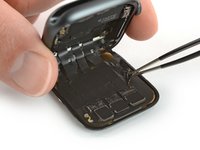
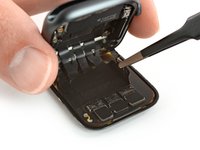
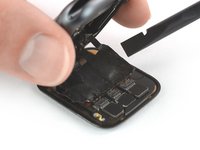
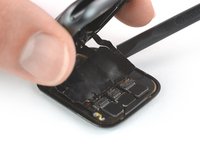
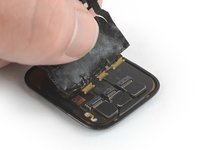
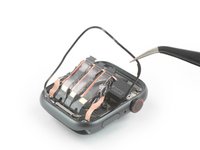
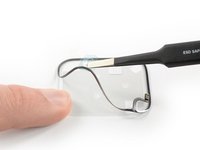
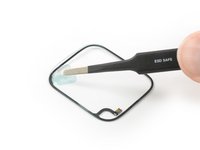
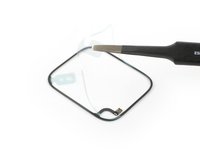
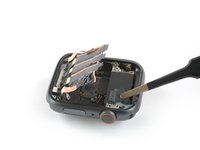
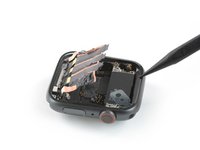
Force Touchタッチセンサーは、Watch本体ではなく、ディスプレイフレームに装着しているものがあります。 この場合、ディスプレイの下に開口ピックを挿入し、Force Touchガスケットをディスプレイから慎重に離してください。
-
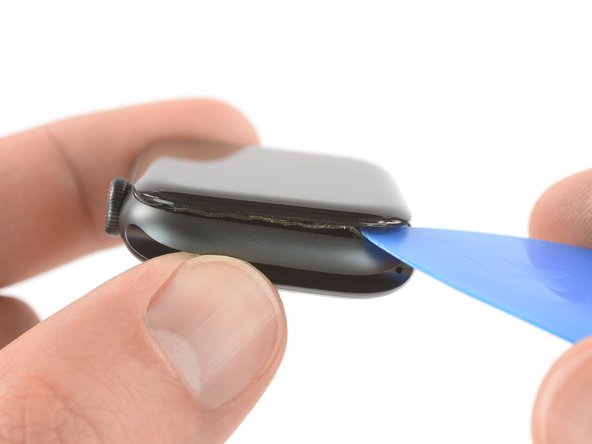
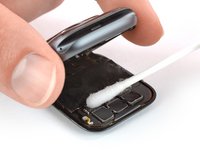
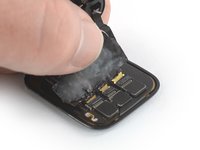
Force Touchガスケットとディスプレイ間の接着剤を剥がすため、ディスプレイ周辺に開口ピックをスライドします。
This impossible for me. I just left the force touch gasket attached to the display side. I was able to bend the display back with the gasket still in place.
See first the instructions for replacing the force touch gasket to familiarize yourself with parts that need separating. These instructions will seem unclear if you don't know what the force touch gasket looks like.
-
-
-
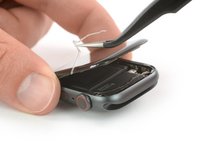
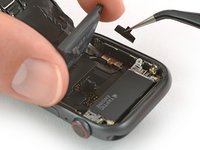
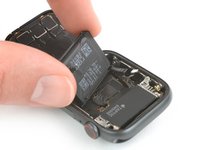
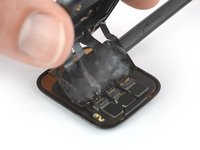
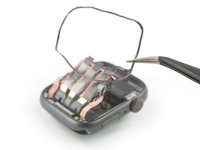
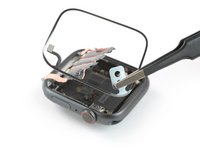
バッテリーを取り出すのに十分なスペースができるまで、慎重にスクリーンを後ろ側に開きます。
-
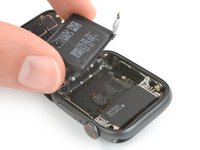
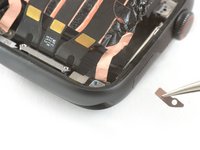
開口ピックをバッテリーとTaptic Engineの間に差し込みます。
If you are just replacing the screen then there is no need to remove battery.
When removing the screen I tore the two outer cables attached to the lcd screen. What are their purpose? I read somewhere they are just some sort of shield. Will my watch function normally without them?
thanks
-
-
この手順で使用する道具:Tweezers$4.99
-
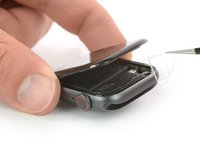
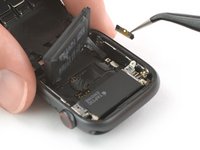
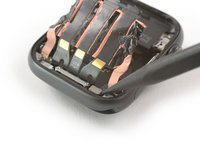
75度の角度までバッテリーを慎重に持ち上げます。
-
ピンセットを使って、バッテリーコネクタを覆っているメタルプレートから黒いステッカーを剥がします。
-
-
-
この手順で使用する道具:Tesa 61395 Tape$5.99
-
バッテリーを外します。
When installing the new battery be aware that the sidewall of the watch directly above the contacts and cover screw hole is magnetized. This was shock to me and a little frustrating. Every time I attempted to place the cover with a tweezers it was pulled toward the sidewall. I pushed the plate in place with a spudger, then attached the screw to the tip of the screwdriver. I was then able to insert the screw with minimal disturbance to cover plate.
-
-
-
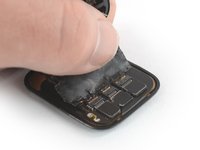
高濃度のイソプロピルアルコール(濃度90%以上)を綿棒に少量含ませて、黒い接着フォイル上に塗ります。接着剤に浸透するまで約2分間待機してください。
-
あるいは、温めたiOpenerをスクリーンの上部にのせて、接着剤を柔らかくします。iOpenerを少なくとも2分間のせてください。
-
-
-
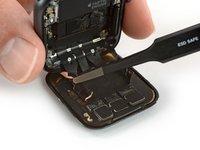
先が鋭利でないピンセットを使って、スクリーン背面側にケーブルを装着している黒いフォイルをサイドから剥がします。
Be very careful not to damage the copper-colored ribbon cables at either end of the display flex cable. I found it impossible to remove the black foil without tearing these ribbons, and as my repair was ultimately unsuccessful, I have no doubt that this mistake was the cause of my failure. I wish this step had emphasized how difficult removing the foil could be. If you make the same mistake as I did, it will require advanced soldering to replace the display flex cable. That's a bridge too far for me with a 5+ year old watch, so it's off to the trash bin for it. Shame...
-


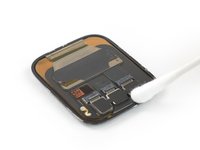


Apple Watch Series 4を再組み立てする際は、スクリーンとバッテリーを装着するために、これらのインストラクションを逆の順番に従って作業を進めてください。
e-wasteを処理する場合は、認可済みリサイクルセンターR2を通じて廃棄してください。
修理が上手く進みませんか?トラブルシューティングのヘルプには、アンサーコミュニティを参照してください。
Apple Watch Series 4を再組み立てする際は、スクリーンとバッテリーを装着するために、これらのインストラクションを逆の順番に従って作業を進めてください。
e-wasteを処理する場合は、認可済みリサイクルセンターR2を通じて廃棄してください。
修理が上手く進みませんか?トラブルシューティングのヘルプには、アンサーコミュニティを参照してください。
13 の人々がこのガイドを完成させました。
以下の翻訳者の皆さんにお礼を申し上げます:
100%

これらの翻訳者の方々は世界を修理する私たちのサポートをしてくれています。 あなたも貢献してみませんか?
翻訳を始める ›


9 件のコメント
I have an Apple Watch SE 40mm that had a very cracked screen after falling on a tiled floor. Gift from my daughters for father's day, ouch!
Reputable service wanted 140.00 to replace the screen. I got cheap and got a kit on Amazon that had a screen with digitizer. Looked at videos on Apple Watch SE screen replacements on YouTube. Some great, & some bad. Watched over and over again the good ones.
Was able to get the screen off using heat gun. Released the latches and gently removed the three ribbon cables. Removed the adhesive strip that was kind of clear in appearance. Saw a light brown strip in the channel around the base of the watch. Thought it was part of the adhesive and pulled it out. Then I thought, sh*^t, was that the Force Touch Gasket! To make matters even worse the two ribbon cables on each side tore. I think they insulate the signals?? Looks like my beloved SE is toast thanks to me being a bone head! Should have sent it in for 140.00!
Do I need to replace the Force Touch gasket even though it isn‘t used anymore sine WatchOS 7?
I mean while replacing a display glass do I need to keep the Force Touch intact?
Daniel Lux - 返信
Yes because you need to glue and fix the Display. It’s also for the water resistants. :)
Is the adhesive supplied with a new Force Touch gasket to be used for subsequent screen removal and replacement? It appears the new Force Touch gasket has some adhesive after removal of the protective foil, is this correct?
Production of the force touch gasket varies (sometimes with sometimes without adhesive). So if it should not come with adhesive, use the separate adhesive to close the watch. And yes, when already equipped with adhesive the extra can be used for subsequent openings.
There is no mention of the adhesive, but the kit comes with 2 adhesive sheets.
How are those installed? One on the glass and one on the watch frame? Sandwiching the Force Touch sensor? Any considerations or tips?
What does the LCD adhere to? Does it adhere to the rim of the frame, or to the force touch sensor?
I would criticize this guide for one thing only, and that is the suggestion to remove the screen in the first place. The gasket and adhesive both can be fitted around the screen, and I found out the hard way that the ribbon connectors will NOT go back in their place easily, in fact, all I did was to push the connectors back in their place and try to push the plastic bar down, and the plastic broke before even light pressure. DO NOT remove the ZIF connectors, it is unnecessary and very risky.
Hi. I changed the screen on an apple watch series 4, now the screen works, whcih is great, but when I charge it, the green snake comes on but never charges. It heats up the bottom, gets very warm. Could it be the battery itself? Maybe needs a new one? Is rthere anything else that woudl be causing the battery to not charge and or heat up on the bottom when chaging the screen?
Derrick Brewer - 返信