はじめに
手順 1 に進む2007年6月29日に解体しました。
必要な工具と部品


-
この手順で使用する道具:Mako Driver Kit - 64 Precision Bits$39.95
-
私たちはiPhoneを手に入れました。今はフォトスタジオに向かっています。
-
8GBのiPhoneを2台を購入しました。
-
iPhoneが到着しました!
-
私たちがiPhoneのパーツを販売できるまでどのくらいの時間がかかるか、誰か賭けてみませんか?
-
-
-
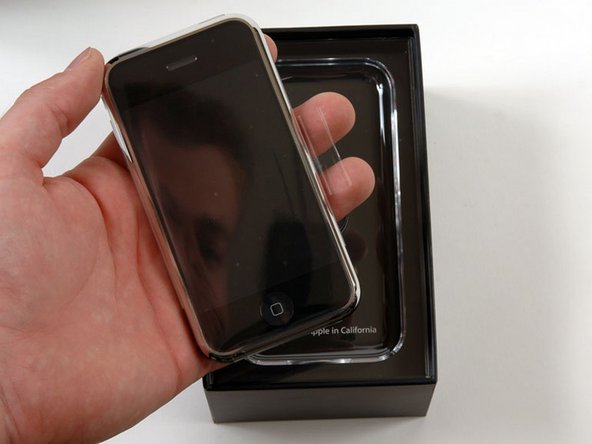
私たちはiPhoneをバラバラにしました。作業には少し手こずりました。
-
まず黒いアンテナプレートを取り外します。
-
バックパネルに、アンテナケーブルを固定する前後のケースを結合しているアースネジがあります。
nosliwsからの引用:
Yes, please. How did you get the iPhone apart? Saying it was tricky isn't helpful.
Take a look at our iPhone 1st Generation guides to see how to take the iPhone apart. The case guide tells you how to remove the rear panel of the iPhone.
-
-
-
前後のケースを分離します。
-
バックパネルを完全に取り外してしまう前に、ヘッドフォンジャックケーブルを取り除いて下さい。
-
ヘッドフォンジャックはケースの奥に隠されているので、大半のヘッドフォンジャックはアダプターなしではフィットしません。(正しい3.5mmのプラグであってもです。)
-
Appleは、ヘッドフォンを引き抜いたときの、狭い金属製のジャックへの負荷を軽減するためにこのデザインを採用しました。硬質プラスチックのケーブルジャケットが衝撃の大半を吸収することになります。
-
ヘッドフォンには内蔵マイクロフォンも搭載されています。ボタンを押すとすぐに電話に出られます。
R.I.P.
The Headphone Jack
Born June 29th, 2007
Died September 16th, 2016
Ryan Morey - 返信
Amen. I guess this is what passes for “courage” these days? :(
devnull -
-
-
-
-
さらなる検討の末、私たちはロジックボードを破壊することなく開ける方法を見つけました。
-
左側基板の左サイド上にあるメタルシールドの下にはSamsung製チップ(K9MCGD8U5M)が搭載されています。
-
620 MHz ARMアーキテクチャプロセッサ ARM1176JZFが積層されたSamsungメモリ。おそらくSamsung S3C6400でしょうか。番号は339S0030ARM, 8900B 0719, NOD4BZ02, K4X1G153PC-XGC3, ECC457Q3 716です。プロセッサは2つの512megabitチップのようなSDRAM上に積層されているように見えます。プロセッサには組み込み式H.264とMP3ハードウェアデコードが付いています。
-
ARM上のチップはWolfsonオーディオチップです。パーツ番号はWM8758BGと73AFMN5です。
-
ARMの下のチップは Linear Technology 4066 USBパワーリチウムイオンバッテリーチャージャー で、AppleはiPodにも同じものを搭載しています。
-
-
-
この画像では空白のように見える中央下部のチップにはこのように表記されています。:MARVELL, W8686B13, 702AUUP. This is Marvell's 802.11b/g18.4mm2 chip.
-
右側上部のチップは、Skyworks GSM/Edge パワー・アンプモジュール(SKY77340)です。
-
Skyworksチップの左側にあるシルバーのチップは、CSR 41814 3A06U K715FBです。これはCSR BlueCore4-ROM WLCSPシングルチップで、Bluetooth 2+EDRのための無線・ベースメントICです。
-
画像中の白いステッカーで覆われているチップには部品の番号338S0289と8G60710が書かれています。EETimesによるとこれはInfineon M1817A11だということです。
-
青いドット付きのチップは、Intel Wireless Flash stacked 32 Mb NOR + 16Mb SRAM チップであると噂されています。パーツ番号は1030W0YTQ2、5716A673、およびZ717074Aです。EE Timesはパーツ番号PF38F1030W0W0YTQ2を追加しました。
-
右側下部のチップは338S 0297G0719です。これがAppleブランドのチップと言う人もいますが、その目的は未だ不明です。
-
左側下部のチップはInfineon PMB8876 S-Gold 2マルチメディア エンジンです。部品番号は337S3235、60708、およびEL629058S03です。
-
もしiPhoneのチップや内部に関する追加情報をご存知でしたら、私たちにメールを送ってください。匿名でその情報を投稿します。
-


以下の翻訳者の皆さんにお礼を申し上げます:
100%


これらの翻訳者の方々は世界を修理する私たちのサポートをしてくれています。 あなたも貢献してみませんか?
翻訳を始める ›
15 件のコメント
Yes. It is possible, but it is very difficult. Here’s the link: iPhone 1st Generation Display Assembly Replacement
Praquron -
The IC marked as 338S 0297 G0719 is in fact a RF Transceiver – Quad-Band GSM/EDGE w/Integrated SAW Filters and PLL from Infineon, probably PMB 6258 or PMB 6272
Also do you know what chip the IPhone 1 has? I think it is call A1 since it is the first one, bu i'm not sure.
@applegenius, the A-series chips started with the A4 for the iPhone 4. It’s technically called the APL0098. So no, it’s not the A1. It includes a 412 MHz single-coreARM11CPU and a PowerVR MBX Lite GPU. It is manufactured by Samsung on a90 nmprocess.^^[3^^]
All this info is blatantly stolen from Wikipedia.
So, it’s impossible to replace the battery. :(
But is it possible to buy and replace a battery-logicboard unit? :)
Replacement of the battery isn’t impossible it just requires the skills and equipment for soldering.
it is possible to replace the battery, you just need to desolder it first.
set up me iPhone x charchter
is it possible to further deconstruct the bottom to replace the charging port?
#2. Soldered battery is very difficult to replace. <— disagree with this statement. The soldering is doable by almost anyone who know how to solder even without special soldering equiment, connector look like 16awg
You’re right - for me it is quite easy too ‘cause I own the necessary skills and equipment. But it is definitely more complicated than modern batteries.
byggxx -
Get a better iPhone
Iphone 2g is great to be teardowns
me iwat to take bets
Meow Purr - 返信