
Sony Xperia Z3 Screen Assembly Replacement

はじめに
手順 1 に進むUse this guide to replace the screen assembly of the Sony Xperia Z3.
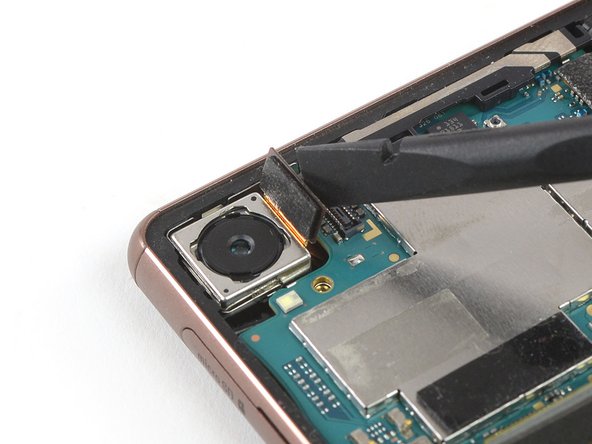
This guide shows how to replace the whole screen assembly of the Sony Xperia Z3 including the midframe. All components such as the vibration motor, the cameras, and the earpiece speaker need to be transferred to the replacement part during the repair process. In case you want to replace the LCD & Digitizer without the frame you need to follow this guide.
必要な工具と部品
パーツ


ツール


もっと見る
-
-
Heat the back cover of your Xperia Z3 to loosen the adhesive underneath.
-
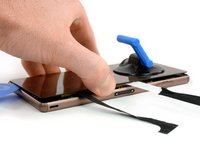
Lift up the back cover with a suction handle and put an opening pick in the gap.
-
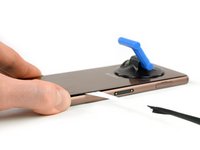
Move the pick carefully around the edges to loosen the adhesive on every side of the phone.
-
-
この手順で使用する道具:Tweezers$4.99
-
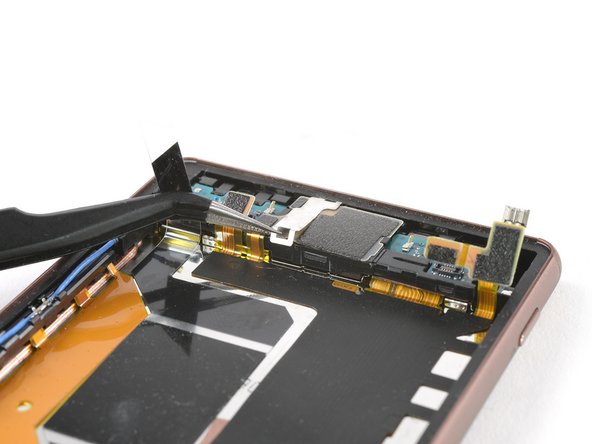
When the edges of the cover are free from adhesive, tilt it to allow access to the battery tabs.
-
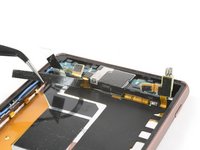
Use tweezers to pull the two black adhesive strips out of the phone but don't pull just yet.
Careful during this bit. My old Z3 back cover couldn’t take it and split into lots of pieces (probably weakened over the years!). Just order a replacement for £3 off ebay before doing it ;-)
Merci pour ce tuto. Excellente procédure. Travaux réalisés en 20 minutes sans aucun problème. Attention: au remontage, il n'y a plus d'adhésif sur la batterie, la coque arrière peut éventuellement tomber. Je ne l'ai pas fait mais il faut peut-être mettre un petit double face sur la batterie.
-
-
-
Unplug the battery flex connector.
-
Use a tweezer to gently pull off the adhesive strip on the bottom part of the battery.
-
-
-
-
Apply a heated iOpener to the upper end of the screen to loosen the adhesive beneath the headphone jack. Apply the iOpener for at least two minutes.
-
-
-
Flip the phone over and apply a heated iOpener to the right side of the screen to loosen the adhesive beneath the main flex cable. Apply the iOpener for at least two minutes.
-
-
-
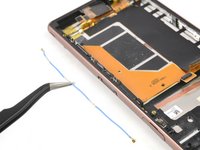
Apply a heated iOpener to the left side of the screen to loosen the adhesive beneath the magnetic charging cable. Apply the iOpener for at least two minutes.
-


To reassemble your device, follow these instructions in reverse order. Apply new adhesive where it’s necessary.
Repair didn’t go as planned? Try some basic troubleshooting, or ask our Answers Community for help.
To reassemble your device, follow these instructions in reverse order. Apply new adhesive where it’s necessary.
Repair didn’t go as planned? Try some basic troubleshooting, or ask our Answers Community for help.
4 の人々がこのガイドを完成させました。


How hot (how many C) should the iOpener be? I think it would be safer / more accurate to heat the iOpener in an oven with accurate temperature control.
Magnus Myklebost - 返信
Careful here. The back cover cracked in two places. Once when I exerted pressure with the suction handle, and in the corner when moving the pick around the edges- even though I was very gentle. The battery was adhered firmly to the back cover.
Joseph Doyle - 返信
I cracked the back cover instantly. Make sure to buy a spare one before opening!
raffaelecaroppo - 返信