はじめに
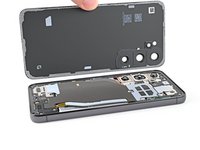
Follow this guide to replace a dead or worn-out battery in your Samsung Galaxy S23.
This guide is for the battery itself. If you're replacing the screen and battery assembly (the frame, screen, and battery as one piece), follow this guide.
Your phone's lithium-ion battery has a limited lifespan. If your phone dies quickly and doesn't hold a charge, it may be time to replace the battery.
If your battery is swollen, take appropriate precautions.
Note: Retaining water resistance after the repair will depend on how well you reapply the back cover adhesive, but your device will lose its IP (Ingress Protection) rating.
必要な工具と部品
-
-
Unplug any cables from your phone.
-
Hold the side key and the volume down button, then select "Power off" to turn off your phone.
-
-
-
Heat an iOpener and apply it to the right edge of the back cover for two minutes to soften the adhesive.
-
-
-
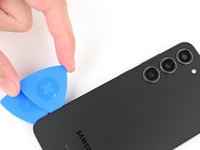
Apply a suction handle to the back cover, as close to the center of the right edge as possible.
-
Pull up on the suction handle with strong, steady force to create a gap between the cover and the frame.
-
Insert an opening pick into the gap.
-
-
-
Slide the pick back and forth along the right edge to separate the adhesive.
-
Leave the pick inserted near the bottom right corner to prevent the adhesive from resealing.
-
-
-
Apply a heated iOpener to the bottom edge of the back cover for two minutes.
-
-
-
Insert a second opening pick at the bottom right corner.
-
Rotate it around the bottom right corner to separate the adhesive.
-
-
-
Slide your opening pick to the bottom left corner to separate the adhesive.
-
Leave the pick in the bottom left corner to prevent the adhesive from resealing.
-
-
-
Apply a heated iOpener to the left edge of the back cover for two minutes.
-
-
-
Rotate the opening pick around the bottom left corner to separate the adhesive.
-
-
-
Insert a third opening pick at the bottom left corner.
-
Slide your pick toward the top left corner to separate the adhesive.
-
Leave the pick in the top left corner to prevent the adhesive from resealing.
-
-
-
-
Heat an iOpener and apply it to the top edge of the back cover for two minutes.
-
-
-
Insert a fourth opening pick at the top left corner.
-
Rotate it around the top left corner to separate the adhesive.
-
-
-
Slide your opening pick to the top right corner to separate the adhesive.
-
Leave the pick in the top right corner to prevent the adhesive from resealing.
-
-
-
Line up the tip of an opening pick with the flash cutout.
-
Slide the opening pick under the top of the back cover until you feel it start to snag on the adhesive.
-
Keep sliding the pick toward the bottom of the phone until you feel the adhesive completely separate from the back cover.
-
-
-
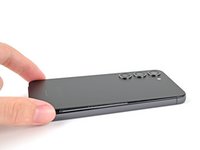
Grab and remove the back cover.
-
Remove any adhesive chunks with a pair of tweezers or your fingers. Apply heat and isopropyl alcohol (90% or greater) if you're having trouble removing the adhesive.
-
If you're using custom-cut adhesives, follow this guide.
-
If you're using double-sided tape, follow this guide.
-
-
-
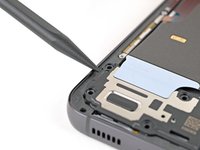
Use the point of your spudger to pry up and disconnect the wireless charging coil press connector from the motherboard.
-
-
-
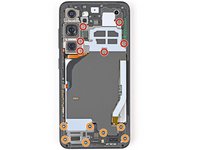
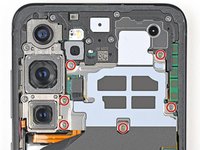
Use a Phillips screwdriver to remove the thirteen 3.5 mm‑long screws securing the wireless charging coil and the loudspeaker:
-
Six screws securing the wireless charging coil
-
Seven screws securing the loudspeaker
-
-
-
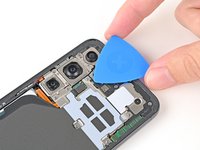
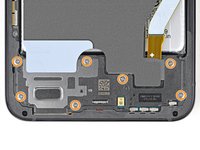
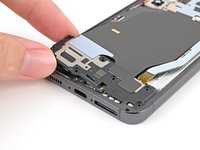
Insert the point of your spudger in the notch at the top left corner of the loudspeaker.
-
Pry up to unclip the loudspeaker from the frame.
-
-
-
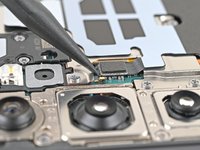
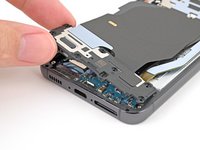
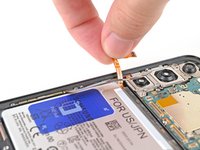
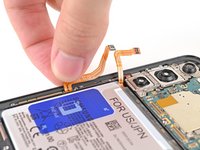
Use the point of your spudger to pry up and disconnect the battery press connector.
-
-
-
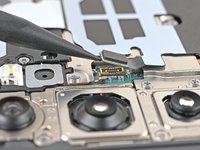
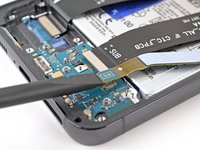
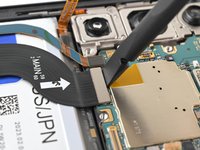
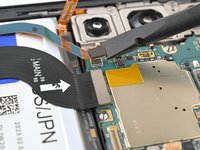
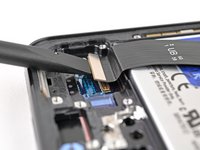
Use your spudger to pry up and disconnect the primary and secondary interconnect cable press connectors from the daughterboard.
-
-
-
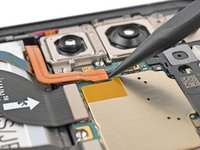
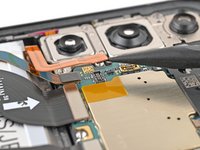
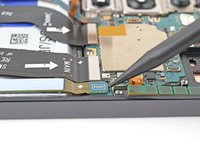
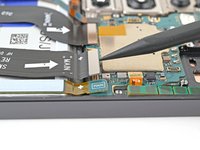
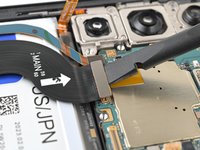
Use your spudger to pry up and disconnect the display and 5G mmWave cable press connectors from the motherboard.
-
-
-
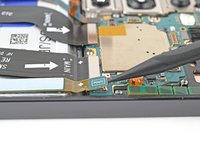
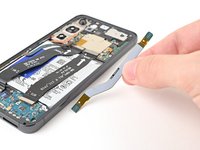
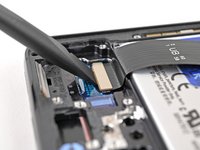
Use the flat end of a spudger to pry up and disconnect the display cable press connector from the bottom edge of the phone.
-
Remove the display cable.
-
-
-
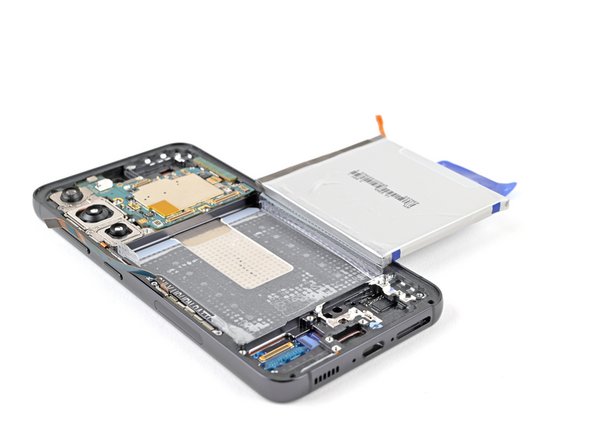
Use your finger to push the battery and antenna cables away from the battery.
-
-
-
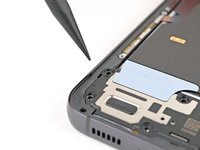
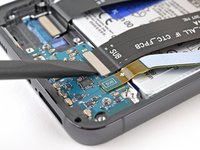
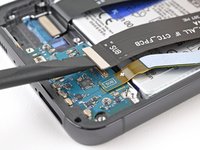
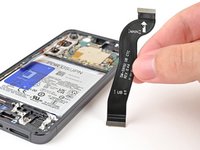
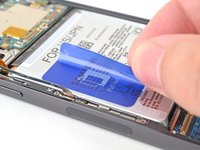
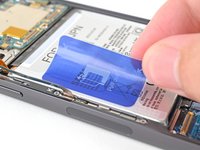
Use your fingers to carefully peel the battery pull tab from the left side of the battery.
-
-
-
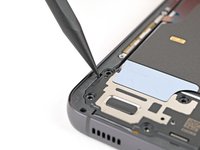
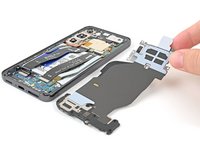
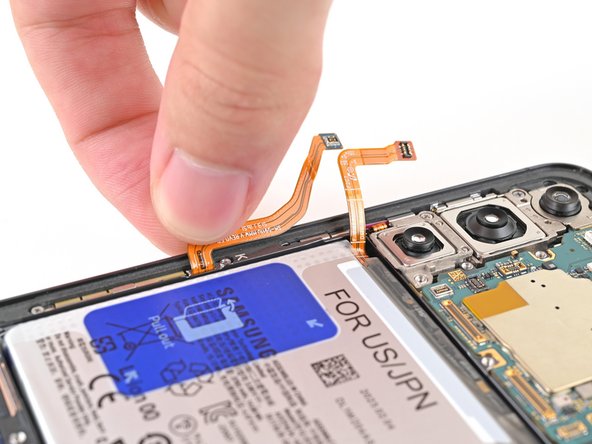
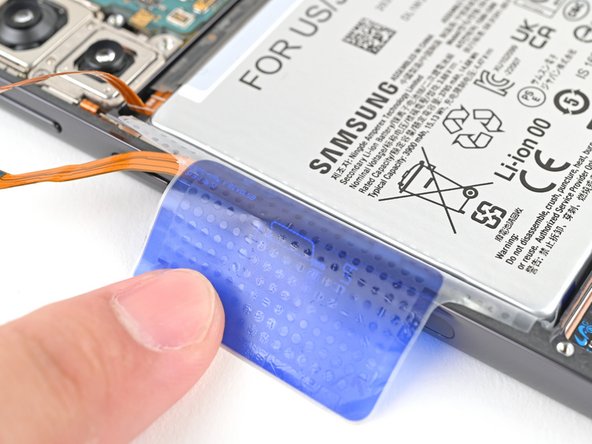
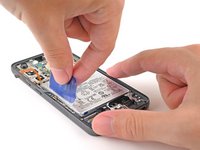
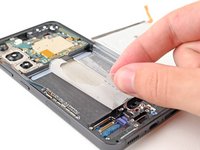
With one hand, fold the two upper and lower tabs out of the way of the battery and firmly hold down the frame.
-
With your free hand, grip the blue center pull tab and pull straight up with strong, steady force to separate the battery adhesive.
-
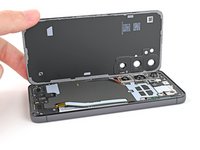
Lay the battery over the right edge of your phone.
-
-
-
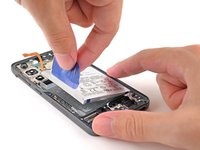
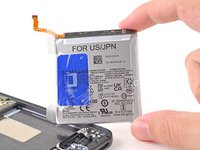
Peel the battery's plastic film from the frame.
-
Remove the battery and its film.
-
If you used isopropyl alcohol, wait ten minutes before installing the new battery to allow the alcohol to completely evaporate.
-


To reassemble your device, follow these instructions in reverse order.
For optimal performance, calibrate your newly installed battery after reassembling your phone.
Take your e-waste to an R2 or e-Stewards certified recycler.
Repair didn’t go as planned? Try some basic troubleshooting, or ask our Samsung Galaxy S23 Answers Community for troubleshooting help.
3 の人々がこのガイドを完成させました。


3 件のコメント
Thank you for this guide! Easy to follow. I couldn't get the phone open until I bought the iopener kit and anticlamp. Once I got it open, wasn't a big deal to replace. I did take photos that helped as I was opening it, as my battery was slightly different from these photos and I wanted to make sure I knew exactly what I was looking at. It works great now and turned right back on with no issue. Thank you!
Great step by step guide. Thanks!
Thank you very much for this guide. My phone basically bricked after an update, and there was nothing I could do to make it respond. Holding the power and volume buttons, charging it, even plugging it into my computer gave zero feedback (totally black screen, no vibration or sound). I had to pop the phone open and completely disconnect the battery, and when I reconnected it everything was back to normal. It was my first time ever disassembling and attempting to repair electronics and this guide was essential in figuring out what I was doing.