メインコンテンツにスキップ
KitchenAid Classic Mixer K45SSWH Gasket Replacement

KitchenAid Classic Mixer K45SSWH Gasket Replacement

Joey Gavin

Joey Gavin とその他 6 人の作成者

最終更新日: May 28, 2023

20 - 25 分
中レベル

If you are worried about oil or grease leaking inside or out of your mixer, you might have to replace your gasket. This guide will show you how to do this.

必要な工具と部品

これらのリンクを通じて購入すると、iFixit は手数料を得ます。
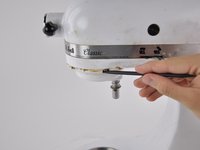
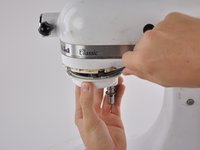
  1. KitchenAid Classic Mixer K45SSWH Gasket Replacement, Motor Housing Cover: 手順 1、 2の画像 1 KitchenAid Classic Mixer K45SSWH Gasket Replacement, Motor Housing Cover: 手順 1、 2の画像 2
    • Using a spudger, gently pry off the aluminum drip ring.

  2. KitchenAid Classic Mixer K45SSWH Gasket Replacement: 手順 2、 1の画像 1
    • Using a 4 mm pin punch and hammer, hammer the pin until it is dislodged from the planetary gear cover.

  3. KitchenAid Classic Mixer K45SSWH Gasket Replacement: 手順 3、 2の画像 1 KitchenAid Classic Mixer K45SSWH Gasket Replacement: 手順 3、 2の画像 2
    • Using a spudger, pry the planetary gear cover from the mixer shaft.

  4. KitchenAid Classic Mixer K45SSWH Gasket Replacement: 手順 4、 1の画像 1
    • Using a flathead screwdriver, remove the five 28 mm front motor housing screws.

    • Using the same flathead screwdriver, remove the two 28 mm locking screws.

    • One of the locking screws contains a safety locking mechanism. Do not interchange these screws with the front motor housing screws.

  5. KitchenAid Classic Mixer K45SSWH Gasket Replacement: 手順 5、 1の画像 1
    • Turn your device around. Using the same flathead screwdriver, remove the two 28 mm rear locking screws.

    • One of the rear motor housing screws contains a safety locking mechanism. Do not interchange these screws with the front motor housing screws.

  6. KitchenAid Classic Mixer K45SSWH Gasket Replacement: 手順 6、 2の画像 1 KitchenAid Classic Mixer K45SSWH Gasket Replacement: 手順 6、 2の画像 2
    • Using a Phillips #2 screwdriver, remove the 10 mm screw from top of back cover.

    • The rear cover is now completely free from the mixer.

  7. KitchenAid Classic Mixer K45SSWH Gasket Replacement: 手順 7、 2の画像 1 KitchenAid Classic Mixer K45SSWH Gasket Replacement: 手順 7、 2の画像 2
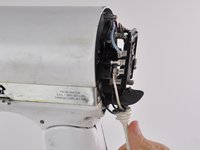
    • Carefully pull the power cord from the notch in back of the mixer.

    • The motor housing cover is now completely free from the base of the mixer.

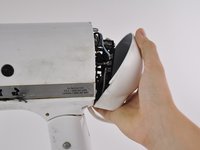
  8. KitchenAid Classic Mixer K45SSWH Gasket Replacement: 手順 8、 1の画像 1
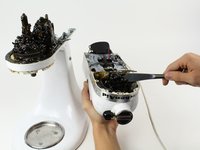
    • Lift the motor housing cover from the mixer base.

    • Be sure to place the cover upside-down to prevent grease from leaking out.

  9. KitchenAid Classic Mixer K45SSWH Gasket Replacement, Gasket: 手順 9、 2の画像 1 KitchenAid Classic Mixer K45SSWH Gasket Replacement, Gasket: 手順 9、 2の画像 2
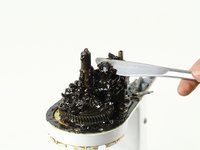
    • Use a butter knife or putty knife to remove grease from around the gasket.

    • Place grease in motor housing cover.

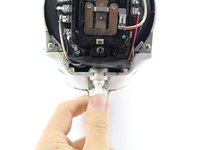
  10. KitchenAid Classic Mixer K45SSWH Gasket Replacement: 手順 10、 1の画像 1
    • Lift the gasket up with your hands or a spuger and remove it.

終わりに

To reassemble your device, follow these instructions in reverse order.

7 の人々がこのガイドを完成させました。

作成者

6人の作成者と共同で作成されました。

Joey Gavin

メンバー登録日: 10/13/14

244 ポイント

1ガイドが承認済み

チーム

Cal Poly, Team 14-28, Maness Fall 2014 Cal Poly, Team 14-28, Maness Fall 2014人のメンバー

CPSU-MANESS-F14S14G28

4 メンバー

22のガイドは作成済み

2 件のコメント

I got all the way to the last step of replacing the pin when i notice the mixer seemed to lock there in place and not move. What did i do wrong?

Dawn dawn6463@yahoo.com

Dawn Bennett - 返信

Hi there - There is a gasket around the engine part that you can see in step 7. Mine tore when I removed it. Is that a bad thing? I put the machine back together and it seems to work.

RES - 返信

コメントを追加

統計データ:

過去 24時間: 2

過去 7 日: 20

過去 30 日: 126

今までの合計 10,409