はじめに
iPhone 6s のスクリーンを交換する方法を学べます。このパーツにはフロントカメラ、センサアセンブリとEMIシールドが既に搭載されています。これで修理がより簡単に済みます。
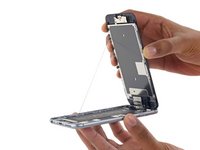
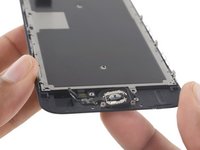
必要な作業は、Touch ID(指紋認証スキャン用)を保つ為、古いスクリーンを取り出して、ホームボタンを新しいスクリーンに取り付けることです。
必要な工具と部品
-
-
ディスプレイのガラスにひびが入っている場合は、作業中ひびが拡大し、怪我をしないようにガラス表面をテーピングします。
-
透明の梱包用テープをiPhoneのディスプレイ全体に二重にして貼ってください。
-
このあとの手順で吸盤カップを装着することができないほどガラスが壊れてしまっている場合は、さらに強力なテープ(ダクトテープなど)を折り曲げて取手を作り、ディスプレイを引っ張って持ち上げます。
-
-
この手順で使用する道具:Clampy - Anti-Clamp$24.95
-
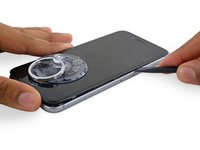
青いハンドルをヒンジ側に引くと、リバースクランプのアームを解除します。
-
iPhoneの左もしくは右側端に向けてアームをスライドします。
-
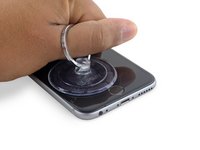
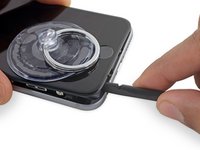
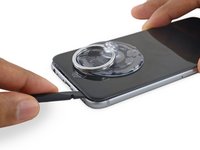
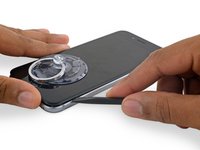
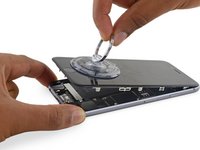
吸盤カップをiPhoneの下端付近に装着します。前面と背面に1つずつ取り付けます。
-
吸盤カップ両側をしっかりと締め合わせると、標的の場所にしっかりと装着させることができます。
-
-
-
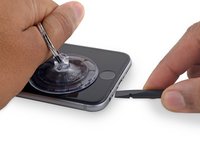
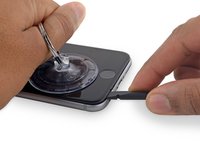
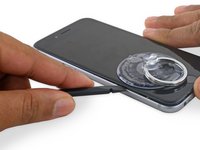
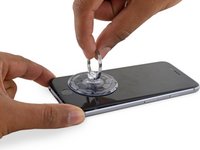
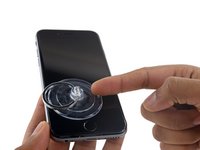
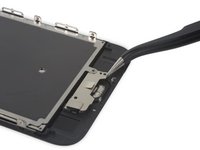
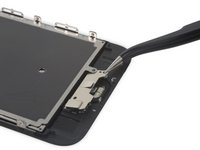
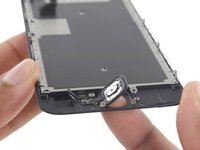
吸盤カップをディスプレイアセンブリの左側下部の端に当てます。
-
ホームボタンの上に吸盤カップを取り付けないでください。
-
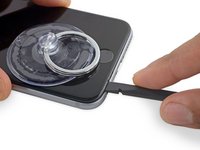
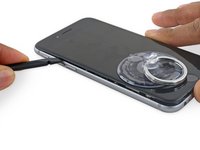
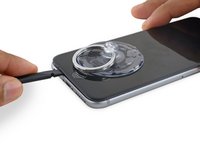
ディスプレイのひび割れ状態が広範囲の場合は、透明の梱包テープを表面に貼ってください。吸盤カップが取り付けやすくなります。あるいは、吸盤カップの代わりに強力なガムテープを使用することもできます。全ての方法が上手くいかない場合は、吸盤カップに強力ボンドを壊れたスクリーンに付けて固めてください。
-
-
-
この手順で使用する道具:Magnetic Project Mat$19.95
-
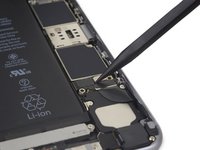
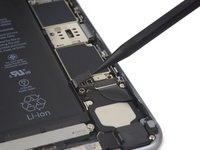
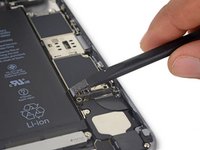
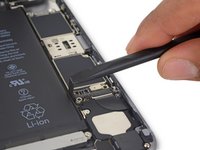
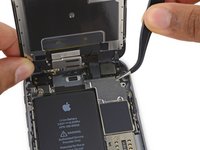
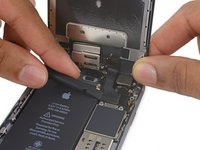
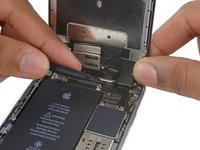
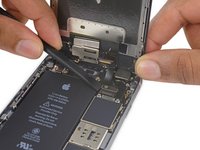
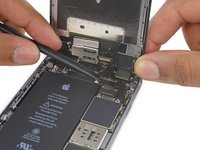
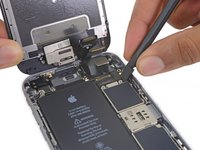
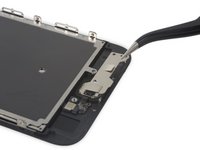
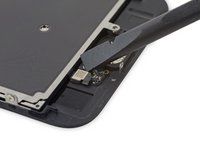
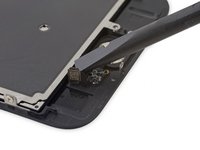
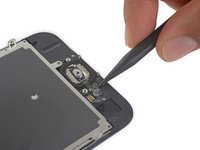
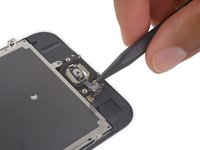
バッテリーコネクタ用ブラケットを固定している次の長さのネジを2本外します。
-
2.9 mmネジー1本
-
2.2 mmネジー1本
-
この修理作業の間、ネジをきちんと管理してください。再組み立ての際は、元あった場所に取り付けます。間違った位置にネジを取り付けると、iPhoneにダメージを与えてしまいます。ご注意ください。
-


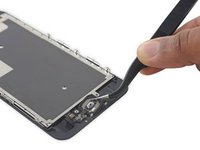

デバイスを再組み立てする際は、これらのインストラクションを逆の順番に従って作業を進めてください。
デバイスを再組み立てする際は、これらのインストラクションを逆の順番に従って作業を進めてください。
1394 の人々がこのガイドを完成させました。
以下の翻訳者の皆さんにお礼を申し上げます:
100%

これらの翻訳者の方々は世界を修理する私たちのサポートをしてくれています。 あなたも貢献してみませんか?
翻訳を始める ›


138 件のコメント
Muito bom. Já aprendi muito consultando os tutoriais da IFIXIT. Parabéns.
Solution worked very well - a couple of comments: 1. With a cracked screen the suction cup doesn't hold very well, I was nevertheless able to get the screen corner off with some heavy prying above the headphone jack as suggested in step 4. 2. In the replacement part I received, the order of the digitizer and camera cables was reversed, I had to tuck the digitizer cable back under the camera cable to get them down in the correct order. Great pictures and guide from ifixit.
Agree with both points. The guide is also missing steps (or mention of) moving the camera/sensor/etc to the new digitizer. I didn't think about it until I wondered why the old screen had 3 cables and the new one only had 2.
Thanks for the tip, I had the same issue with the suction cup not working on the cracked screen. Applying clear packaging tape over the screen helped but it still didn't come apart. Ended up using a blow dryer on the highest setting to help melt the adhesive around the bottom of the phone (being careful to not let it heat up too long) which eventually made it possible to wedge the spudge inside.
The guide and photos were great along with the replacement part from iFixit. Probably the easiest screen replacement I've done so far.
gotchay -
Try putting packing tape in the center of the screen. This will keep the glass chunks in and the suction cup will stick to it.