メインコンテンツにスキップ

開口方法

注意:あなたはさきほど閲覧しているガイドの前提となるページを編集しています。あなたが行った変更は、この手順を含むガイド全体に影響を与えます。

英語
日本語

手順 3を翻訳中

手順3
Opening Procedure: 手順 0、 2の画像 1 Opening Procedure: 手順 0、 2の画像 2
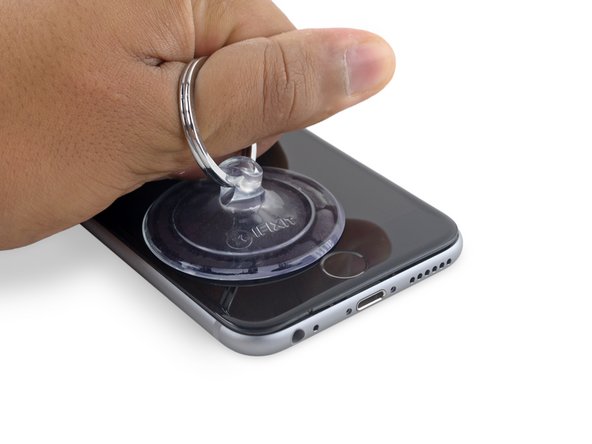
  • Pull up on the suction cup with firm, constant pressure to create a slight gap between the front panel and rear case.

  • Take your time and apply firm, constant force. The display assembly is a much tighter fit than most devices and is held down with adhesive.

  • Pulling too hard may damage the display assembly. Apply just enough pressure to create a small gap between the display assembly and the rear case.

  • If you have any trouble, heat the front of the iPhone using an iOpener, hair dryer, or heat gun until it's slightly too hot to touch. This will help soften the adhesive securing the edges of the display.

吸盤カップを均一の強さで持ち上げます。その際、フロントパネルとリアケースの間に小さな隙間を作ります。

時間をかけて丁寧に、均一の力加減で持ち上げます。このディスプレイアセンブリは他のデバイスに比べてしっかりと接着されています。

強く引っ張りすぎるとディスプレイアセンブリにダメージを与えてしまうことがあります。ディスプレイアセンブリとリアケースの間に、小さな隙間を作るぐらの力加減で持ち上げます。

作業が上手く進まない場合は、iOpenerやヘアドライヤー、ヒートガンなどを使ってiPhoneの正面側を温めてください。熱くて触れない程度まで温めます。ディスプレイ端に沿って留められた接着剤を柔らかくすることができます。

クリエイティブコモンズのオープンソース著作権のもと、あなたの投稿は著作権の対象となります