はじめに
傷が入ったり、破損した背面ケースを交換するにはこのガイドをご利用ください。
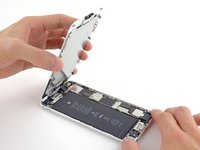
このガイドにはあらかじめ、バッテリーを取り外すことが必要です。新しいケースにバッテリーを再装着する際は、 バッテリーの接着ストリップを交換する必要があるためこのガイドを参照してください。バッテリーはデバイスにしっかりと固定して取り付けられますが、ストリップを再装着するとガタガタと音を立てて動かなくなります。
必要な工具と部品
-
この手順で使用する道具:Clampy - Anti-Clamp$24.95
-
青いハンドルを後方に引き、リバースクランプのアームのロックを解除します。
-
iPhoneの左/右側の端に向けてアームをスライドします。
-
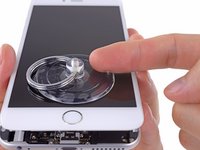
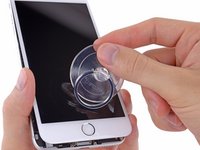
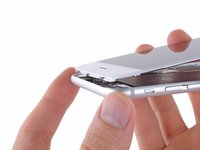
吸盤カップを、ホームボタンすぐ上のiPhoneの下端付近に装着します。上部に一つ、下部に1つずつ取り付けます。
-
両側のカップをしっかりと押し付けて、取り付けたい位置に装着します。
-
-
-
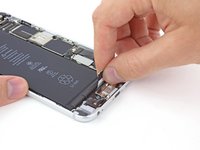
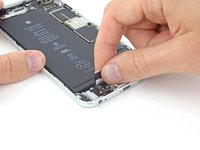
バッテリーがリアケースに付着したままの場合は、iOpenerを用意するか、ヘアドライヤーでバッテリーの真後ろのリアケースを加熱します。気持ちよく触れられる程度の温度になります。
-
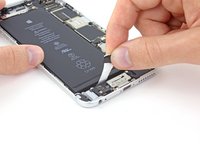
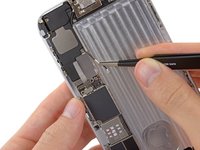
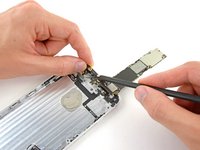
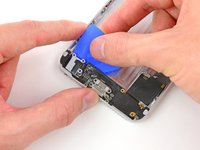
その後、プラスチックの開口ツールを使って、バッテリーをゆっくりと持ち上げます。
-
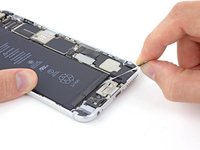
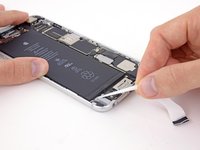
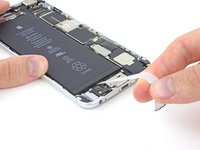
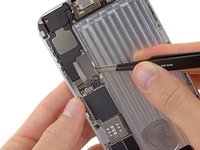
フロスや糸をバッテリーの下にくぐらせて鋸を引くように左右に動かします。接着剤を剥がしながらバッテリーの上部から下部までスライドします。
-
-
-
-
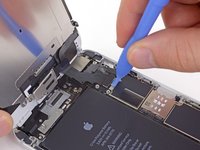
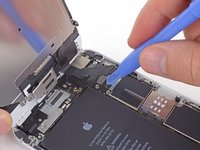
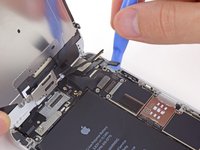
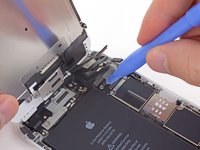
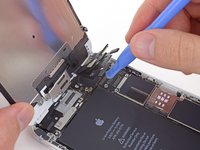
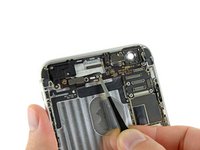
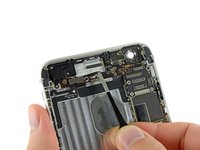
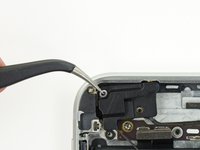
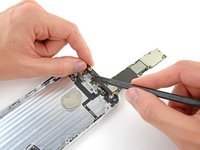
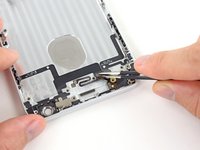
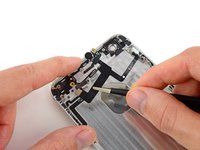
背面ケースに留められているアンテナブラケットから次のネジを取り外します。
-
1.5 mm フィリップス #00ネジー1本
-
2.8 mm フィリップス #00ネジー1本
-
-
-
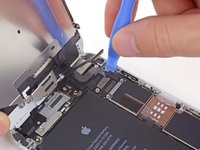
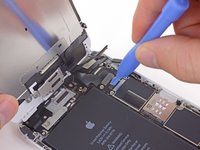
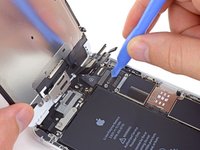
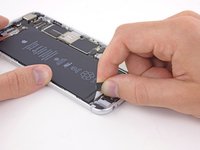
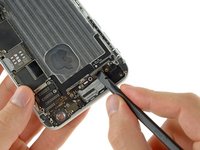
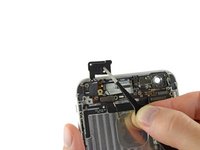
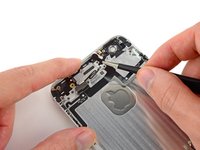
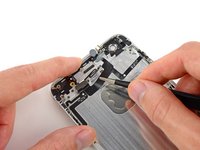
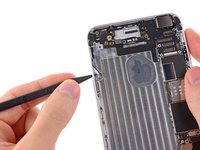
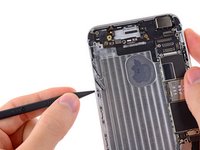
背面ケースに留められたオーディオコントロールとロッカースイッチから次のネジを取り外します。
-
2.0 mm フィリップス #00ネジー2本
-
2.5 mm フィリップス #00ネジー1本
-


デバイスを再組み立てする際は、これらのインストラクションを逆の順番に従って作業を進めてください。
59 の人々がこのガイドを完成させました。
以下の翻訳者の皆さんにお礼を申し上げます:
100%

Midori Doiさんは世界中で修理する私たちを助けてくれています! あなたも貢献してみませんか?
翻訳を始める ›


6件のガイドコメント
what are the 5 metal "spacers" attached to the housing? they are simplistic metal spacing bars with a tiny rubber block. all held to the left side and right side walls with 2 screws per spacer. The instructions totally skipped this step about removing them. all housings i see being sold do not include them, so wouldnt you want to move them over too?
they probably don't add it because its pretty self explanatory.
step 84, When you have finished tearing it all down, there are a couple of things you missed, the rubber piece that is connected to the case near the speaker and the charging port housing when you remove the board at the bottom.
jamielee2k - 返信
In addition to the metal "spacers," the screen for the speaker and the charging port housing, don't forget to transfer a few other things that weren't mentioned in the guide to your new rear case: the power button, the little metal switch for the sim tray; there's a tiny black speaker screen near the headphone jack that must be transferred over (might want to clean it off if it has collected dust); in the top left corner there are two more screws to loosen: one is for a tiny metal spacer piece and the other for the antennae connector cable; there is also a little metal square that cushions the antenna connector's socket; a small strip where the earpiece speaker would be that looks like a black rolled piece of tape; and finally, the foam cushion for the rear camera and the little black screen next to it. But yea... pretty self explanatory.
Hi all,
During the instructions, the screws flip from having #00 next to them and then nothing.
Does this mean that these screws are different? If so, how do you differentiate them? I have a replacement set of screws that are unsorted so hoping to sort them with my digital caliper.
All the best
Mike