メインコンテンツにスキップ
Oster CKSTSTMD5-W Disassembly

Oster CKSTSTMD5-W Disassembly

Arielle Weinstein

Arielle Weinstein とその他 2 人の作成者

最終更新日: December 15, 2021

20分
簡単

Curious about the inner workings of your food steamer? Want to identify a problem with your device? Start here, with a disassembly guide for the Oster CKSTSTMD5-W Double Tiered Food Steamer.

It highlights the disassembly of the electrical heating components of the steamer. For this guide, you will need a phillips screwdriver, scissors, and a ratchet with a 7mm socket. We recommend using the iFixit screwdriver with the J1 tip.

This guide is not difficult and can be accomplished by all experience levels. Make sure the device is unplugged from the wall and has not been in use for several hours before disassembling - this will ensure there are no hazards to your body and face.

必要な工具と部品

これらのリンクを通じて購入すると、iFixit は手数料を得ます。
  1. Oster CKSTSTMD5-W Disassembly, Oster CKSTSTMD5-W Disassembly: 手順 1、 1の画像 1
    • Remove the plastic steamer tiers and make sure the device is unplugged.

  2. Oster CKSTSTMD5-W Disassembly: 手順 2、 3の画像 1 Oster CKSTSTMD5-W Disassembly: 手順 2、 3の画像 2 Oster CKSTSTMD5-W Disassembly: 手順 2、 3の画像 3
    • Flip the device upside down so that the sticker is facing upwards.

    • Using your hands, carefully pry out the four rubber feet from each of the corners.

  3. Oster CKSTSTMD5-W Disassembly: 手順 3、 2の画像 1 Oster CKSTSTMD5-W Disassembly: 手順 3、 2の画像 2
    • Using the JIS #1 screwdriver, remove four 12 mm screws from the four holes.

  4. Oster CKSTSTMD5-W Disassembly: 手順 4、 1の画像 1
    • Once the four screws are removed, lift the bottom of the device off of the frame.

  5. Oster CKSTSTMD5-W Disassembly: 手順 5、 2の画像 1 Oster CKSTSTMD5-W Disassembly: 手順 5、 2の画像 2
    • Use a pair of scissors to cut the zip tie binding the blue and brown wires together.

  6. Oster CKSTSTMD5-W Disassembly: 手順 6、 3の画像 1 Oster CKSTSTMD5-W Disassembly: 手順 6、 3の画像 2 Oster CKSTSTMD5-W Disassembly: 手順 6、 3の画像 3
    • Using a socket wrench with a 7 mm bit, unscrew the nut from the center of the metal ring.

  7. Oster CKSTSTMD5-W Disassembly: 手順 7、 1の画像 1
    • Remove the nut and the two washers from the center bolt.

  8. Oster CKSTSTMD5-W Disassembly: 手順 8、 2の画像 1 Oster CKSTSTMD5-W Disassembly: 手順 8、 2の画像 2
    • Lift off the metal brace from the bolt in the center of the device.

  9. Oster CKSTSTMD5-W Disassembly: 手順 9、 2の画像 1 Oster CKSTSTMD5-W Disassembly: 手順 9、 2の画像 2
    • From the center of the device, carefully grab the blue wire and lift the thermal fuse from its socket.

  10. Oster CKSTSTMD5-W Disassembly: 手順 10、 3の画像 1 Oster CKSTSTMD5-W Disassembly: 手順 10、 3の画像 2 Oster CKSTSTMD5-W Disassembly: 手順 10、 3の画像 3
    • Using your hands, carefully lift the wires over the center bolt so that they are out of the way.

  11. Oster CKSTSTMD5-W Disassembly: 手順 11、 2の画像 1 Oster CKSTSTMD5-W Disassembly: 手順 11、 2の画像 2
    • Using your index finger, carefully pry the metal sheeting out from under the wires.

  12. Oster CKSTSTMD5-W Disassembly: 手順 12、 3の画像 1 Oster CKSTSTMD5-W Disassembly: 手順 12、 3の画像 2 Oster CKSTSTMD5-W Disassembly: 手順 12、 3の画像 3
    • Using the JIS #1 screwdriver, remove the two 12 mm screws from the left side of the device.

    • Lift off the white plastic brace.

  13. Oster CKSTSTMD5-W Disassembly: 手順 13、 1の画像 1
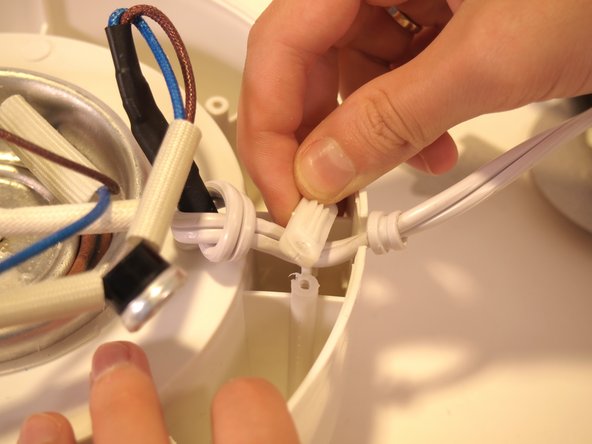
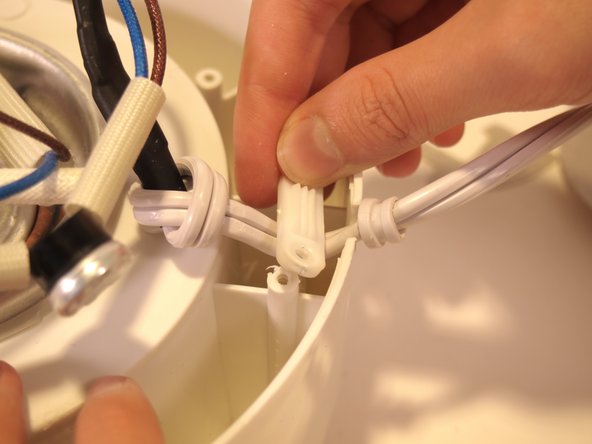
    • Lift the white power cord out of its socket.

  14. Oster CKSTSTMD5-W Disassembly: 手順 14、 3の画像 1 Oster CKSTSTMD5-W Disassembly: 手順 14、 3の画像 2 Oster CKSTSTMD5-W Disassembly: 手順 14、 3の画像 3
    • On the left-hand side of the device, carefully remove the indicator light from its place next to the timer by pulling on the heat protector covering the brown wire.

    • Be careful to ensure the bulb stays attached to the wire.

  15. Oster CKSTSTMD5-W Disassembly: 手順 15、 2の画像 1 Oster CKSTSTMD5-W Disassembly: 手順 15、 2の画像 2
    • Using the JIS #1 screwdriver, remove the two 12 mm screws attached on each side of the timer.

  16. Oster CKSTSTMD5-W Disassembly: 手順 16、 3の画像 1 Oster CKSTSTMD5-W Disassembly: 手順 16、 3の画像 2 Oster CKSTSTMD5-W Disassembly: 手順 16、 3の画像 3
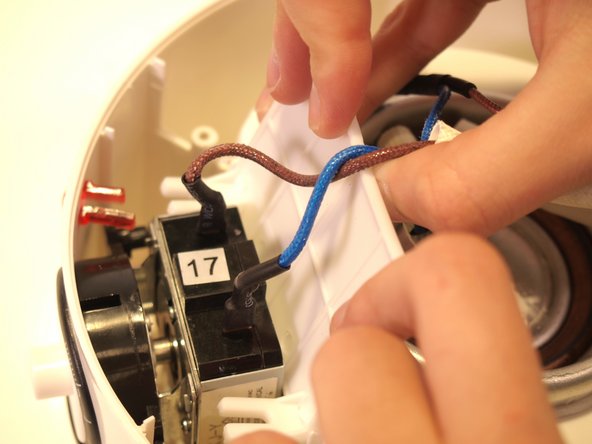
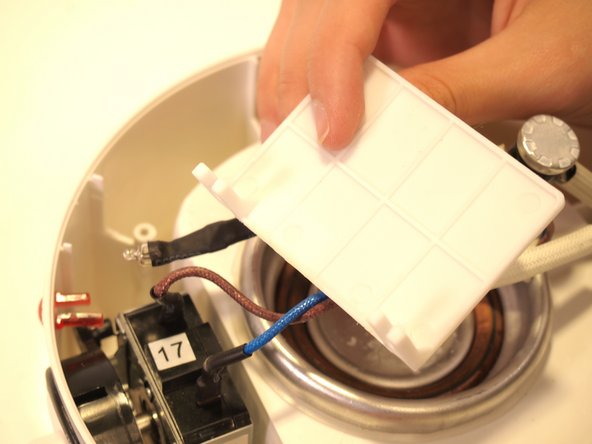
    • Using your hands, carefully lift the white plastic barrier out of the device from the right side of the timer.

    • Be careful not to impede the blue and brown wires connecting the heating element to the timer.

  17. Oster CKSTSTMD5-W Disassembly: 手順 17、 2の画像 1 Oster CKSTSTMD5-W Disassembly: 手順 17、 2の画像 2
    • Rotate the device so that the dial faces you.

    • Using the plastic opening tool, pry the white dial out of the timer socket.

  18. Oster CKSTSTMD5-W Disassembly: 手順 18、 1の画像 1
    • Pull the white dial the rest of the way out of the socket.

  19. Oster CKSTSTMD5-W Disassembly: 手順 19、 2の画像 1 Oster CKSTSTMD5-W Disassembly: 手順 19、 2の画像 2
    • Using the JIS #1 screwdriver, remove the two 12 mm screws from the top and bottom of the timer socket.

  20. Oster CKSTSTMD5-W Disassembly: 手順 20、 1の画像 1
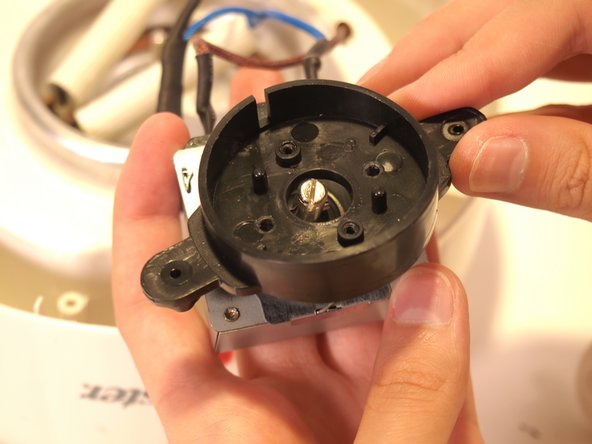
    • Using your fingers, pry out the black timer socket from the front hole.

  21. Oster CKSTSTMD5-W Disassembly: 手順 21、 2の画像 1 Oster CKSTSTMD5-W Disassembly: 手順 21、 2の画像 2
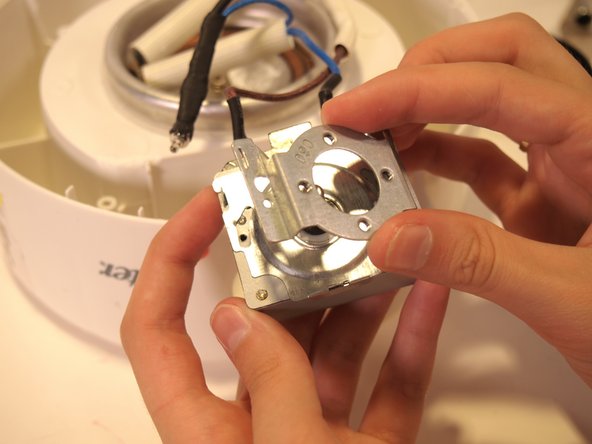
    • Using your hands, carefully lift the timer out of the socket and away from the device.

    • Be careful not to pull too hard as to not break the wire connection.

  22. Oster CKSTSTMD5-W Disassembly: 手順 22、 2の画像 1 Oster CKSTSTMD5-W Disassembly: 手順 22、 2の画像 2
    • Using the JIS #1 screwdriver, remove the two 4.3 mm screws from the right and left side of the timer.

    • Using your hands, lift off the black plastic cover.

  23. Oster CKSTSTMD5-W Disassembly: 手順 23、 3の画像 1 Oster CKSTSTMD5-W Disassembly: 手順 23、 3の画像 2 Oster CKSTSTMD5-W Disassembly: 手順 23、 3の画像 3
    • Using the JIS #1 screwdriver, remove the two 4.3 mm screws from the right and left side of the timer.

  24. Oster CKSTSTMD5-W Disassembly: 手順 24、 2の画像 1 Oster CKSTSTMD5-W Disassembly: 手順 24、 2の画像 2
    • Using the plastic opening tool, bend the 3 metal braces towards the outside of the timer so that the metal fits through the slots.

  25. Oster CKSTSTMD5-W Disassembly: 手順 25、 2の画像 1 Oster CKSTSTMD5-W Disassembly: 手順 25、 2の画像 2
    • Lift the silver cover off of the timer.

  26. Oster CKSTSTMD5-W Disassembly: 手順 26、 1の画像 1
    • Lift the metal silver plate off of the timer.

  27. Oster CKSTSTMD5-W Disassembly: 手順 27、 2の画像 1 Oster CKSTSTMD5-W Disassembly: 手順 27、 2の画像 2
    • Using the JIS #1 screwdriver, remove the single 4.3mm screw from the top center of the timer.

  28. Oster CKSTSTMD5-W Disassembly: 手順 28、 3の画像 1 Oster CKSTSTMD5-W Disassembly: 手順 28、 3の画像 2 Oster CKSTSTMD5-W Disassembly: 手順 28、 3の画像 3
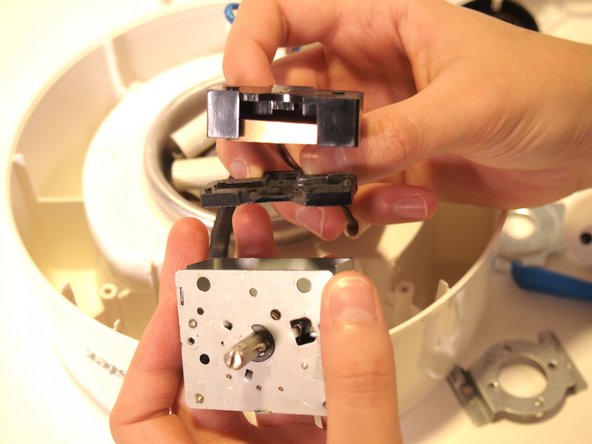
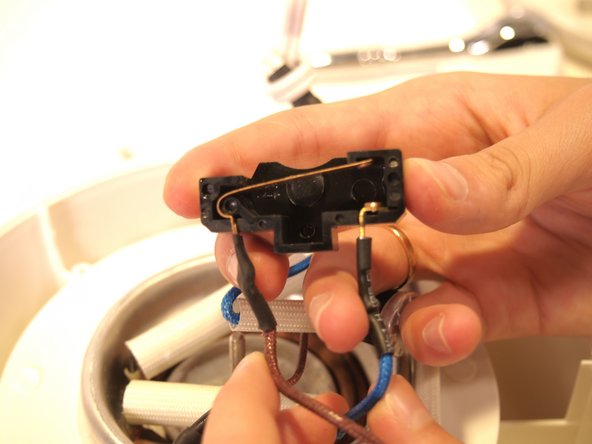
    • Lift the black plastic casing out from in between the front and back of the timer.

  29. Oster CKSTSTMD5-W Disassembly: 手順 29、 2の画像 1 Oster CKSTSTMD5-W Disassembly: 手順 29、 2の画像 2
    • Rotate the timer 90 degrees to the left so that you can see it from the side.

    • Lift the silver back casing off of the timer.

終わりに

To reassemble your device, follow these instructions in reverse order.

添付文書

作成者

2人の作成者と共同で作成されました。

Arielle Weinstein

メンバー登録日: 09/16/21

459 ポイント

1ガイドが承認済み

チーム

0 件のコメント

コメントを追加

統計データ:

過去 24時間: 2

過去 7 日: 6

過去 30 日: 16

今までの合計 255