はじめに
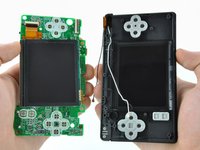
お持ちのNintendo DS Liteの上部LCDを交換しましょう。
必要な工具と部品


デバイスを再度組み立てるには、この説明書の逆の順番で組み立ててください。
105 の人々がこのガイドを完成させました。
以下の翻訳者の皆さんにお礼を申し上げます:
100%

これらの翻訳者の方々は世界を修理する私たちのサポートをしてくれています。 あなたも貢献してみませんか?
翻訳を始める ›

10件のガイドコメント
This is a very concise and accurate guide! I found this repair to be very difficult, especially so due to the aftermarket Chinese screen I installed that required me to solder on the speaker wires. Ugh! If you can, get a replacement with the speakers attached. I also can't stress enough how annoying threading the ribbon cable through the case is. DS is a great platform, but product design left a lot to be desired.
This repair is somewhat difficult. There are a couple of points to be careful about:
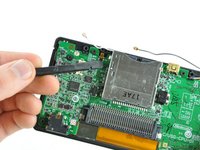
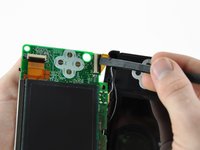
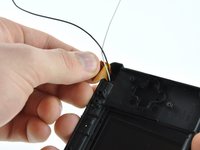
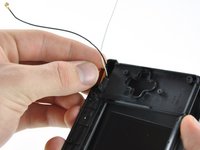
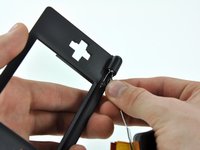
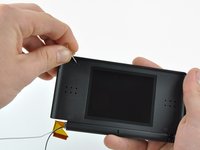
1) The display ribbon cable is fairly easy to remove from the hinge, but somewhat difficult to route through it once the new display is in place. It is easier to do if the antenna/microphone wires are out of the way.
2) The ribbon connector is fairly short and difficult to manipulate so that it mates securely to the socket on the motherboard. If it isn't seated properly the DS will not boot. So test it first (by temporarily pressing the battery against the battery connectors and turning power on) before re-assembly.
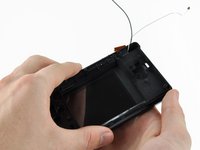
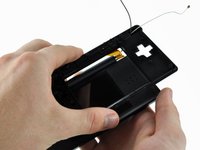
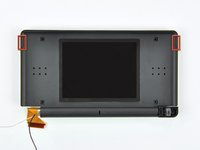
Make a note of where the Wi-Fi antenna connector, microphone, and speaker wires are positioned in the DS Lite housing. If they are not placed back in the correct location, the case will not close. If you force it closed you will squash the wiring which could lead to problems later on. Also be sure the speakers are placed back in correctly. If you can see metal through the speaker holes in the case then you've done it wrong (flip the speakers over). Lastly, when trying to maneuver the antenna connector back under the game cartridge reader, make sure the connector head is face down so that it does not get stuck (happened to me). If you look at the picture in Step 7, it's a straight shot from right to left when running the wire through. Use a paperclip and a flashlight to help you if you get stuck and most importantly, do not try to yank it free!
Funny how these things give you instructions for taking things apart , but not for installing and putting back together. I found routing the screen ribbon through the hinge to be especially difficult and I think I might have damaged it in the process. I wish i would have known that its best to make sure this is done before trying lock the screen case back up.
This was a very difficult but fun and satisfying repair to do. The hardest part was definitely putting the display ribbon cable through the small tube to the bottom of the unit. One thing that could be done to make this easier, I would suggest having a small set of tweezers to help assist with pulling the cable through . One thing you can also do is to wrap the ribbon wire around the microphone and antenna wires a few time, then guide the orange ribbon cable about halfway out of the tube, and then attach the bottom part to it, and then pull the rest of the cable through with the tweezers. This helps a lot with preventing stress on those small, delicate cables, and can make life much easier.