メインコンテンツにスキップ
MSI MS-1782 Cooling Assembly Replacement

MSI MS-1782 Cooling Assembly Replacement

Joshua Pizzo

Joshua Pizzo とその他 3 人の作成者

最終更新日: June 1, 2023

10分
中レベル
おすすめの学生による修理ガイド

This guide will cover the replacement of the cooling assembly in the MSI MS-1782 laptop. This part of the laptop is responsible for cooling the internal components such as the CPU and GPU. If your laptop's fans aren't spinning or components are not staying cool, a fan replacement and new thermal paste will be required. Check out the troubleshooting page if your laptop is overheating.

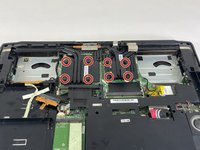
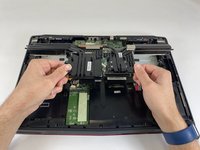
When working on the laptop make sure to disconnect the battery first. Also be sure to keep track of thermal pads when taking off the cooler. Lastly make sure to replace the thermal paste anyways when removing the cooler because when you do remove the cooler the seal is broken that the paste makes with the components. Use this guide here to replace the thermal paste.

必要な工具と部品

ツール

もっと見る

  1. MSI MS-1782 Cooling Assembly Replacement, Back Cover: 手順 1、 1の画像 1
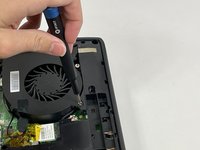
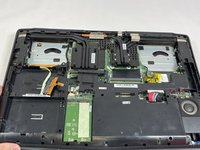
    • Remove five 6.6 mm screws from the edges of the bottom cover using a JIS #1 screwdriver.

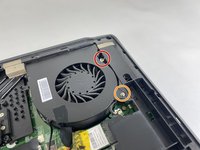
    • Remove one 5.6 mm screw from the center of the bottom cover using a JIS #1 screwdriver.

  2. MSI MS-1782 Cooling Assembly Replacement: 手順 2、 3の画像 1 MSI MS-1782 Cooling Assembly Replacement: 手順 2、 3の画像 2 MSI MS-1782 Cooling Assembly Replacement: 手順 2、 3の画像 3
    • Use an iFixit opening pick to unclip the bottom cover.

    • It is ok to run the picks along the edges since there is nothing connected to the bottom cover. It is easier to start from the sides and then work your way forward.

    • After unclipping the bottom case, pull from the back of the laptop upwards using the lip of the bottom case as a handle.

  3. MSI MS-1782 Cooling Assembly Replacement, Cooling Assembly: 手順 3、 3の画像 1 MSI MS-1782 Cooling Assembly Replacement, Cooling Assembly: 手順 3、 3の画像 2 MSI MS-1782 Cooling Assembly Replacement, Cooling Assembly: 手順 3、 3の画像 3
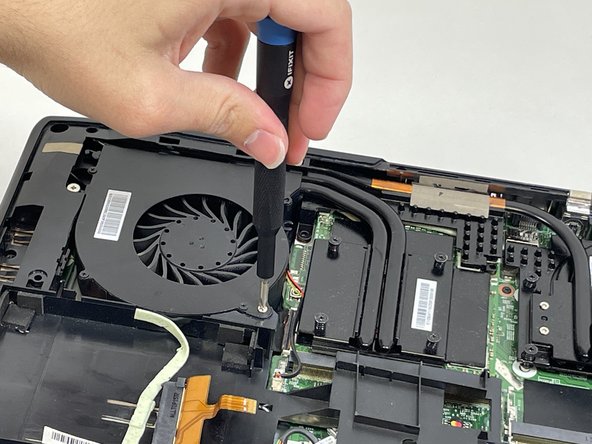
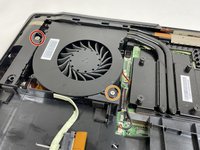
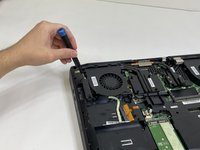
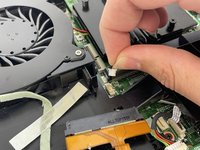
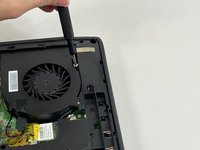
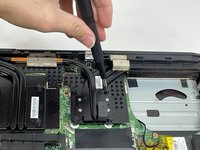
    • Loosen the captive screw on the left side of the left fan using a JIS #2 screwdriver.

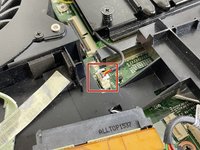
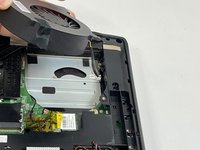
    • Remove the 5.1 mm screw on the right side of the left fan using a JIS #2 screwdriver.

  4. MSI MS-1782 Cooling Assembly Replacement: 手順 4、 3の画像 1 MSI MS-1782 Cooling Assembly Replacement: 手順 4、 3の画像 2 MSI MS-1782 Cooling Assembly Replacement: 手順 4、 3の画像 3
    • Gently detach the fan connector.

    • Remove the fan by lifting it out of its housing.

    • Be sure to handle the wire delicately; if not it will break.

  5. MSI MS-1782 Cooling Assembly Replacement: 手順 5、 3の画像 1 MSI MS-1782 Cooling Assembly Replacement: 手順 5、 3の画像 2 MSI MS-1782 Cooling Assembly Replacement: 手順 5、 3の画像 3
    • Loosen the captive screw on the top of the right fan using a JIS #2 screwdriver.

    • Remove the 3.6 mm screw on the bottom of the right fan using a JIS #2 screwdriver.

  6. MSI MS-1782 Cooling Assembly Replacement: 手順 6、 3の画像 1 MSI MS-1782 Cooling Assembly Replacement: 手順 6、 3の画像 2 MSI MS-1782 Cooling Assembly Replacement: 手順 6、 3の画像 3
    • Gently detach the fan connector.

    • Remove the fan by lifting it out of its housing.

    • Be sure to handle the wire delicately; if not it will break.

  7. MSI MS-1782 Cooling Assembly Replacement: 手順 7、 3の画像 1 MSI MS-1782 Cooling Assembly Replacement: 手順 7、 3の画像 2 MSI MS-1782 Cooling Assembly Replacement: 手順 7、 3の画像 3
    • Loosen the eight captive screws holding the heat sink in place using a JIS #2 screwdriver.

    • Be sure to follow the numbers that are next to the screws on the heatsink. This evenly removes pressure on the components when removing the heatsink.

  8. MSI MS-1782 Cooling Assembly Replacement: 手順 8、 3の画像 1 MSI MS-1782 Cooling Assembly Replacement: 手順 8、 3の画像 2 MSI MS-1782 Cooling Assembly Replacement: 手順 8、 3の画像 3
    • Gently lift the heat sink and then pull forwards towards you.

終わりに

To reassemble your device, follow these instructions in reverse order.

作成者

3人の作成者と共同で作成されました。

Joshua Pizzo

メンバー登録日: 03/08/23

438 ポイント

3のガイドは作成済み

チーム

University of New Orleans, Team 4-4, McDonald Spring 2023 University of New Orleans, Team 4-4, McDonald Spring 2023人のメンバー

UNO-MCDONALD-S23S4G4

3 メンバー

7のガイドは作成済み

0 件のコメント

コメントを追加

統計データ:

過去 24時間: 0

過去 7 日: 13

過去 30 日: 26

今までの合計 318