メインコンテンツにスキップ
Dell XPS 15 9570 Display Replacement

Dell XPS 15 9570 Display Replacement

Nissan Uddin

Nissan Uddin とその他 3 人の作成者

最終更新日: December 28, 2020

1時間
中レベル

If the display on your Dell XPS 15 9570 is damaged or will not turn on, you may consider replacing the display assembly. This do-it-yourself guide will walk you through each step of removing the display assembly from the rest of the display case.

The display assembly constitutes the front panel of the display portion of your Dell XPS. Other than the obvious signs of damage or malfunction, other symptoms may tell you it is time to replace the display. These include the appearance of “dead” pixels, splotches, or a screen that is having trouble reaching full brightness.

Before using this guide, you may check the settings on your device for brightness and contrast to see if the image cannot be corrected.

Check to make sure that you have all of the required tools and parts before beginning this guide. A steady hand and attention to detail is required to complete these tasks.

Be sure to power off the device before beginning work on any electronic application (see step one).

必要な工具と部品

パーツ

ツール

  • T5 Torx Screwdriver
    T5 Torx Screwdriver
  • Phillips #00 Screwdriver
    Phillips #00 Screwdriver
  • Spudger
    Spudger
  • iFixit Opening Tool
    iFixit Opening Tool

もっと見る

これらのリンクを通じて購入すると、iFixit は手数料を得ます。
  1. Dell XPS 15 9570 Display Replacement, Display: 手順 1、 3の画像 1 Dell XPS 15 9570 Display Replacement, Display: 手順 1、 3の画像 2 Dell XPS 15 9570 Display Replacement, Display: 手順 1、 3の画像 3
    • Power off your XPS 15 before beginning the disassembly.

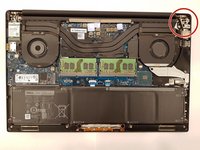
    • Remove the ten 3mm T5 Torx screws located on the outer perimeter of the device.

    • Use a Phillips #00 screwdriver to remove the two 10mm screws under the flip up plate.

    • Remove the rear panel using a plastic spudger. Its easiest to start from the top and work your way to the bottom.

  2. Dell XPS 15 9570 Display Replacement: 手順 2、 3の画像 1 Dell XPS 15 9570 Display Replacement: 手順 2、 3の画像 2 Dell XPS 15 9570 Display Replacement: 手順 2、 3の画像 3
    • Before proceeding, be sure to disconnect the battery. Failure to do so may cause damage to the device.

    • Using a plastic spudger, pull down on the connector towards the battery to disconnect it.

  3. Dell XPS 15 9570 Display Replacement: 手順 3、 3の画像 1 Dell XPS 15 9570 Display Replacement: 手順 3、 3の画像 2 Dell XPS 15 9570 Display Replacement: 手順 3、 3の画像 3
    • Use a Phillips #00 screwdriver to remove the two screws holding down the the display cable fastener.

    • This will reveal the display connector.

  4. Dell XPS 15 9570 Display Replacement: 手順 4、 3の画像 1 Dell XPS 15 9570 Display Replacement: 手順 4、 3の画像 2 Dell XPS 15 9570 Display Replacement: 手順 4、 3の画像 3
    • Remove the yellow sticker holding down the connector.

    • Pull up on the black tab to disconnect the display connector from the motherboard.

  5. Dell XPS 15 9570 Display Replacement: 手順 5、 3の画像 1 Dell XPS 15 9570 Display Replacement: 手順 5、 3の画像 2 Dell XPS 15 9570 Display Replacement: 手順 5、 3の画像 3
    • Use a Phillips #00 screwdriver to remove the screw from the network card.

    • Disconnect the white and the black network wires by popping them up from the card with a spudger.

    • Remove the network card and set it aside.

    • The white wire is connected to the MAIN and the black wire is connected to AUX. This is important when reassembling your device.

  6. Dell XPS 15 9570 Display Replacement: 手順 6、 3の画像 1 Dell XPS 15 9570 Display Replacement: 手順 6、 3の画像 2 Dell XPS 15 9570 Display Replacement: 手順 6、 3の画像 3
    • Unscrew the three screws from the screen bracket in the upper right corner using a Phillips #00 screwdriver.

    • Pry the latch up with a spudger or using the display for leverage.

    • Its easier to pull up on the latch if you use the display as leverage.

  7. Dell XPS 15 9570 Display Replacement: 手順 7、 3の画像 1 Dell XPS 15 9570 Display Replacement: 手順 7、 3の画像 2 Dell XPS 15 9570 Display Replacement: 手順 7、 3の画像 3
    • Unscrew the three screws from the screen bracket in the upper left corner using a Phillips #00 screwdriver.

    • Pry the hinge upwards with a spudger or using the display for leverage.

    • Once the latches are 90° to the motherboard, the display is fully disconnected from the body of the laptop.

  8. Dell XPS 15 9570 Display Replacement: 手順 8、 1の画像 1
    • Pull the display assembly away from the rest of the case.

終わりに

To reassemble your device, follow these instructions in reverse order.

8 の人々がこのガイドを完成させました。

作成者

3人の作成者と共同で作成されました。

Nissan Uddin

メンバー登録日: 02/04/20

346 ポイント

1ガイドが承認済み

2 件のコメント

I have a 9570 with a 1080 non-touch screen. This page lists an amazon screen that is 4k with touch. Looking at the product page, it does not mention the 9570 but does mention the 9560. Will the 4k touch screen work? I would like to make this upgrade but am skeptical.


https://www.amazon.com/NBPCLCD-3840x2160...

Brandon Budnicki - 返信

Thank you! Well done steps, concise and precise.

rblinzler - 返信

コメントを追加

統計データ:

過去 24時間: 2

過去 7 日: 13

過去 30 日: 49

今までの合計 8,788