はじめに
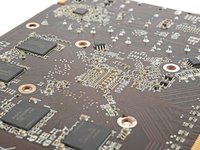
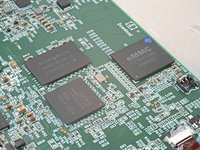
多くの修理はハンダ付けなしで行えますが、ジョイスティック、ヘッドホンのバッテリー、ランブル・モーターなど、特定の部品を交換する必要がある場合もあります。さらに、ハンダ付けをすることで、楽しいエレクトロニクス・プロジェクトの新しい世界が広がります。難易度が高く聞こえるかもしれませんが、簡単に始められます!
このガイドでは、基本的なはんだ付けのスキルと、以下の具体的な手順を説明します。
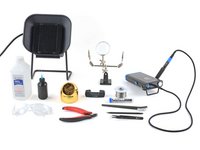
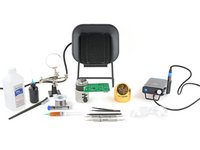
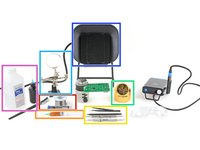
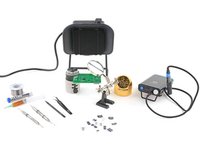
必要な工具と部品
-
-
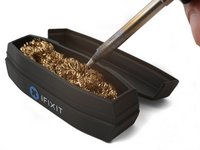
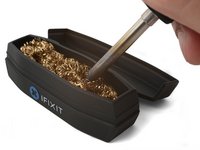
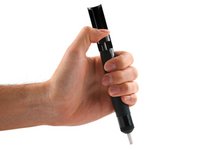
万力、クランプ、または「お助けツール」。2本のワイヤーを接合する場合は、当社のはんだ付けスプリントが最適なツールです。
-
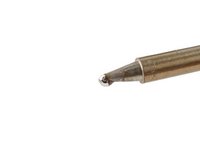
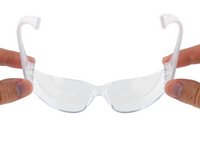
安全保護ゴーグル(メガネは目を保護しますが、はんだが飛び散るとメガネが破損します)
-
ロジン・コアはんだワイヤー(有鉛または鉛フリー)
-
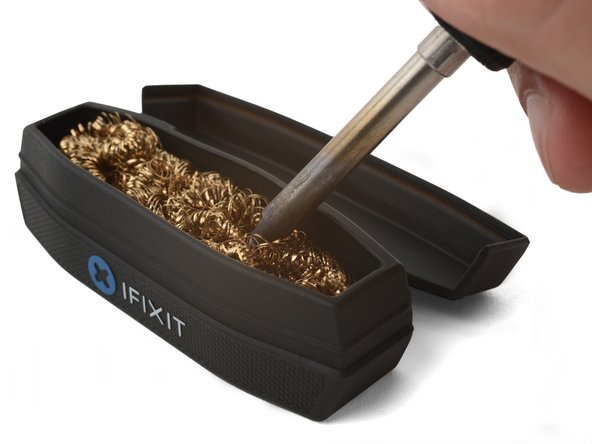
こて先洗浄用具(濡れたスポンジまたは真鍮線)
-
排煙ダクト(屋内で作業する場合)
-
高濃度(90%以上)のイソプロピルアルコールと柔らかい毛のブラシ(歯ブラシのようなもの)
-
スパッジャー、ピンセット、フラッシュカッター
-
-
-
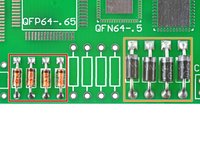
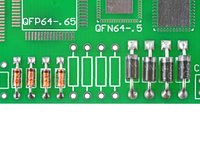
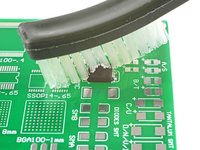
この手順で使用する道具:Solder Wick Braid$4.99
-
はんだ芯(別名:はんだ吸い取りブレード )と/もしくは、はんだ吸い取りポンプ
-
スパッジャー、ピンセットと/もしくはペンチ(頑固な部品をほぐすのに役立つ)
-
-
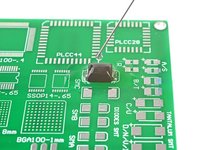
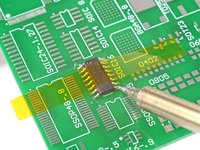
この手順で使用する道具:Tack Flux SMD291 no clean 5cc ROHS$13.99
-
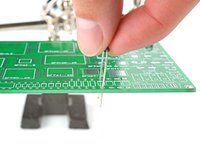
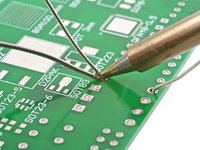
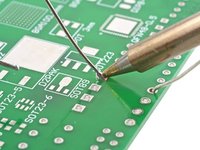
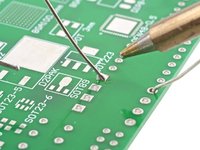
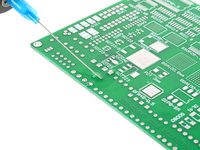
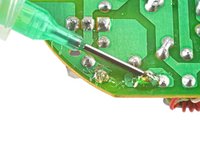
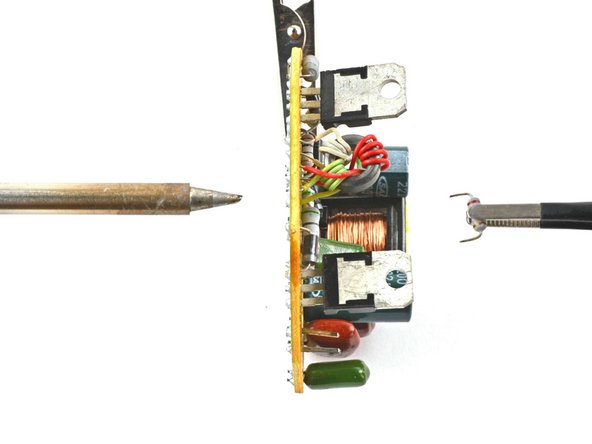
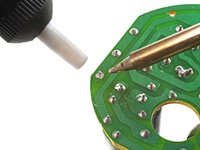
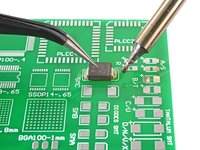
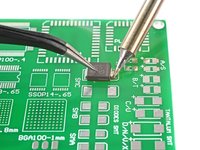
はんだ接合部に フラックスを塗ります。
-
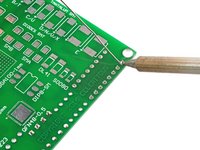
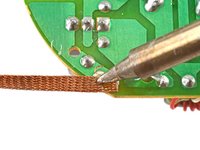
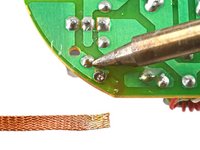
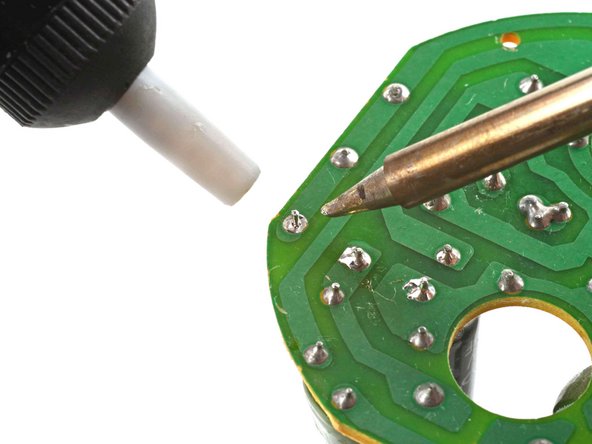
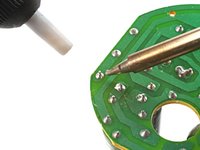
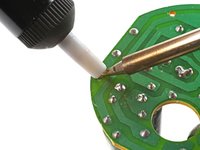
ハンダ芯のきれいな部分をハンダ接合部の上に置きます。
-
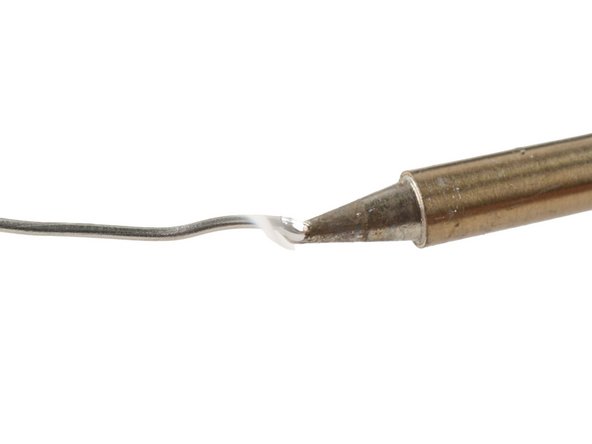
はんだごての先端を芯に2~3秒間しっかりと押し当てます。芯を十分に熱くし、芯の下のはんだを溶かすようにします。
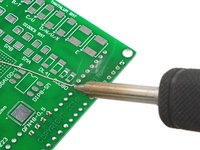
-
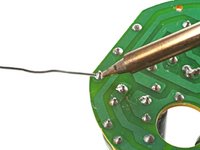
はんだが芯に浸透してきたら、新しい部分が接合部に触れるように芯をスライドさせます。芯の色が銅色から銀色に変われば、浸透していることがわかります。
-
はんだの大部分が芯にしみ込んだら、芯を持ち上げて、芯を接合部分から離します。
-
-
-
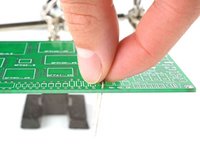
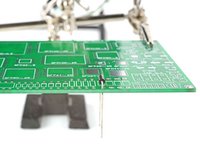
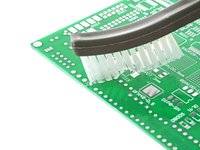
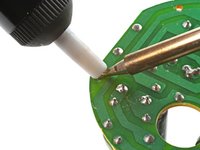
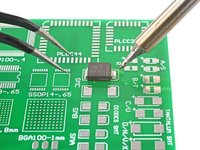
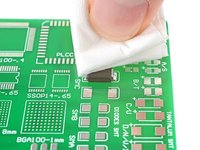
はんだ接合部にイソプロピルアルコールを塗布し、毛先の柔らかいブラシでこすり、フラックスの残留物を取り除きます。
-
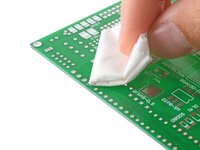
糸くずの出ないクロスではんだ接合部を拭き、フラックスとアルコールの残留物を染み込ませます。
-
-
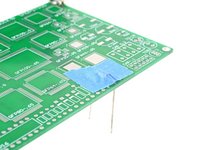
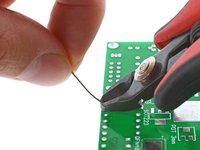
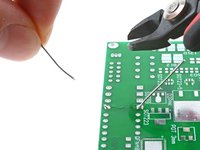
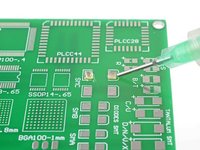
この手順で使用する道具:Polyimide Tape$9.99
-
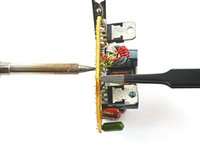
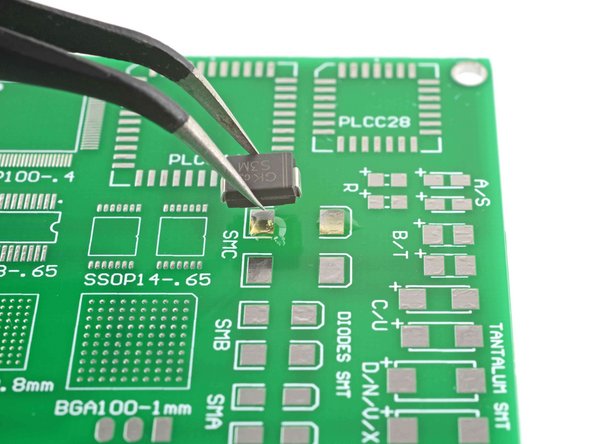
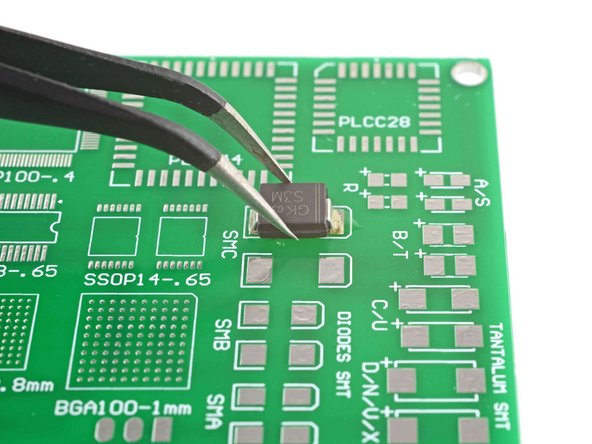
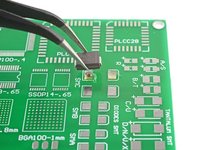
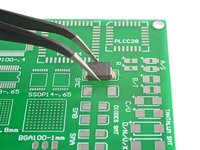
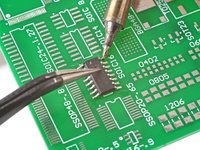
部品を所定の位置に固定し、コーナーのリードをはんだ付けして固定します。
-
あるいは、ポリイミドテープを使って部品を基板に固定し、コーナーリードをはんだ付けする方法もあります。
-


はんだ付け入門ガイドの完成、おめでとうございます!貴重で多彩なスキルをマスターする第一歩を踏み出しました。基本を身につけた後は、様々な電子製品プロジェクトや修理に取り組むことができます。習うより慣れろですから、どんどん試して、テクニックを磨いてください。
はんだ付けに関する詳しい情報はこちらをクリックしてください。
はんだ付け入門ガイドの完成、おめでとうございます!貴重で多彩なスキルをマスターする第一歩を踏み出しました。基本を身につけた後は、様々な電子製品プロジェクトや修理に取り組むことができます。習うより慣れろですから、どんどん試して、テクニックを磨いてください。
はんだ付けに関する詳しい情報はこちらをクリックしてください。
457 の人々がこのガイドを完成させました。
以下の翻訳者の皆さんにお礼を申し上げます:
100%


これらの翻訳者の方々は世界を修理する私たちのサポートをしてくれています。 あなたも貢献してみませんか?
翻訳を始める ›


33 件のコメント
TIP: Another method which works well for clearing solder from holes (especially on repairs like AC Jacks on laptops) is to use compressed air to clear melted solder from holes. A quick blast with a duster can works well (I have even used a drink straw in a pinch and blown out with a blast of air from mouth). Heat the solder until it liquefies, put the duster straw right above the solder and quickly hit the melted solder with an air blast to instantly clear the hole of solder. This works well on very small holes as melted solder does not always push out cleanly with metal tools. You have to be quick with the air blast because the solder re-hardens rapidly.
just be careful doing this lol, flying molten solder can and will burn you or other components.
Logixal -
Flying solder might also get into places you don't want it. Making shorts and other unwanted connections of which you don't know where they are, so it can give you a very hard time finding them.
This is not IPC standards but for the ghetto approach, it will get the job done. I solder in manufacture settings, run my own shop. This is wrong to a degree but will do. If ifixit would like tips from ILLFIXIT then your more then welcome!
Tony Stark - 返信
yeaaaa….. i was going to say something along these lines lol. itll get the job done but its by no means the right \ best way to do the job.
Logixal -
A very good guide to soldering.
I have never soldered anything (I'm a girl you see), but your clear and detailed guidance inspired me to give it a go.
I was well prepared in advance-it could be difficult-and that helped a lot.
I have now got a new battery soldered into my Palm TX and I'm as happy as Larry (or Lorraine in this case)..
geeklynews - 返信
Go Gurl! I'm a gurl, too. I worked in my dad's machine shop for 13+ years. I hit the ground running. Programmed, set up, and fixtured, retro-fitted CNC Mills, using SurfCam and G Code programming. We used Master Cam for the wire EDM. My fave was running a standard lathe. I guess I enjoy cylindrical objects. We held tolerances of .005+/- .001, all the way down to .0003+/-.0002. That…is very microscopic. lol
…add to that, Public Relations, Inventory, Inspector, Fixing Crashed tools, Shipping, Document Control, and so on. All I know is, if it needs to be done, it can be done, if your sharp. And, sometimes we gurls, have a different “feel” for delicate or fine work, as compared to some of the guys. There is nothing we cannot do, as well as anyone else, if we want to, and are willing to learn, and practice. I'm ready to try a little delicate connecting, myself.
Happy Trails and Tablets,
PoniGurll, or
DIY Gurll, otherwise, it won't get done!!
Using a solder wick braid is a good thing to do every time you are trying to remove solder from the thru-hole and pad. This is because after you use the solder wick you have a clean hole and a clean pad with just a slight film of solder on it and you have a nice open workspace without any old solder in there. Old solder doesn't have solder flux anymore -it's burned off-and won't "flow" around the component or wire leads and leaves an icy-looking "cold" solder joint, a dull grey glob of solder that is weak and doesn't conduct electricity very well. By wicking it off, the new solder, which does have solder flux, will be shiny, smooth, quite strong and conductive. I've been soldering since the early 70's and solder wick is a good friend if you use it right. No need for staples or picks, either.
Also, to help the solder wick pickup the solder faster and to help clean the solder pad at the same time, put just a little flux on the wick before applying the iron to the wick, then wipe the area clean with some alcohol, works great.
C.Vos -
Perfect Illustrations, Thank you.
I found this to be a clear and easy tutorial on how to solder to remove and install small electrical components. Excellent for beginners and useful for experts in teaching situations.
Allan Ryle - 返信
Very good guidance
another tip is if you do not have a soldering station and your iron gets too hot just unplug it and continue and never ever dunk your soldering iron in flux if it is excessively hot because it will take the conductive coating off the tip of your soldering iron. also dont dip touch the tip of your iron (while its off) because the oils from your hand can burn through the tip like the flux.
ps: this is from my personal experience and its just some things to look out for
Nice job!
Well done,,,,
This is a good job thanks.
Sooo just bought a soldering iron, never used one before in my life, re attaching wires to a little motherboard for a light switch and dimmer, this page literally just taught me exactly what i needed to know and success the first try! Thank so much! finally someone knows they’re stuff instead of me having to go through 30 different pages of nothing on google lol respect dude! keep it up!
Great guide! It also helps to use a bit of flux on the points to aid with adhesion of new solder to the contact points, and to help with heat transfer from the solder tip onto the solder pad.
I need to solder my wifi it came loose on my insignia tablet. All i need to know is where its located on mother board. Please guide me
Plug in the soldering iron. Wait for it to heat up… test by tapping solder on to the soldering iron tip. Having ‘tinned’ the soldering tip, apply the tip to the component leg and PCB. If the component leg is comparatively ‘thick’, apply more heat to the leg than the PCB. Tap the solder jointly on the component leg and the iron tip. If the component leg is at the right temperature, the solder will flow and make a sound electrical connection. If the component leg is not at the right temperature, the solder will melt on the iron tip and ‘drip’ onto the component not making a good connection.
I’d never do any soldering without a solder sucker e.g. https://www.amazon.co.uk/Draper-23553-De... but be careful when using it on delicate PCBs as the suck can lift circuit tracks where too much heat has been applied.
I’m a little late with my comments but just had to brag about my younger days with Heathkits and other companies! I learned how to solder the hard way (without any instructions) and put together a B/W TV, a color TV, an AM/FM receiver and various other little projects. I understand Heathkit is coming back and encourage you younger people to enjoy the hobby of putting together their kits after doing these soldering lessons.
Mike Gross - 返信
Absolutely. I’ve worked alongside women in the US Navy. Most of them are very competent, excellent technicians. Like guys, though, you have your whiners and slackers. We are all the same.
Some information in the top title area was misleading, as the iPod isn’t sold anymore (except for the touch with a soldered battery) and the iPhone has had a socketed battery since 2008. I fixed it in the latest unverified version.
and where/how do we post future questions ?
practice on eWaste first
We refreshed the soldering guide!
Arthur Shi - 返信
Great presentation. Very helpful for a newbie like me. One comment, in Step 10 you say concave and I think you meant convex. A concave tent would hold water if it rains.
Thank you @miha821! You may actually change the respective section yourself!