メインコンテンツにスキップ

Öffnungsvorgang

注意:あなたは必要条件ガイドを編集しています。あなたが行なう変更は、この手順を含む全ての9個のガイドに反映されます。

英語
ドイツ語

手順 7を翻訳中

手順7
Opening Procedure, Lift the display slightly: 手順 0、 3の画像 1 Opening Procedure, Lift the display slightly: 手順 0、 3の画像 2 Opening Procedure, Lift the display slightly: 手順 0、 3の画像 3
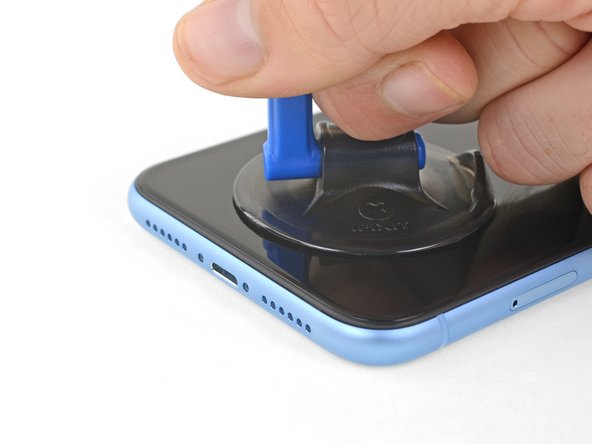
Lift the display slightly
  • Pull up on the suction cup with firm, constant pressure to create a slight gap between the front panel and rear case.

  • Insert an opening pick under the screen and the plastic bezel, not the screen itself.

  • The watertight adhesive holding the display in place is very strong; creating this initial gap takes a significant amount of force. If you're having a hard time opening a gap, apply more heat, and gently rock the screen up and down to weaken the adhesive until you create enough of a gap to insert your tool.

Ziehe fest und gleichmäßig am Saugheber und erzeuge dadurch einen kleinen Spalt zwischen Frontpanel und Rückgehäuse.

Setze ein Plektrum in den Spalt unter dem Display und der Kunstoffblende ein, nicht am Display selbst.

Der wasserfeste Kleber, mit dem das Display befestigt ist, ist sehr stark, es ist also ein gewisser Kraftaufwand nötig, um diesen ersten Spalt zu öffnen. Falls du Schwierigkeiten hast, erwärme das Display erneut und wackle das Display hoch und runter, um den Kleber zu schwächen, bis die Öffnung groß genug für ein Plektrum ist.

クリエイティブコモンズのオープンソース著作権のもと、あなたの投稿は著作権の対象となります