はじめに
iPhone 6 のボリュームボタンカバーを取り外したり、交換するにはこのガイドをご利用ください。このガイドは実際のボタンを交換するためのもので、ボタン下に装着されている電気スイッチを交換するものではありません。ご注意ください。
必要な工具と部品
-
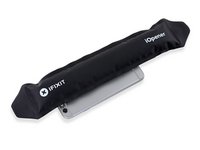
この手順で使用する道具:Clampy - Anti-Clamp$24.95
-
青いハンドルをヒンジ側に引くと、リバースクランプのアームを解除します。
-
iPhoneの左もしくは右側端に向けてアームをスライドします。
-
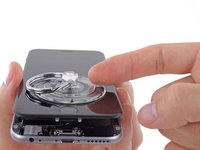
吸盤カップをiPhoneの下端付近に装着します。前面と背面に1つずつ取り付けます。
-
吸盤カップ両側をしっかりと締め合わせると、標的の場所にしっかりと装着させることができます。
-
-
この手順で使用する道具:Clampy - Anti-Clamp$24.95
-
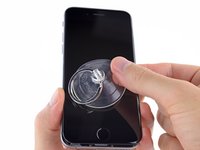
リバースクランプをお持ちでない場合は、シングルタイプの吸盤カップを利用してフロントパネルを持ち上げます。
-
ホームボタンの真上のスクリーン上に吸盤カップを押し当てます。
-
-
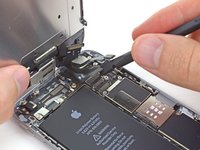
この手順で使用する道具:Magnetic Project Mat$19.95
-
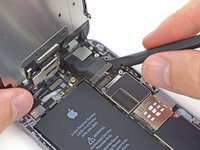
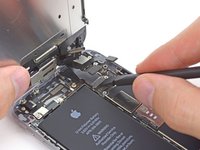
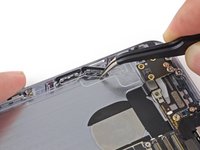
次のプラスネジをバッテリーコネクターブラケットから取り外します。
-
2.2 mm ネジー1本
-
3.2 mmネジー1本
-
-
-
-
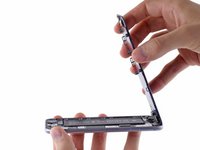
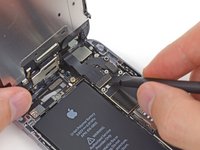
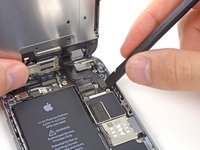
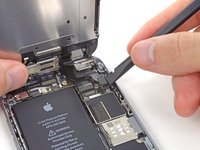
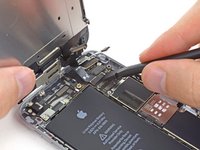
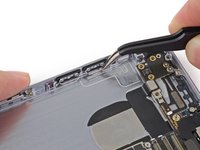
フロントパネルアセンブリーのケーブルブラケットから次のプラスネジを5本取り外します。
-
1.2 mmネジー3本
-
1.7 mmネジー1本
-
3.1 mm ネジー1本
-
-
-
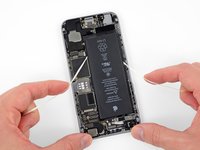
バッテリーがリアケースに付着したままの場合は、iOpenerを用意するか、ヘアドライヤーでバッテリーの真後ろのリアケースを加熱します。気持ちよく触れられる程度の温度になります。
-
その後、プラスチックの開口ツールを使って、バッテリーをゆっくりと持ち上げます。
-
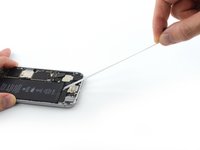
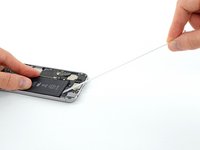
フロスや糸をバッテリー上端の角の後ろに通し、両端を合わせて折りたたんだ布で巻いて、均等に引っ張ります。
-
-
-
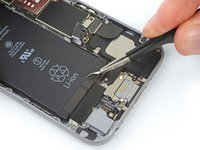
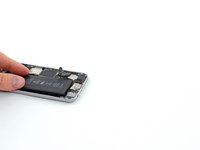
iPhoneからバッテリーを取り外します。
-
デバイス内にアルコール溶液が残っていたら、新しいバッテリーをインストールする前にきれいに拭き取るか、自然乾燥させてください。
-
交換用バッテリを装着前に、バッテリーコネクタをロジックボードのソケットに一時的に再接続してください。バッテリーが定位置に装着できるか確認します。
-
バッテリーを装着して、接続を外してからデバイスの再組み立てを継続してください。
-
-
-
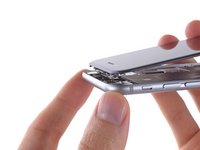
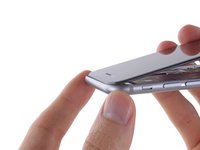
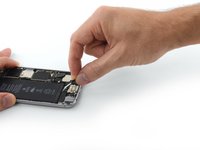
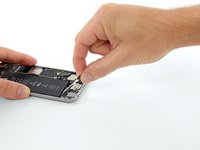
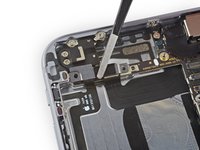
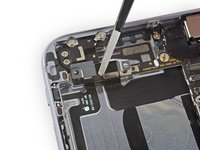
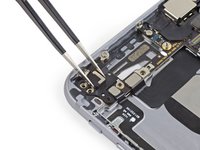
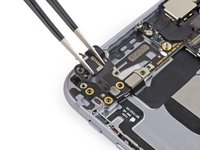
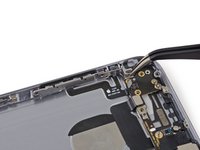
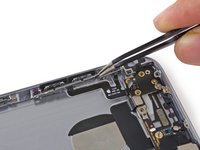
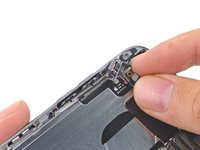
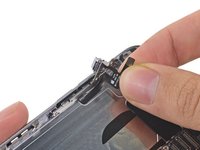
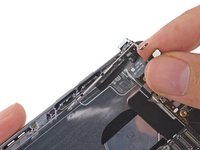
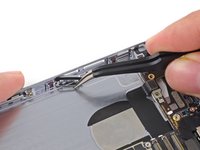
背面ケースからメタルバー付近にあるボリュームコントロールボタンを引っ張り、取り外します。
-
ボタンは接着ガスケットで背面ケースに留められています。薄い膜を裂かないよう、ゆっくりと丁寧に取り外してください。
-


デバイスを元に戻すにはこのインストラクションを逆の順番に従って作業を進めてください。
デバイスを元に戻すにはこのインストラクションを逆の順番に従って作業を進めてください。
79 の人々がこのガイドを完成させました。
以下の翻訳者の皆さんにお礼を申し上げます:
100%

Midori Doiさんは世界中で修理する私たちを助けてくれています! あなたも貢献してみませんか?
翻訳を始める ›


6 件のコメント
hello guys, i have a problem with installing the frets to put in silent, I noticed that there are small springs to adhere well to the external key to the internal mechanism, only to replace it I loosened a bit, and now the clips and some smollato ... you as you have done? have you also found this problem? I hope you can help me.
Best regards
No doubt you probably have sorted it by now lol but I was struggling re-mounting the mute switch too! You’ll notice there’s small grooves/notches that the little pins off the bottom of the physical metal switch sit in. You just have to put the switch in the off position (top side when mounted) and then get it seated over the plastic switch first, and then move the little pins back under the springs either side and into the little grooves/notches on the mount. Once it’s seated in those notches just push the springs down a little so the metal switch won’t easily fall off when moving around and positioning back into the chassis ;)
Und wie klebt man die Klebedichtung wieder an?
Hab echt ein Problem….und wo bekäme man diese als ersatzteile?
Danke , freundlich grüsst
Michael
From (https://translate.google.com.au/?hl=en&t...):
“And how do you glue the adhesive seal back on?
Have a real problem .... And where would you get these as spare parts?
Thank you, friendly greetings”
—————————————————————————————————————
I was lucky enough just to get them to stick back into their spots with the existing adhesive on them. They’d be near impossible to clean anyhow, so just do your best ;)
Hello! If one of the buttons is bent, then I only need to replace the button not the whole cable right? :)