メインコンテンツにスキップ
リペアコミュニティに参加 - アカウントの作成

iPhone 17 Pro LiDAR Module Replacement

必要な工具と部品

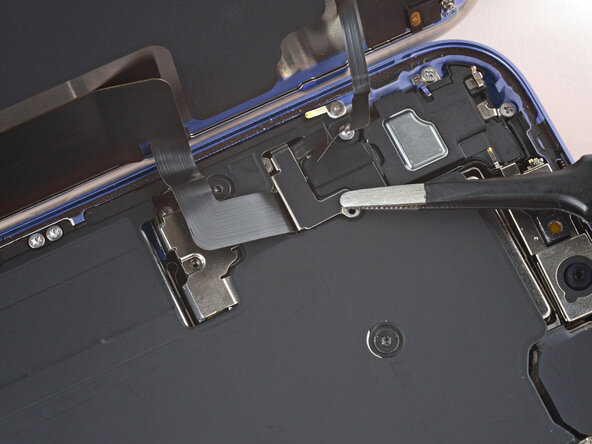
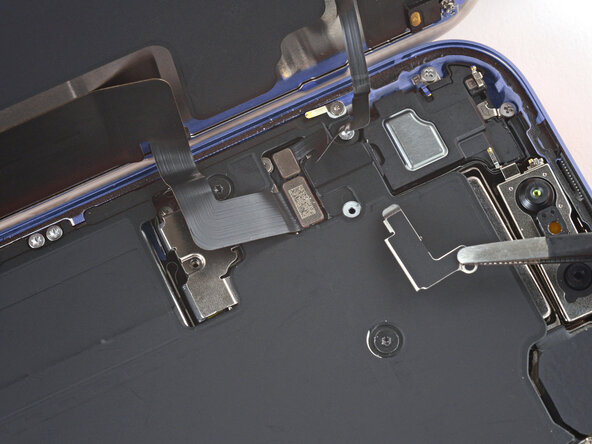
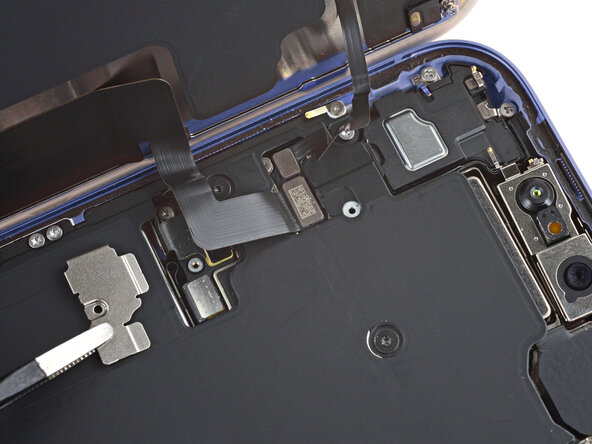
  1. iPhone 17 Pro LiDAR Module Replacement, Safety precautions: 手順 1、 2の画像 1 iPhone 17 Pro LiDAR Module Replacement, Safety precautions: 手順 1、 2の画像 2
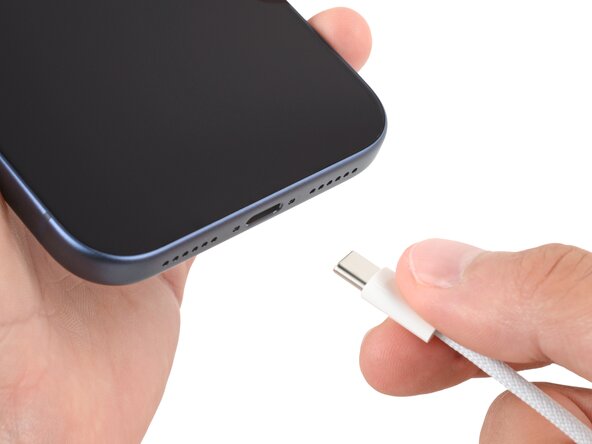
    • Let your iPhone's battery drain below 25% before starting this repair—a charged lithium‑ion battery may catch fire if damaged.

    • Unplug all cables from your phone.

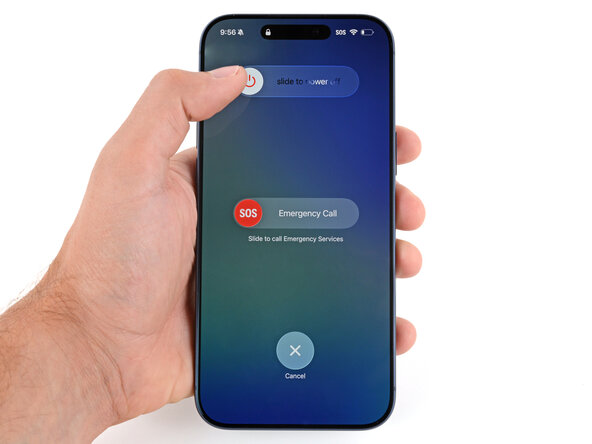
    • Hold the power and either volume button and slide to power off your phone.

    FixBotに聞いてみる

    コメントを追加

  2. iPhone 17 Pro LiDAR Module Replacement, Cracked glass preparation: 手順 2、 3の画像 1 iPhone 17 Pro LiDAR Module Replacement, Cracked glass preparation: 手順 2、 3の画像 2 iPhone 17 Pro LiDAR Module Replacement, Cracked glass preparation: 手順 2、 3の画像 3
    この手順で使用する道具:
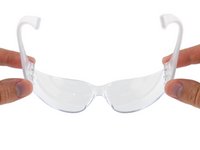
    iFixit Safety Glasses
    $7.95
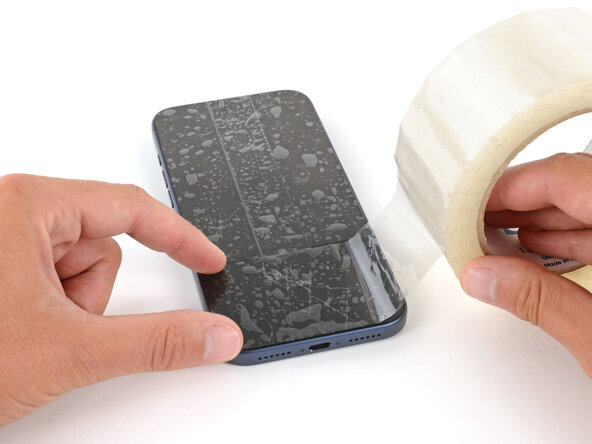
    • Glass shards can complicate disassembly—or worse, cause injury. If your phone is cracked, follow this step.

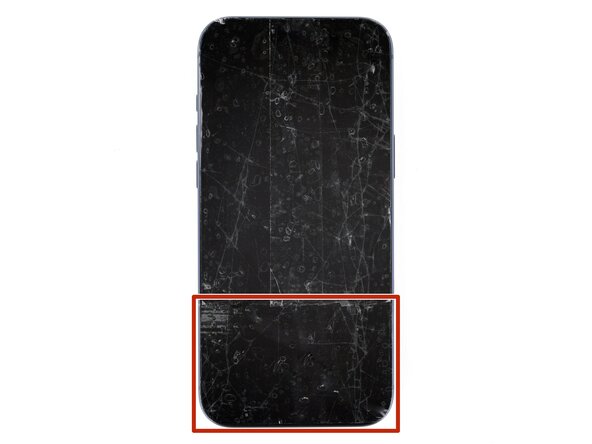
    • Apply strips of packing tape to the cracked glass until it's completely covered—this will help keep the glass contained and allow the suction cup to stick.

    • Make sure there's a single strip of tape (not overlapping) across the bottom edge, big enough for a suction cup to fit on.

    • Only cover the glass itself—don't stick any tape to the frame.

    • Consider wearing safety glasses to protect your eyes from any glass shaken free during the repair.

    FixBotに聞いてみる

    コメントを追加

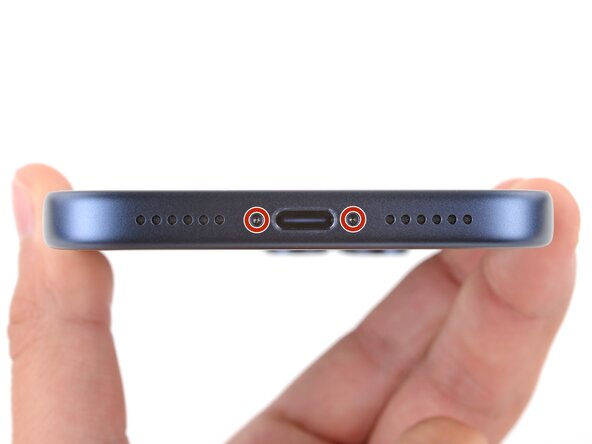
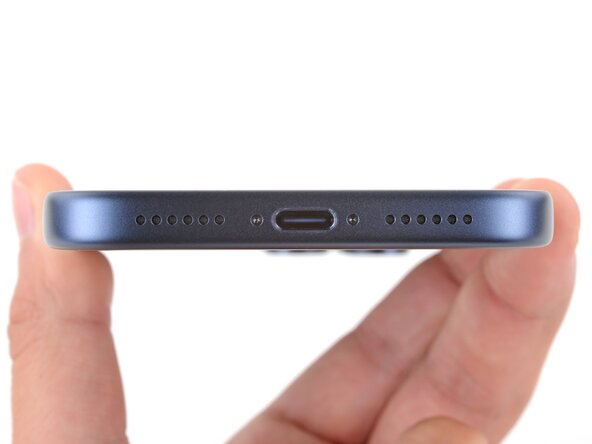
  3. iPhone 17 Pro LiDAR Module Replacement, Remove the pentalobe screws: 手順 3、 2の画像 1 iPhone 17 Pro LiDAR Module Replacement, Remove the pentalobe screws: 手順 3、 2の画像 2
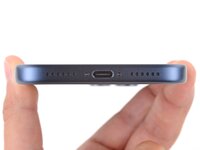
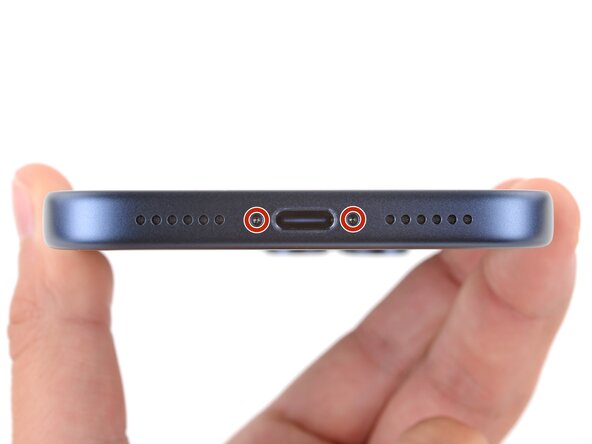
    • Use a P2 pentalobe screwdriver to remove the two 7.5 mm‑long screws on either side of the charging port.

    FixBotに聞いてみる

    コメントを追加

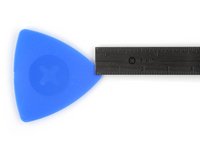
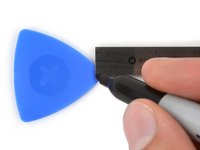
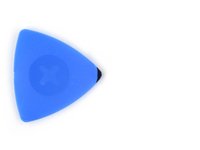
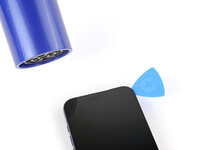
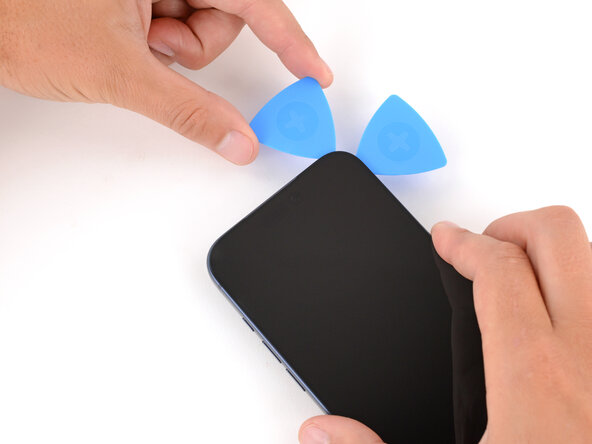
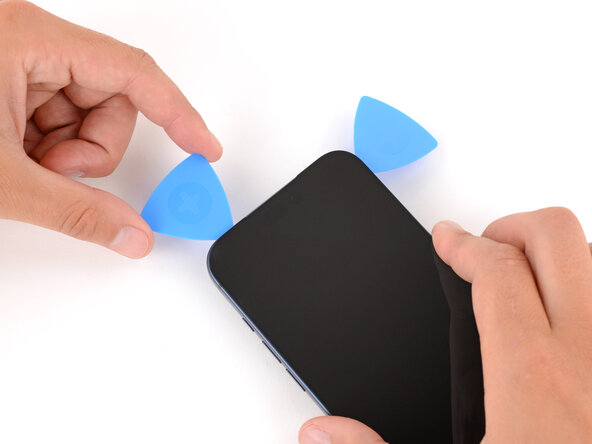
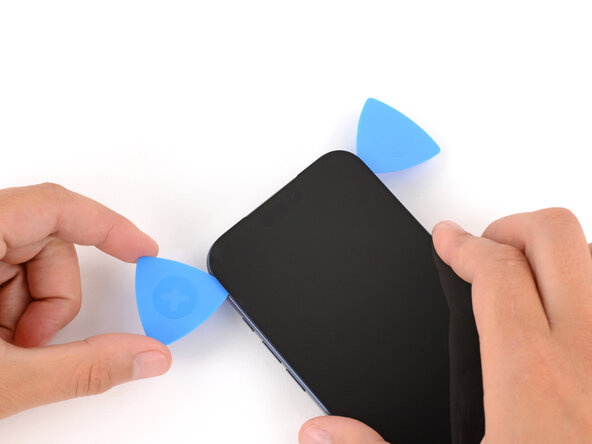
  4. iPhone 17 Pro LiDAR Module Replacement, Mark your opening picks: 手順 4、 3の画像 1 iPhone 17 Pro LiDAR Module Replacement, Mark your opening picks: 手順 4、 3の画像 2 iPhone 17 Pro LiDAR Module Replacement, Mark your opening picks: 手順 4、 3の画像 3
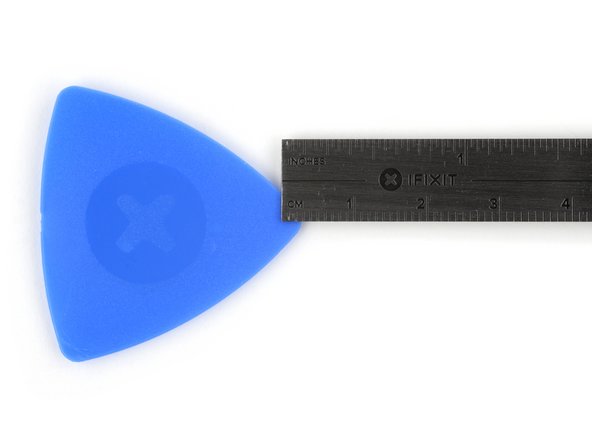
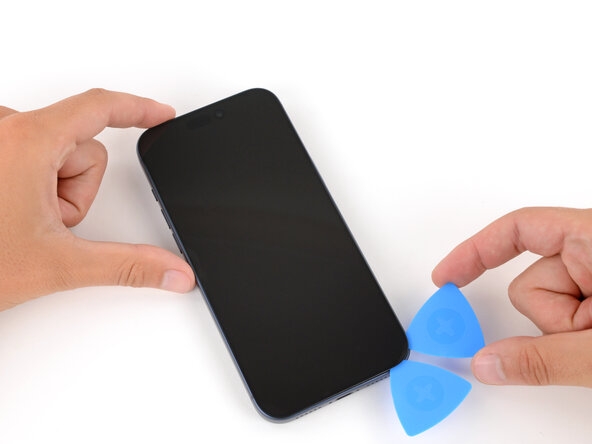
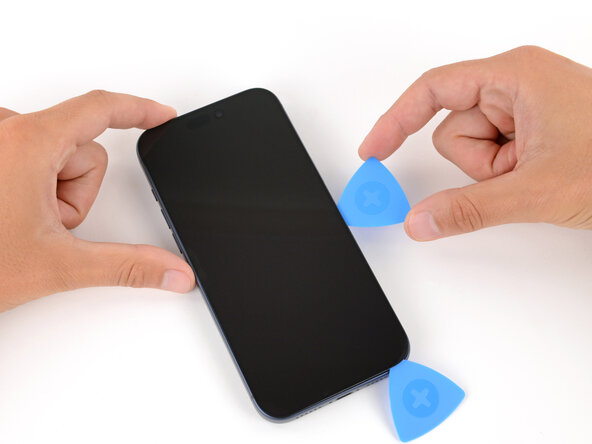
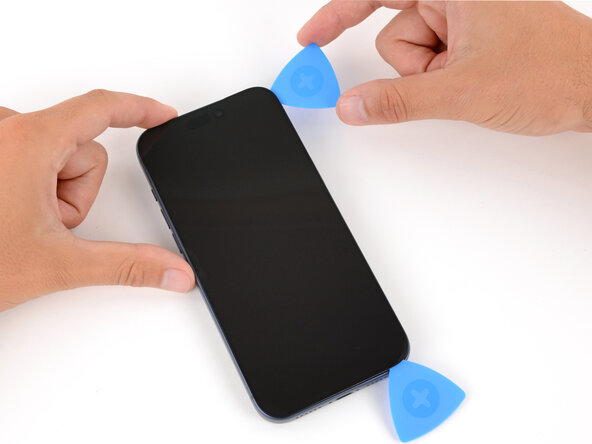
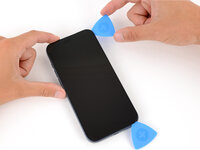
    • If inserted too far, an opening pick can damage your device. Follow this step to mark your pick and prevent damage.

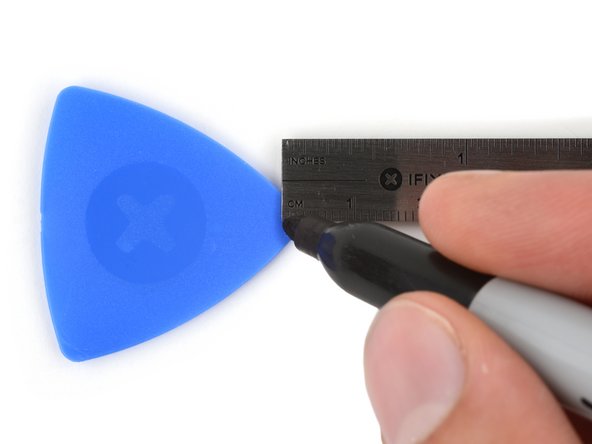
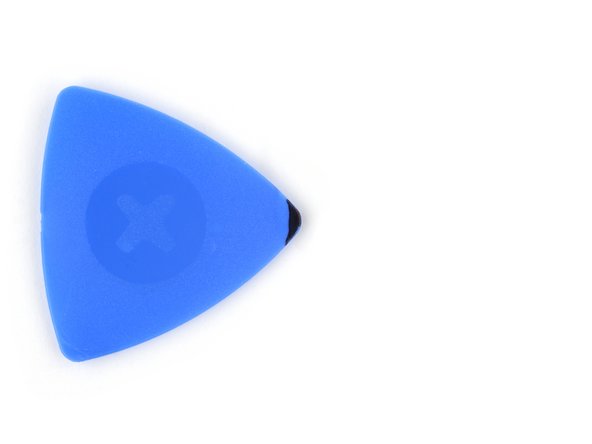
    • Measure 3 mm from the tip and mark the opening pick with a permanent marker.

    • Alternatively, you can tape a coin 3 mm from the tip of the pick.

    FixBotに聞いてみる

    コメントを追加

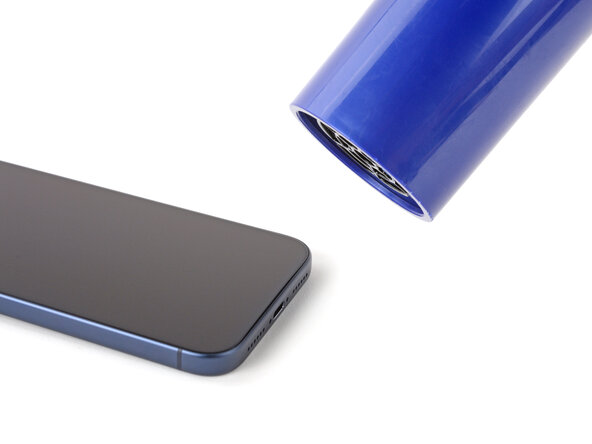
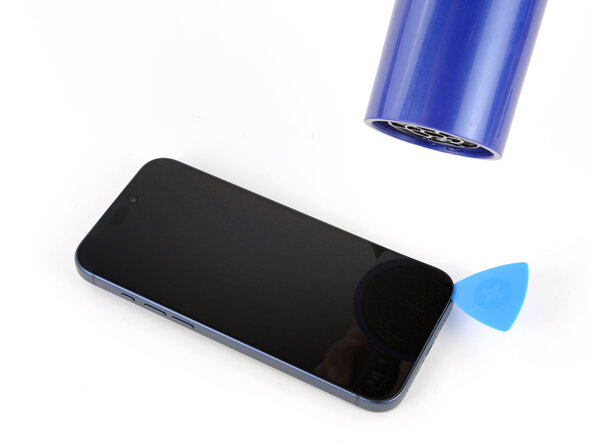
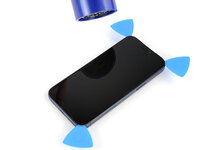
  5. iPhone 17 Pro LiDAR Module Replacement, Heat the bottom edge: 手順 5、 1の画像 1
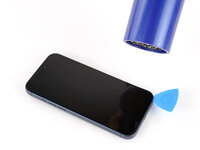
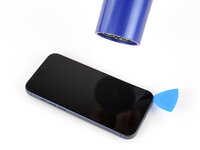
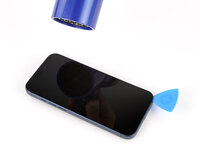
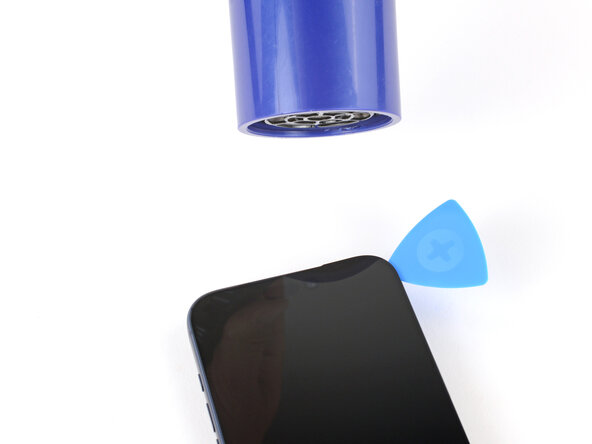
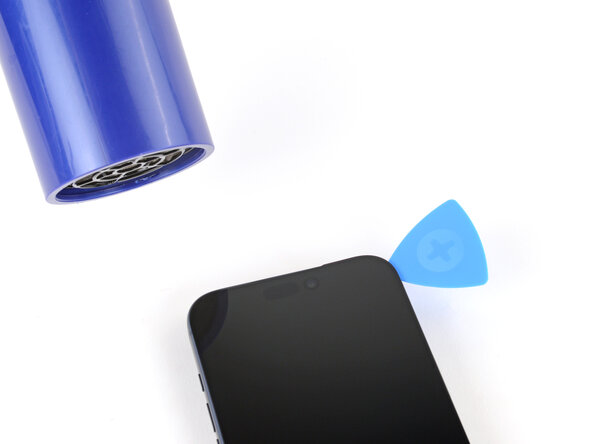
    • Use a hair dryer or heat gun to heat the bottom edge of the screen until it's slightly too hot to touch.

    • Improper use of a heat gun can destroy the display and/or battery—follow the linked instructions carefully.

    FixBotに聞いてみる

    コメントを追加

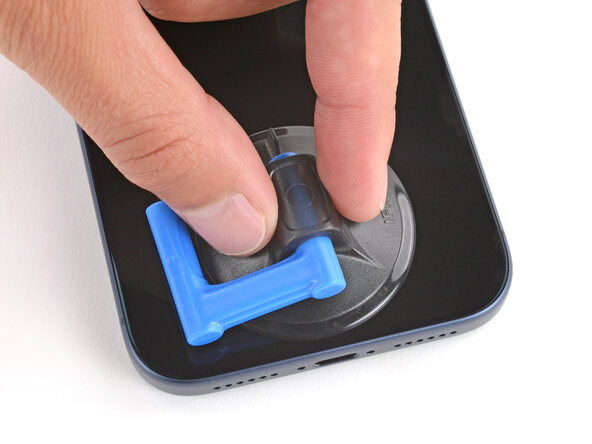
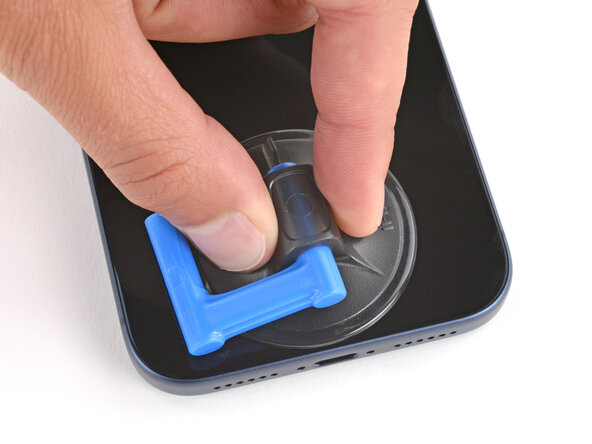
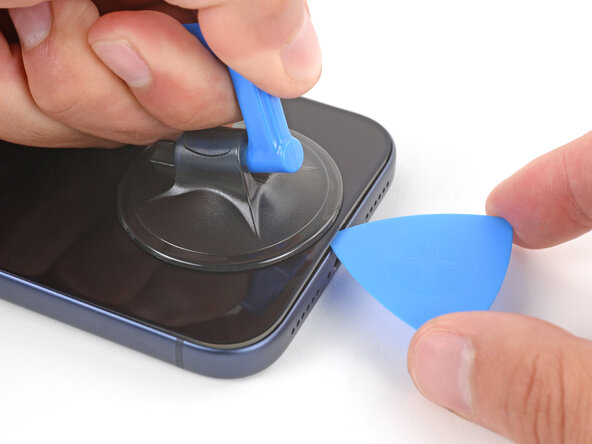
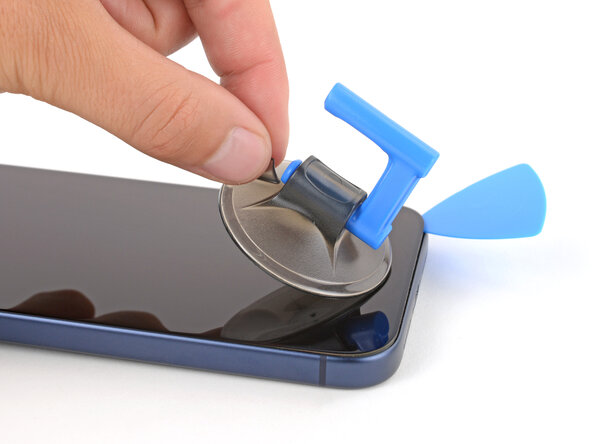
  6. iPhone 17 Pro LiDAR Module Replacement, Apply a suction handle: 手順 6、 2の画像 1 iPhone 17 Pro LiDAR Module Replacement, Apply a suction handle: 手順 6、 2の画像 2
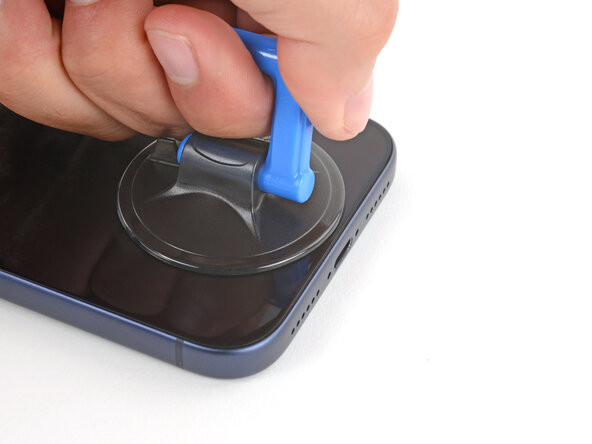
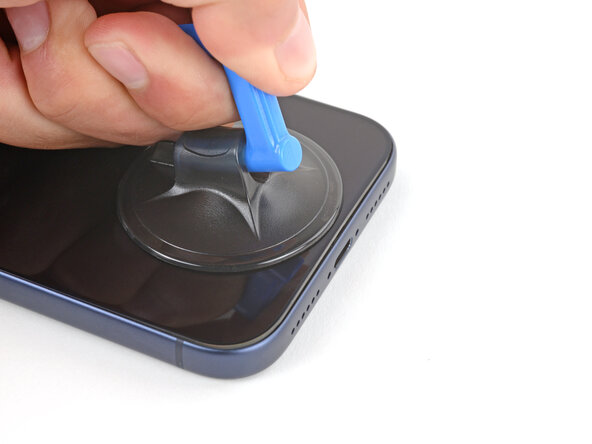
    • Apply a suction handle to the bottom edge of the screen, as close to the edge as possible.

    FixBotに聞いてみる

    コメントを追加

  7. iPhone 17 Pro LiDAR Module Replacement, Screen bezel information: 手順 7、 3の画像 1 iPhone 17 Pro LiDAR Module Replacement, Screen bezel information: 手順 7、 3の画像 2 iPhone 17 Pro LiDAR Module Replacement, Screen bezel information: 手順 7、 3の画像 3
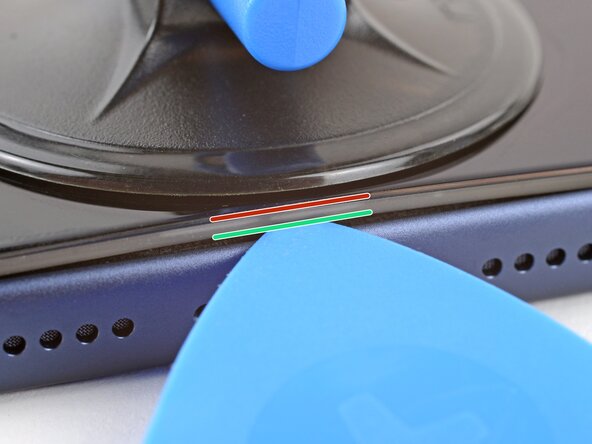
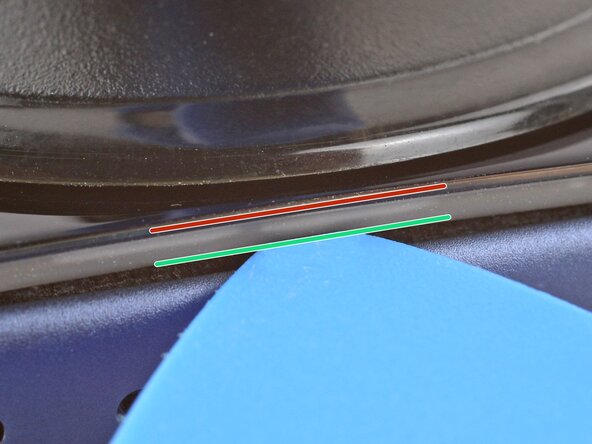
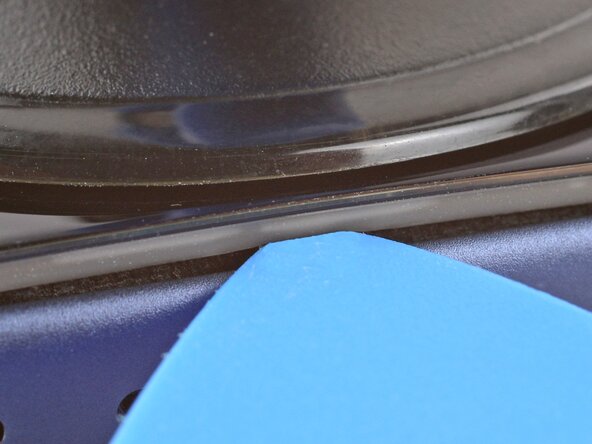
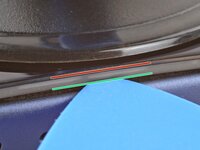
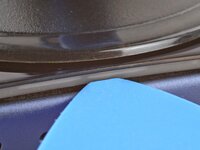
    • During the next step, make sure you're inserting your pick in the correct location:

    • There's a plastic bezel on the underside of the screen that sits on the frame. Insert your pick here, making sure it's completely under the bezel.

    • There's a seam between the plastic bezel and the display panel. Don't insert your pick here or you'll separate the two, complicating the repair.

    FixBotに聞いてみる

    コメントを追加

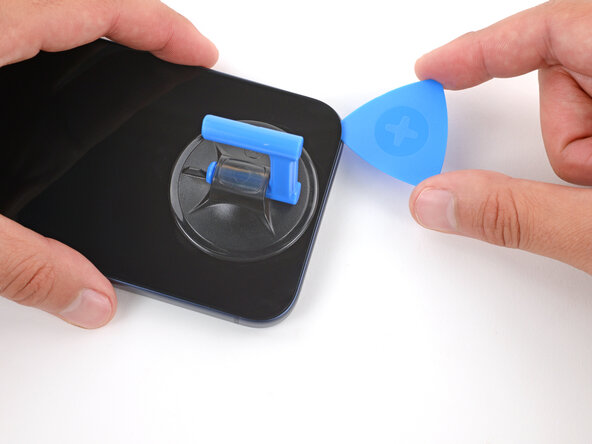
  8. iPhone 17 Pro LiDAR Module Replacement, Insert an opening pick: 手順 8、 3の画像 1 iPhone 17 Pro LiDAR Module Replacement, Insert an opening pick: 手順 8、 3の画像 2 iPhone 17 Pro LiDAR Module Replacement, Insert an opening pick: 手順 8、 3の画像 3
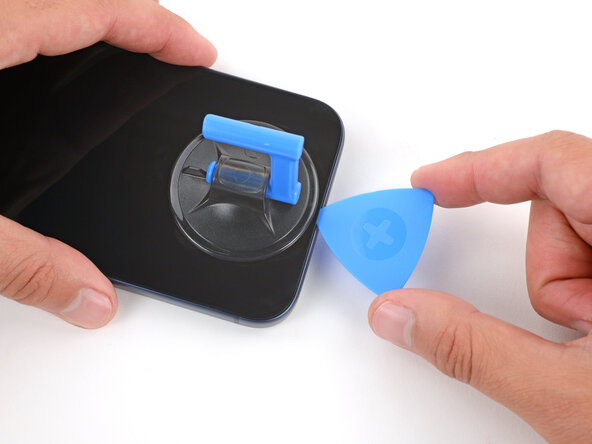
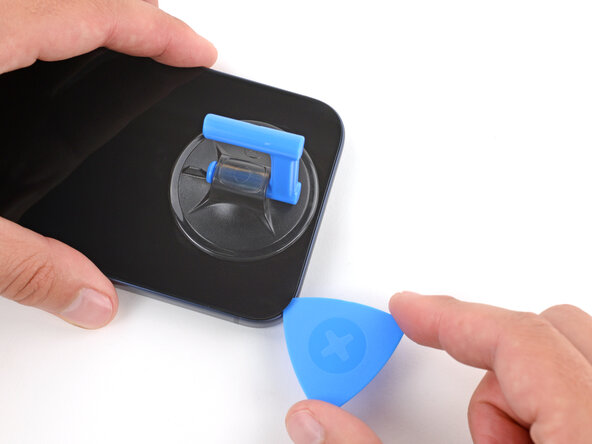
    • Pull up on the suction handle with strong, steady force until a gap forms between the screen and frame.

    • This may take significant force. If you're having trouble, reheat the screen and try again.

    • Insert the tip of an opening pick in the gap you just created.

    FixBotに聞いてみる

    コメントを追加

  9. iPhone 17 Pro LiDAR Module Replacement, Screen information: 手順 9、 3の画像 1 iPhone 17 Pro LiDAR Module Replacement, Screen information: 手順 9、 3の画像 2 iPhone 17 Pro LiDAR Module Replacement, Screen information: 手順 9、 3の画像 3
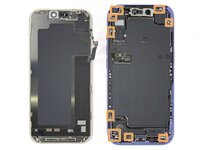
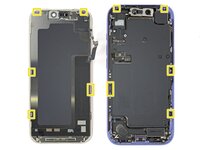
    • Don't insert your pick more than 3 mm under the screen to avoid damaging the following components:

    • The screen and ambient light sensor cables are located near the volume and Action buttons.

    • There are delicate spring contacts around the perimeter of the phone.

    • The underside of the screen has thin, metal clips that go into corresponding slots on the frame.

    FixBotに聞いてみる

    コメントを追加

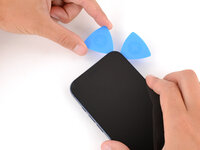
  10. iPhone 17 Pro LiDAR Module Replacement, Separate the bottom edge adhesive: 手順 10、 3の画像 1 iPhone 17 Pro LiDAR Module Replacement, Separate the bottom edge adhesive: 手順 10、 3の画像 2 iPhone 17 Pro LiDAR Module Replacement, Separate the bottom edge adhesive: 手順 10、 3の画像 3
    • Slide the opening pick along the bottom edge to separate the adhesive.

    • Leave the pick inserted under the bottom right corner to prevent the adhesive from re‑sealing.

    FixBotに聞いてみる

    コメントを追加

  11. iPhone 17 Pro LiDAR Module Replacement, Remove the suction handle: 手順 11、 1の画像 1
    • Pull the small nub on the suction cup to remove it from the screen.

    FixBotに聞いてみる

    コメントを追加

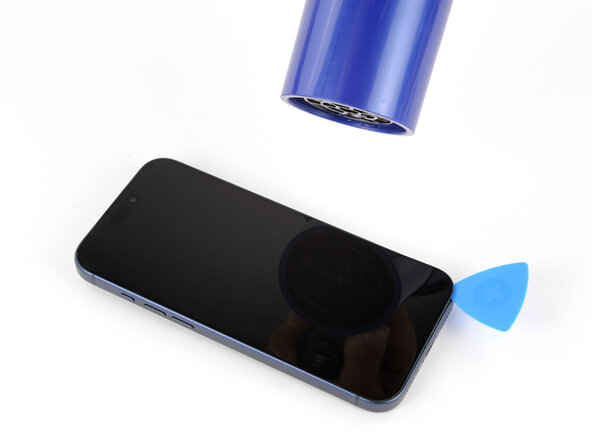
  12. iPhone 17 Pro LiDAR Module Replacement, Heat the right edge: 手順 12、 3の画像 1 iPhone 17 Pro LiDAR Module Replacement, Heat the right edge: 手順 12、 3の画像 2 iPhone 17 Pro LiDAR Module Replacement, Heat the right edge: 手順 12、 3の画像 3
    • Use a hair dryer or heat gun to heat the right edge of the screen until it's slightly too hot to touch.

    FixBotに聞いてみる

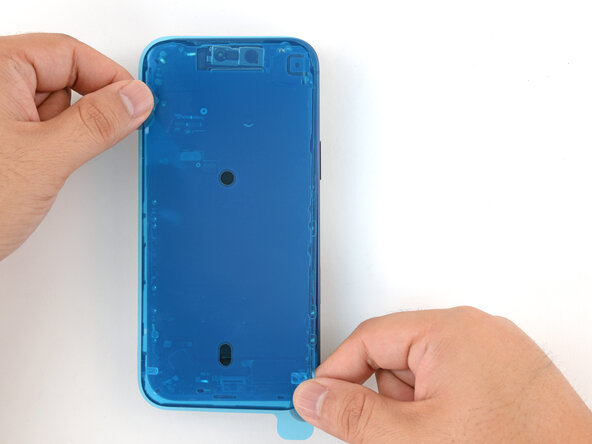
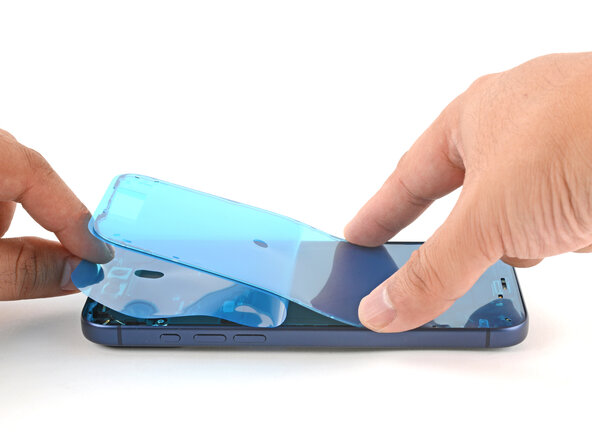
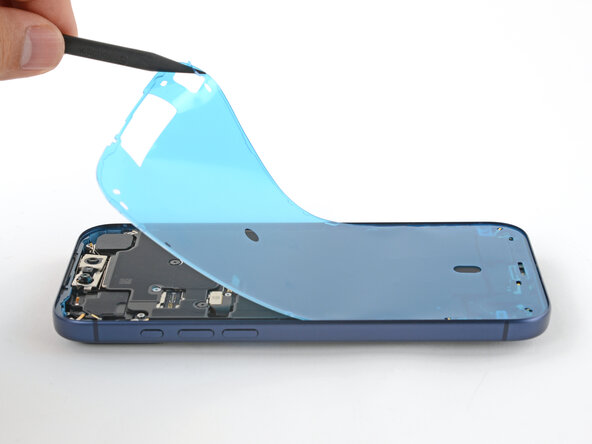
    コメントを追加

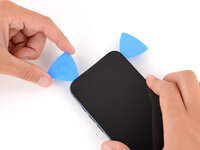
  13. iPhone 17 Pro LiDAR Module Replacement, Separate the right edge adhesive: 手順 13、 3の画像 1 iPhone 17 Pro LiDAR Module Replacement, Separate the right edge adhesive: 手順 13、 3の画像 2 iPhone 17 Pro LiDAR Module Replacement, Separate the right edge adhesive: 手順 13、 3の画像 3
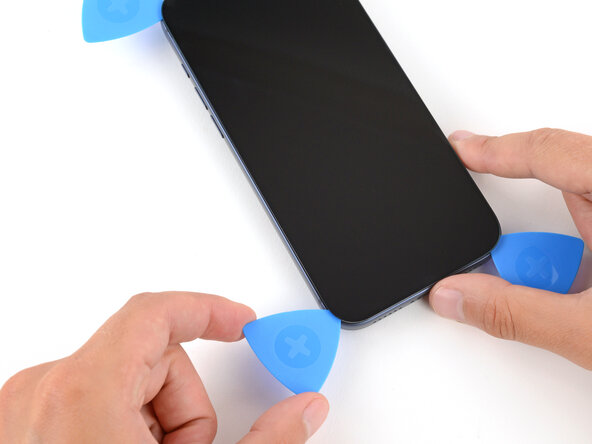
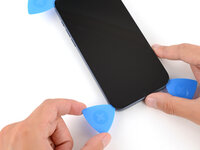
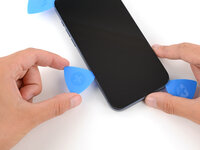
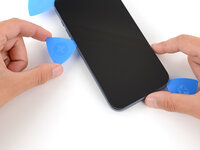
    • Insert a second opening pick under the bottom right corner of the screen.

    • Slide the pick up the right edge to separate the adhesive and release the two clips.

    • You may need to pry the screen up slightly to release the clips

    • Leave the pick inserted under the top right corner to prevent the adhesive from re‑sealing.

    FixBotに聞いてみる

    コメントを追加

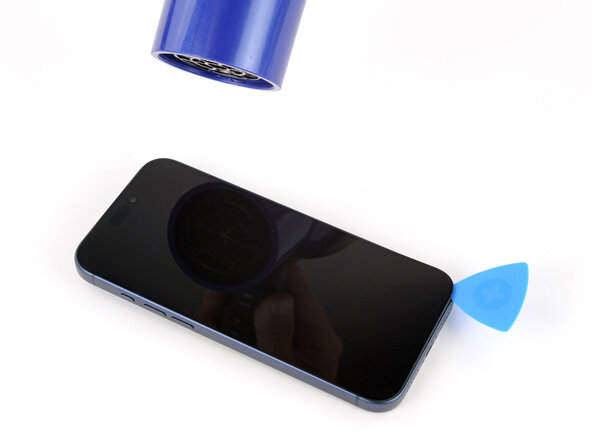
  14. iPhone 17 Pro LiDAR Module Replacement, Heat the top edge: 手順 14、 2の画像 1 iPhone 17 Pro LiDAR Module Replacement, Heat the top edge: 手順 14、 2の画像 2
    • Use a hair dryer or heat gun to heat the top edge of the screen until it's slightly too hot to touch.

    FixBotに聞いてみる

    コメントを追加

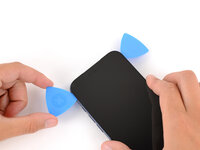
  15. iPhone 17 Pro LiDAR Module Replacement, Separate the top edge adhesive: 手順 15、 3の画像 1 iPhone 17 Pro LiDAR Module Replacement, Separate the top edge adhesive: 手順 15、 3の画像 2 iPhone 17 Pro LiDAR Module Replacement, Separate the top edge adhesive: 手順 15、 3の画像 3
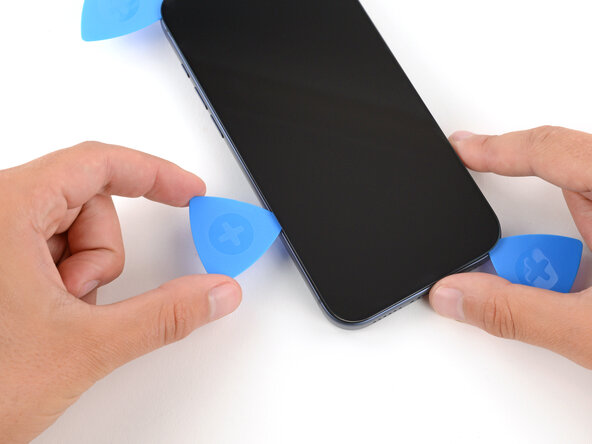
    • Insert a third opening pick under the top right corner of the screen.

    • Slide the pick along the top edge and just barely around the top left corner to separate the adhesive and release the two clips.

    • Don't slide the pick farther, or you may damage the ambient light sensor cable.

    • Leave the pick inserted under the top left corner to prevent the adhesive from re‑sealing.

    FixBotに聞いてみる

    コメントを追加

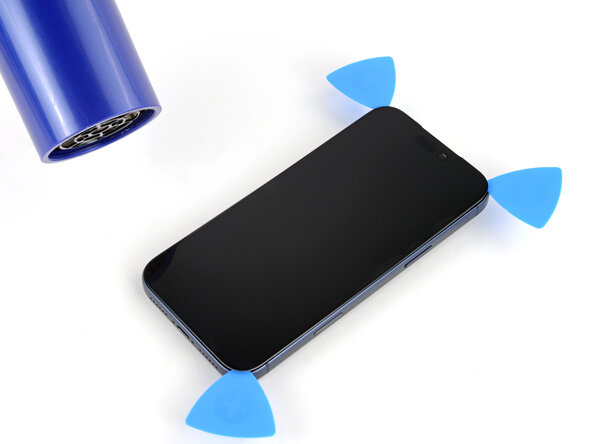
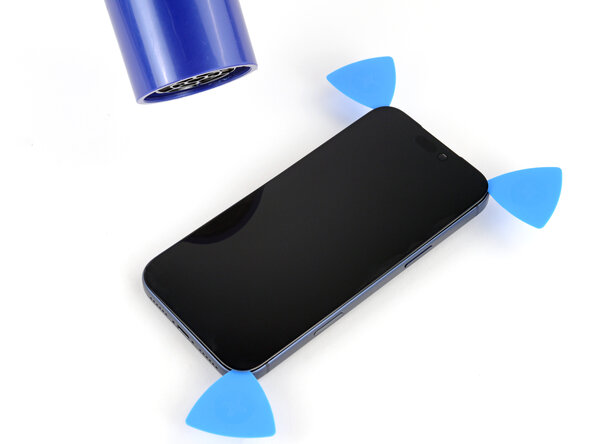
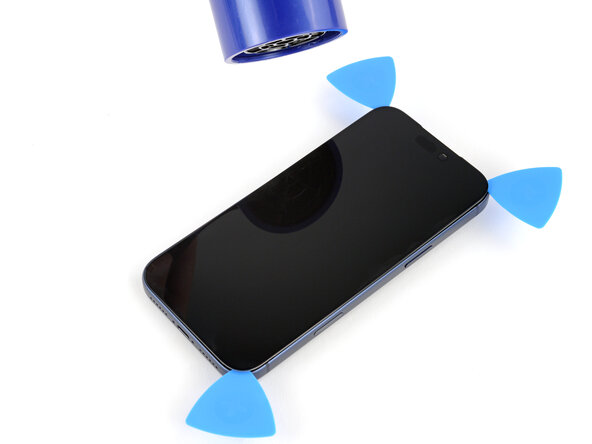
  16. iPhone 17 Pro LiDAR Module Replacement, Heat the left edge: 手順 16、 3の画像 1 iPhone 17 Pro LiDAR Module Replacement, Heat the left edge: 手順 16、 3の画像 2 iPhone 17 Pro LiDAR Module Replacement, Heat the left edge: 手順 16、 3の画像 3
    • Use a hair dryer or heat gun to heat the left edge of the screen until it's slightly too hot to touch.

    FixBotに聞いてみる

    コメントを追加

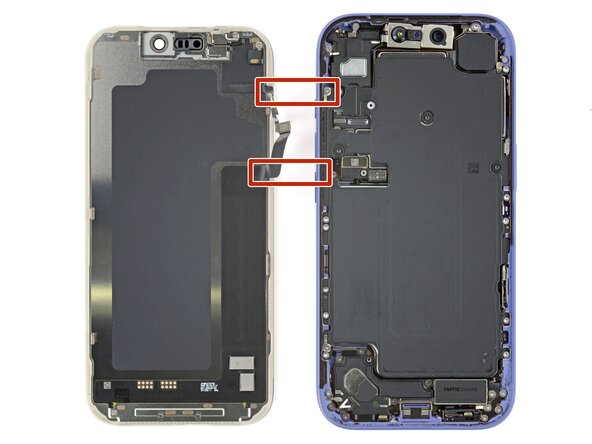
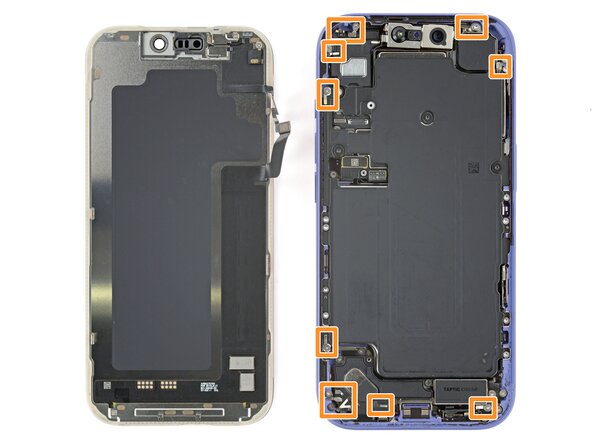
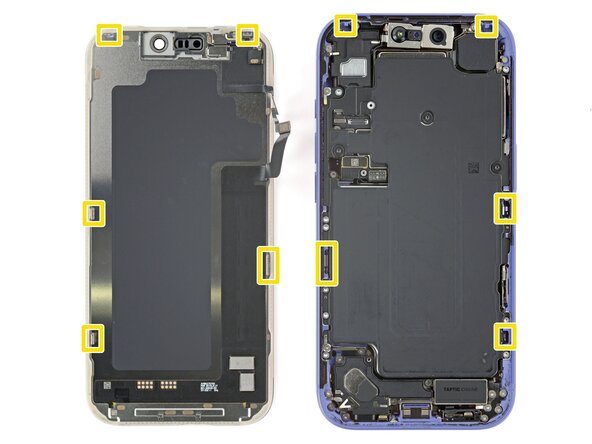
  17. iPhone 17 Pro LiDAR Module Replacement, Separate the left edge adhesive: 手順 17、 3の画像 1 iPhone 17 Pro LiDAR Module Replacement, Separate the left edge adhesive: 手順 17、 3の画像 2 iPhone 17 Pro LiDAR Module Replacement, Separate the left edge adhesive: 手順 17、 3の画像 3
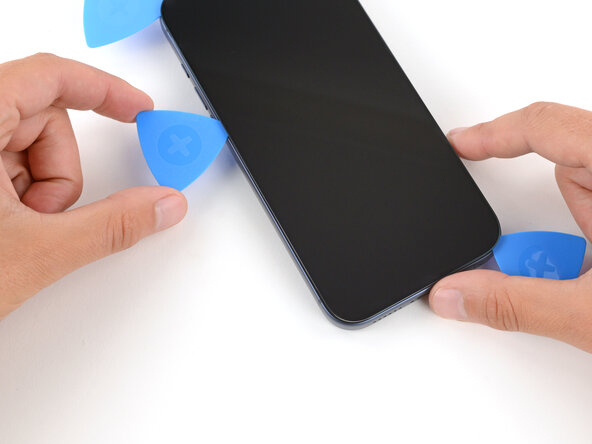
    • Insert a fourth opening pick under the bottom left corner of the screen.

    • Slide the pick up the right edge to separate the adhesive and release the clip, stopping just before the volume up button.

    • You may need to pry up the screen slightly to release the clip.

    • Don't slide the pick farther, or you may damage the screen cable.

    FixBotに聞いてみる

    コメントを追加

  18. iPhone 17 Pro LiDAR Module Replacement, Prop up the screen: 手順 18、 2の画像 1 iPhone 17 Pro LiDAR Module Replacement, Prop up the screen: 手順 18、 2の画像 2
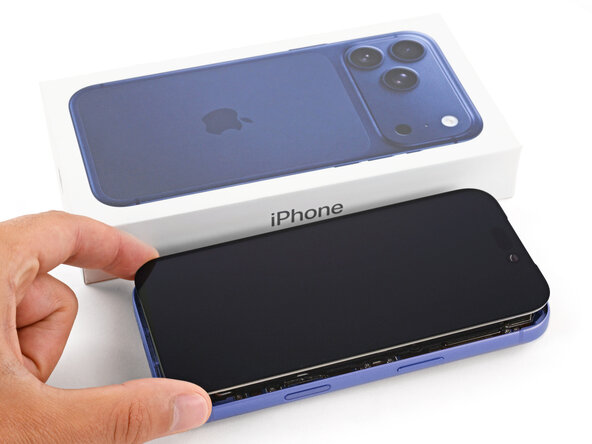
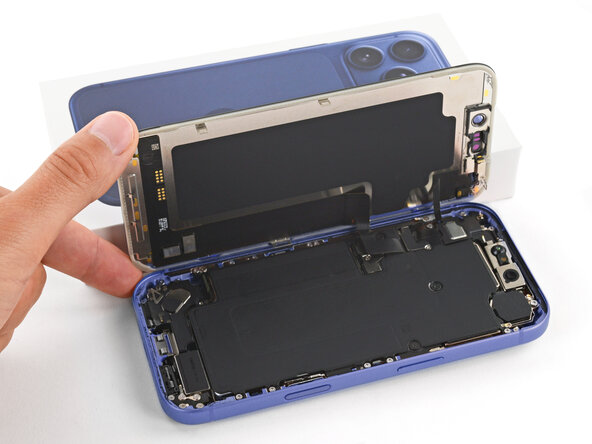
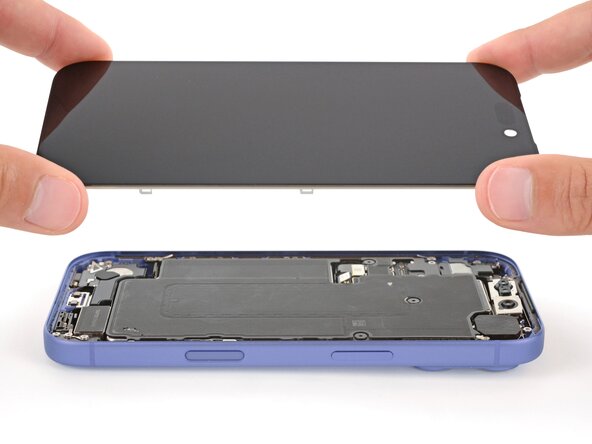
    • At this point, the screen should be completely detached from the frame. If it feels stuck, go back around the perimeter and separate any remaining adhesive or clips.

    • Lift the screen straight up and swing it over the left edge, propping it up against a sturdy box or stack of books so the cables aren't strained.

    • Alternatively, you can lay the screen down flat over the left side.

    FixBotに聞いてみる

    コメントを追加

  19. iPhone 17 Pro LiDAR Module Replacement, Remove the cover screws: 手順 19、 1の画像 1
    この手順で使用する道具:
    FixMat
    $36.95
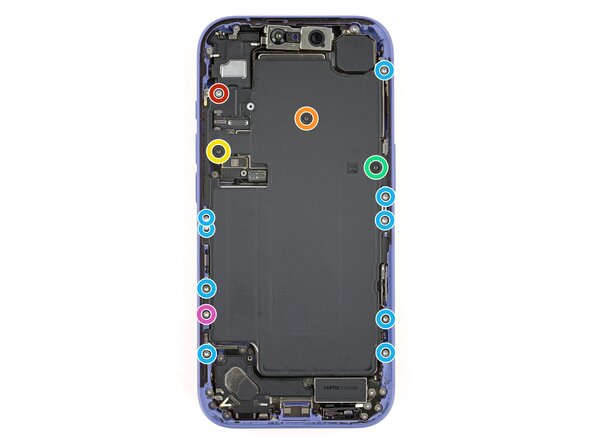
    • Throughout this repair, keep track of each screw and make sure it goes back exactly where it came from.

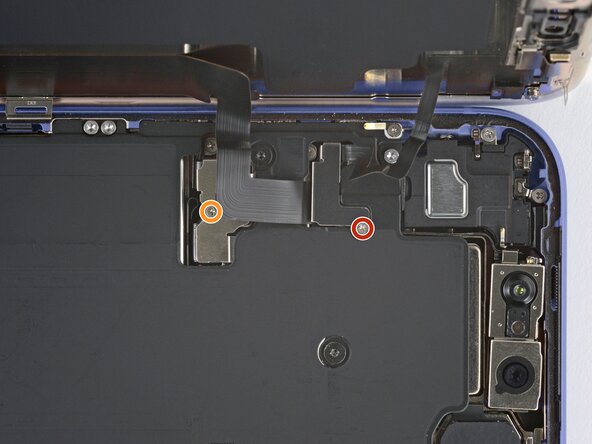
    • Use a JIS 00 screwdriver to remove the two screws securing the cable covers:

    • One 1.4 mm‑long screw for the screen and front sensor cable cover

    • One 1.3 mm‑long screw for the battery cover

    • Small iFixit Phillips bits are designed to work with JIS screws. You can try Phillips drivers from other manufacturers, but you risk stripping the screw.

    FixBotに聞いてみる

    コメントを追加

  20. iPhone 17 Pro LiDAR Module Replacement, Remove the covers: 手順 20、 3の画像 1 iPhone 17 Pro LiDAR Module Replacement, Remove the covers: 手順 20、 3の画像 2 iPhone 17 Pro LiDAR Module Replacement, Remove the covers: 手順 20、 3の画像 3
    • Remove the two covers.

    FixBotに聞いてみる

    コメントを追加

  21. iPhone 17 Pro LiDAR Module Replacement, Disconnect the battery: 手順 21、 2の画像 1 iPhone 17 Pro LiDAR Module Replacement, Disconnect the battery: 手順 21、 2の画像 2
    • Use the point of a spudger to pry up and disconnect the battery press connector.

    FixBotに聞いてみる

    コメントを追加

  22. iPhone 17 Pro LiDAR Module Replacement, Disconnect the screen: 手順 22、 3の画像 1 iPhone 17 Pro LiDAR Module Replacement, Disconnect the screen: 手順 22、 3の画像 2 iPhone 17 Pro LiDAR Module Replacement, Disconnect the screen: 手順 22、 3の画像 3
    • Use the tip of an opening pick or the point of a spudger to pry up and disconnect the screen and ambient light sensor press connectors.

    FixBotに聞いてみる

    コメントを追加

  23. iPhone 17 Pro LiDAR Module Replacement, Remove the screen: 手順 23、 1の画像 1
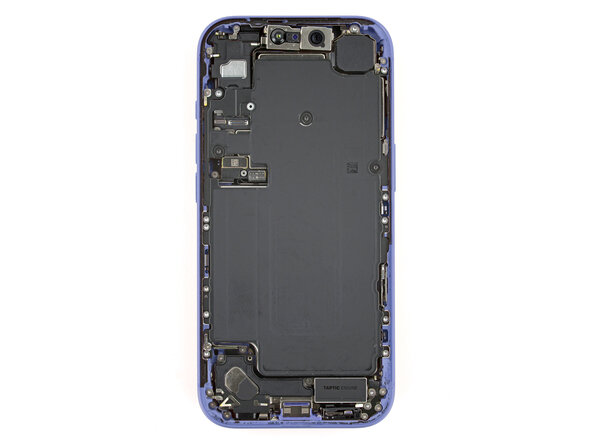
    • Remove the screen.

    FixBotに聞いてみる

    コメントを追加

  24. iPhone 17 Pro LiDAR Module Replacement, Remove the battery tray screws: 手順 24、 2の画像 1 iPhone 17 Pro LiDAR Module Replacement, Remove the battery tray screws: 手順 24、 2の画像 2
    • Use a Torx Plus 4IP screwdriver to remove the screws securing the battery tray:

    • One 7.5 mm‑long screw

    • One 5.9 mm‑long screw

    • One 3.4 mm‑long screw

    • One 2.3 mm‑long screw

    • Nine 3.7 mm‑long screws

    • One 3.7 mm‑long screw

    • iPhone models with a physical SIM card won't have this screw.

    FixBotに聞いてみる

    コメントを追加

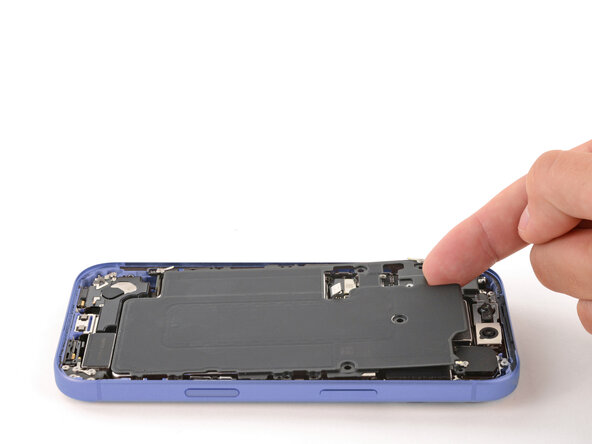
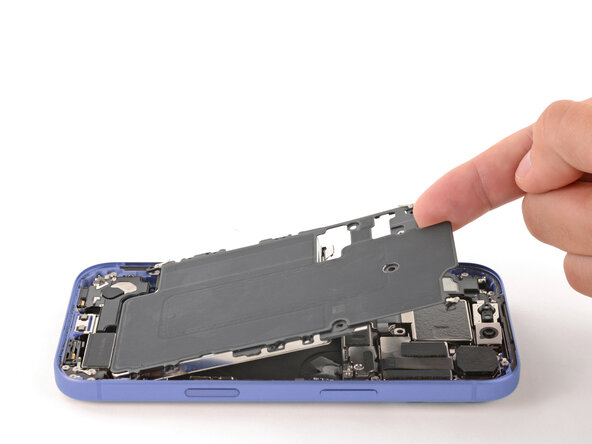
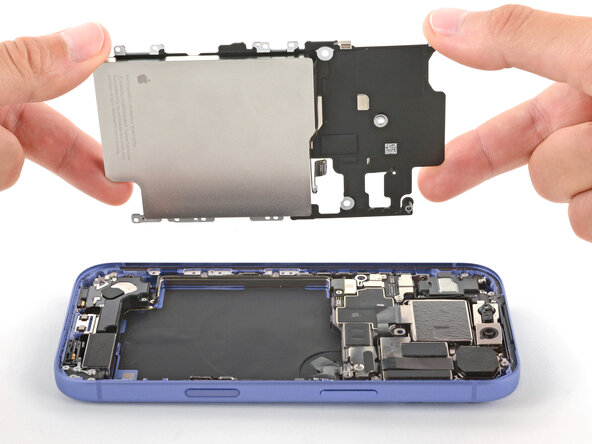
  25. iPhone 17 Pro LiDAR Module Replacement, Remove the battery: 手順 25、 3の画像 1 iPhone 17 Pro LiDAR Module Replacement, Remove the battery: 手順 25、 3の画像 2 iPhone 17 Pro LiDAR Module Replacement, Remove the battery: 手順 25、 3の画像 3
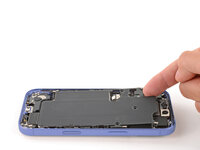
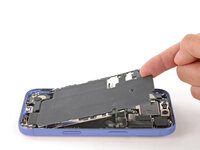
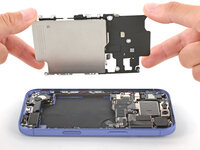
    • Use your finger to lift the top left corner of the battery tray and remove it.

    • Be careful not to smudge the front camera.

    FixBotに聞いてみる

    コメントを追加

  26. iPhone 17 Pro LiDAR Module Replacement, Remove the rear camera connector cover: 手順 26、 2の画像 1 iPhone 17 Pro LiDAR Module Replacement, Remove the rear camera connector cover: 手順 26、 2の画像 2
    • Use a tri-point Y000 screwdriver to remove the 1.0 mm‑long screw securing the rear camera connector cover.

    FixBotに聞いてみる

    コメントを追加

  27. iPhone 17 Pro LiDAR Module Replacement: 手順 27、 3の画像 1 iPhone 17 Pro LiDAR Module Replacement: 手順 27、 3の画像 2 iPhone 17 Pro LiDAR Module Replacement: 手順 27、 3の画像 3
    • Use tweezers to unlatch the rear camera connector cover from the logic board and remove it.

    FixBotに聞いてみる

    コメントを追加

  28. iPhone 17 Pro LiDAR Module Replacement, Disconnect the rear camera assembly: 手順 28、 3の画像 1 iPhone 17 Pro LiDAR Module Replacement, Disconnect the rear camera assembly: 手順 28、 3の画像 2 iPhone 17 Pro LiDAR Module Replacement, Disconnect the rear camera assembly: 手順 28、 3の画像 3
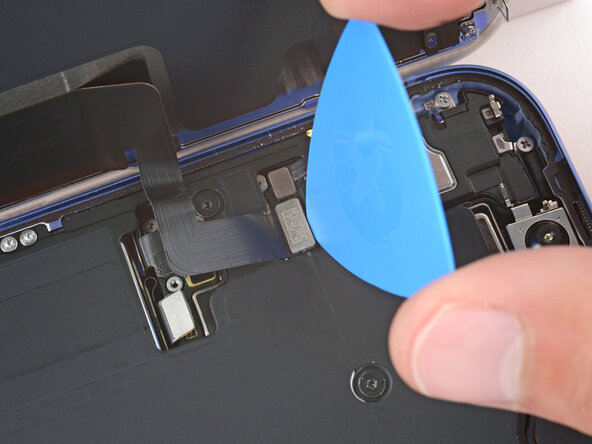
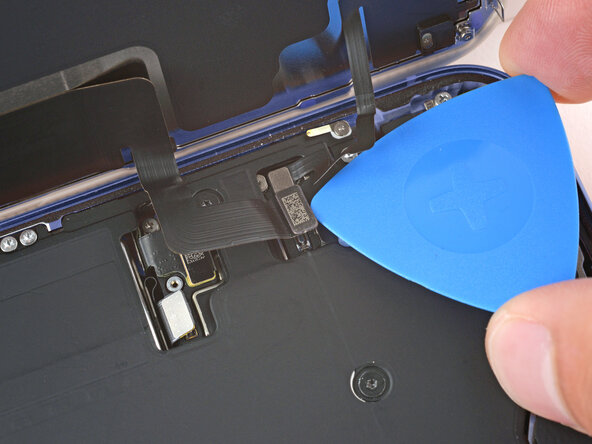
    • Use the point of a spudger to pry up and disconnect the three rear camera press connectors.

    • One of the connectors is under the other.

    FixBotに聞いてみる

    コメントを追加

  29. iPhone 17 Pro LiDAR Module Replacement, Remove the rear camera assembly: 手順 29、 1の画像 1
    • Use a Torx Plus 4IP screwdriver to remove the three screws securing the rear camera assembly:

    • Two 4.0 mm‑long screws

    • One 4.4 mm‑long screw

    FixBotに聞いてみる

    コメントを追加

  30. iPhone 17 Pro LiDAR Module Replacement: 手順 30、 3の画像 1 iPhone 17 Pro LiDAR Module Replacement: 手順 30、 3の画像 2 iPhone 17 Pro LiDAR Module Replacement: 手順 30、 3の画像 3
    • Use the point of a spudger to pry up the top edge of the rear camera assembly.

    • Grab the assembly with your fingers and remove it.

    FixBotに聞いてみる

    コメントを追加

  31. iPhone 17 Pro LiDAR Module Replacement, Remove the front camera connector cover: 手順 31、 1の画像 1
    • Use a tri-point Y000 screwdriver to remove the 1.0 mm‑long screw securing the front camera connector cover.

    FixBotに聞いてみる

    コメントを追加

  32. iPhone 17 Pro LiDAR Module Replacement: 手順 32、 2の画像 1 iPhone 17 Pro LiDAR Module Replacement: 手順 32、 2の画像 2
    • Use tweezers to unhook and remove the front camera connector cover.

    FixBotに聞いてみる

    コメントを追加

  33. iPhone 17 Pro LiDAR Module Replacement, Remove the front camera assembly: 手順 33、 3の画像 1 iPhone 17 Pro LiDAR Module Replacement, Remove the front camera assembly: 手順 33、 3の画像 2 iPhone 17 Pro LiDAR Module Replacement, Remove the front camera assembly: 手順 33、 3の画像 3
    • Use the point of a spudger to pry up and disconnect the two front camera connectors (one's under the other) from the logic board.

    FixBotに聞いてみる

    コメントを追加

  34. iPhone 17 Pro LiDAR Module Replacement: 手順 34、 2の画像 1 iPhone 17 Pro LiDAR Module Replacement: 手順 34、 2の画像 2
    • Lift and remove the front camera assembly from its recess.

    FixBotに聞いてみる

    コメントを追加

  35. iPhone 17 Pro LiDAR Module Replacement, Remove the top speaker: 手順 35、 1の画像 1
    • Use a JIS 00 screwdriver to remove the three 2.2 mm‑long screws securing the top speaker.

    FixBotに聞いてみる

    コメントを追加

  36. iPhone 17 Pro LiDAR Module Replacement: 手順 36、 2の画像 1 iPhone 17 Pro LiDAR Module Replacement: 手順 36、 2の画像 2
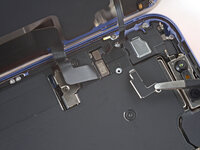
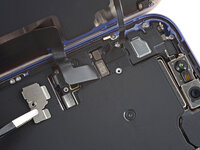
    • Use the point of a spudger to pry up and loosen the top speaker.

    • Remove the top speaker.

    FixBotに聞いてみる

    コメントを追加

  37. iPhone 17 Pro LiDAR Module Replacement, Remove the button connector cover: 手順 37、 1の画像 1
    • Use a tri-point Y000 screwdriver to remove the 1.0 mm‑long screw securing the button connector cover.

    FixBotに聞いてみる

    コメントを追加

  38. iPhone 17 Pro LiDAR Module Replacement: 手順 38、 3の画像 1 iPhone 17 Pro LiDAR Module Replacement: 手順 38、 3の画像 2 iPhone 17 Pro LiDAR Module Replacement: 手順 38、 3の画像 3
    • Use tweezers to unlatch the button connector cover from the logic board and remove it.

    FixBotに聞いてみる

    コメントを追加

  39. iPhone 17 Pro LiDAR Module Replacement, Disconnect the logic board: 手順 39、 3の画像 1 iPhone 17 Pro LiDAR Module Replacement, Disconnect the logic board: 手順 39、 3の画像 2 iPhone 17 Pro LiDAR Module Replacement, Disconnect the logic board: 手順 39、 3の画像 3
    • Use the point of a spudger to pry up and disconnect the two press connectors along the top edge of the logic board.

    FixBotに聞いてみる

    コメントを追加

  40. iPhone 17 Pro LiDAR Module Replacement: 手順 40、 3の画像 1 iPhone 17 Pro LiDAR Module Replacement: 手順 40、 3の画像 2 iPhone 17 Pro LiDAR Module Replacement: 手順 40、 3の画像 3
    • Use the point of a spudger to pry up and disconnect five press connectors on the logic board:

    • Two button board connectors (one's underneath the other)

    • Two USB-C port assembly connectors (one's underneath the other)

    • One power button connector

    FixBotに聞いてみる

    コメントを追加

  41. iPhone 17 Pro LiDAR Module Replacement: 手順 41、 3の画像 1 iPhone 17 Pro LiDAR Module Replacement: 手順 41、 3の画像 2 iPhone 17 Pro LiDAR Module Replacement: 手順 41、 3の画像 3
    • Don't attempt to remove the logic board. It's still attached to the frame by the underside flex cable(s).

    • Use your fingers to carefully tilt the bottom left corner of the logic board up until it stands vertical.

    • Shift the logic board as needed to maintain slack on the underside flex cable(s).

    FixBotに聞いてみる

    コメントを追加

  42. iPhone 17 Pro LiDAR Module Replacement, Remove the LiDAR cover: 手順 42、 1の画像 1
    • Remove the two screws securing the LiDAR cover:

    • One 5.0 mm‑long standoff screw

    • One 2.3 mm‑long JIS 00 screw

    FixBotに聞いてみる

    コメントを追加

  43. iPhone 17 Pro LiDAR Module Replacement: 手順 43、 1の画像 1
    • Remove the LiDAR cover.

    FixBotに聞いてみる

    コメントを追加

  44. iPhone 17 Pro LiDAR Module Replacement, Remove the LiDAR module: 手順 44、 3の画像 1 iPhone 17 Pro LiDAR Module Replacement, Remove the LiDAR module: 手順 44、 3の画像 2 iPhone 17 Pro LiDAR Module Replacement, Remove the LiDAR module: 手順 44、 3の画像 3
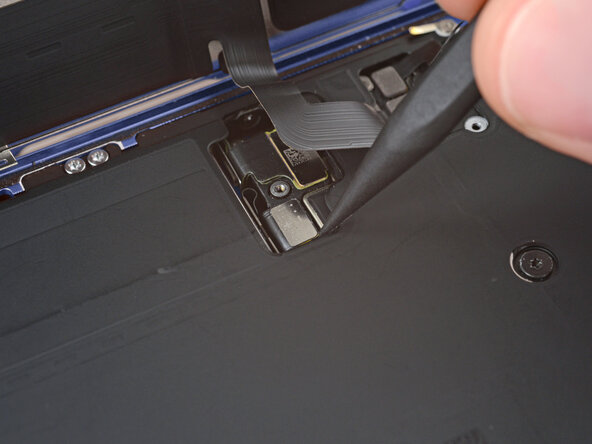
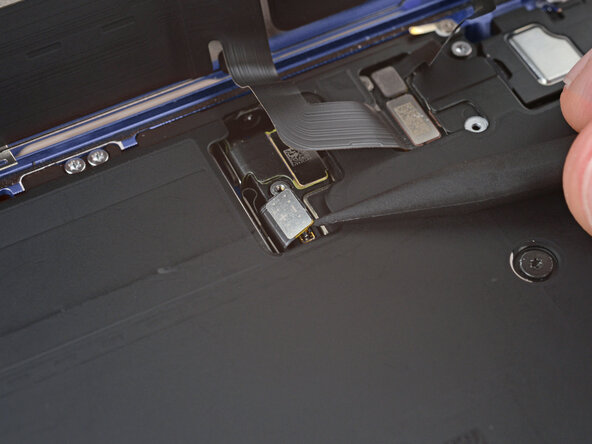
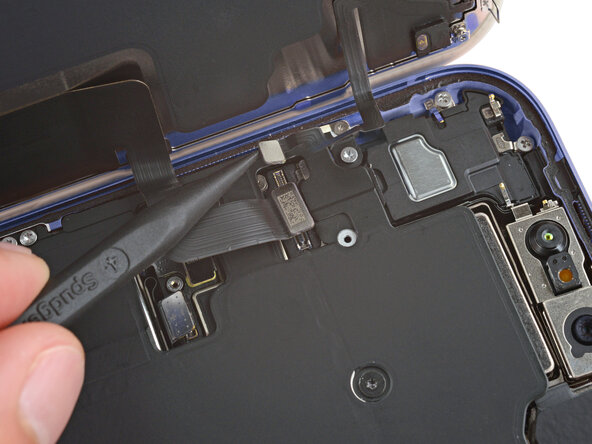
    • Use the point of a spudger to pry up a corner of the LiDAR module.

    • Use your fingers to remove the LiDAR module.

    FixBotに聞いてみる

    コメントを追加

  45. iPhone 17 Pro LiDAR Module Replacement, Disassembly complete: 手順 45、 1の画像 1
    • Congratulations on completing disassembly! The remaining steps will show how to reassemble your iPhone.

    • Depending on your iPhone model, some reassembly photos may have minor visual discrepancies. The procedure, however, will be correct for your iPhone.

    FixBotに聞いてみる

    コメントを追加

  46. iPhone 17 Pro LiDAR Module Replacement, Install the LiDAR module: 手順 46、 2の画像 1 iPhone 17 Pro LiDAR Module Replacement, Install the LiDAR module: 手順 46、 2の画像 2
    • Use your fingers to place the LiDAR module in its recess and gently press it in place.

    FixBotに聞いてみる

    コメントを追加

  47. iPhone 17 Pro LiDAR Module Replacement, Install the LiDAR cover: 手順 47、 1の画像 1
    • Place the LiDAR cover on top of the LiDAR module.

    FixBotに聞いてみる

    コメントを追加

  48. iPhone 17 Pro LiDAR Module Replacement: 手順 48、 1の画像 1
    • Install the two LiDAR cover screws:

    • One 5.0 mm‑long standoff screw

    • One 2.3 mm‑long JIS 00 screw

    FixBotに聞いてみる

    コメントを追加

  49. iPhone 17 Pro LiDAR Module Replacement, Install the logic board: 手順 49、 3の画像 1 iPhone 17 Pro LiDAR Module Replacement, Install the logic board: 手順 49、 3の画像 2 iPhone 17 Pro LiDAR Module Replacement, Install the logic board: 手順 49、 3の画像 3
    • Use an opening pick to hold the flex cables along the left edge of the iPhone to prevent them from being trapped underneath the logic board.

    • Swing the logic board down in place, making sure no flex cables are trapped along the left and bottom edges.

    FixBotに聞いてみる

    コメントを追加

  50. iPhone 17 Pro LiDAR Module Replacement: 手順 50、 1の画像 1
    • Check the right edge of the logic board to make sure the power button connector wasn't trapped underneath the logic board.

    FixBotに聞いてみる

    コメントを追加

  51. iPhone 17 Pro LiDAR Module Replacement: 手順 51、 1の画像 1
    • Use your finger to press and connect the small button connector on the left side of the logic board.

    • Stop if the connector feels like it won't reach. The button cable has a bend that often catches underneath the logic board. Lift the logic board, free the cable bend, and try again.

    FixBotに聞いてみる

    コメントを追加

  52. iPhone 17 Pro LiDAR Module Replacement: 手順 52、 1の画像 1
    • Use your finger to press and attach the six press connectors:

    • Two connectors along the top edge of the logic board

    • One remaining button board connector

    • Two USB-C port assembly connectors (one on top of the other)

    • One power button connector

    FixBotに聞いてみる

    コメントを追加

  53. iPhone 17 Pro LiDAR Module Replacement, Install the button connector cover: 手順 53、 3の画像 1 iPhone 17 Pro LiDAR Module Replacement, Install the button connector cover: 手順 53、 3の画像 2 iPhone 17 Pro LiDAR Module Replacement, Install the button connector cover: 手順 53、 3の画像 3
    • Latch the end of the button connector cover onto the logic board.

    FixBotに聞いてみる

    コメントを追加

  54. iPhone 17 Pro LiDAR Module Replacement: 手順 54、 1の画像 1
    • Use a tri-point Y000 screwdriver to install the 1.0 mm‑long button connector screw.

    FixBotに聞いてみる

    コメントを追加

  55. iPhone 17 Pro LiDAR Module Replacement, Install the top speaker: 手順 55、 2の画像 1 iPhone 17 Pro LiDAR Module Replacement, Install the top speaker: 手順 55、 2の画像 2
    • Align the top edge of the top speaker with the iPhone.

    • Lay the speaker in its recess.

    FixBotに聞いてみる

    コメントを追加

  56. iPhone 17 Pro LiDAR Module Replacement: 手順 56、 1の画像 1
    • Use a JIS 00 screwdriver to install the three 2.2 mm‑long top speaker screws.

    FixBotに聞いてみる

    コメントを追加

  57. iPhone 17 Pro LiDAR Module Replacement, Install the front camera assembly: 手順 57、 1の画像 1
    • Lay the front camera assembly in its recess.

    FixBotに聞いてみる

    コメントを追加

  58. iPhone 17 Pro LiDAR Module Replacement: 手順 58、 3の画像 1 iPhone 17 Pro LiDAR Module Replacement: 手順 58、 3の画像 2 iPhone 17 Pro LiDAR Module Replacement: 手順 58、 3の画像 3
    • Use your fingers to press and connect the two front camera assembly connectors.

    FixBotに聞いてみる

    コメントを追加

  59. iPhone 17 Pro LiDAR Module Replacement, Install the front camera connector cover: 手順 59、 3の画像 1 iPhone 17 Pro LiDAR Module Replacement, Install the front camera connector cover: 手順 59、 3の画像 2 iPhone 17 Pro LiDAR Module Replacement, Install the front camera connector cover: 手順 59、 3の画像 3
    • Hook the small latch in the corner of the camera connector cover onto the logic board and set it in place.

    FixBotに聞いてみる

    コメントを追加

  60. iPhone 17 Pro LiDAR Module Replacement: 手順 60、 1の画像 1
    • Use a tri-point Y000 screwdriver to install the 1.0 mm‑long front camera connector screw.

    FixBotに聞いてみる

    コメントを追加

  61. iPhone 17 Pro LiDAR Module Replacement, Install the rear camera assembly: 手順 61、 2の画像 1 iPhone 17 Pro LiDAR Module Replacement, Install the rear camera assembly: 手順 61、 2の画像 2
    • Lay the rear camera assembly in its recess.

    FixBotに聞いてみる

    コメントを追加

  62. iPhone 17 Pro LiDAR Module Replacement: 手順 62、 3の画像 1 iPhone 17 Pro LiDAR Module Replacement: 手順 62、 3の画像 2 iPhone 17 Pro LiDAR Module Replacement: 手順 62、 3の画像 3
    • Use your finger to press and connect the three camera press connectors onto the logic board.

    FixBotに聞いてみる

    コメントを追加

  63. iPhone 17 Pro LiDAR Module Replacement: 手順 63、 2の画像 1 iPhone 17 Pro LiDAR Module Replacement: 手順 63、 2の画像 2
    • Use a Torx Plus 4IP screwdriver to install the three rear camera assembly screws:

    • Two 4.0 mm‑long screws

    • One 4.4 mm‑long screw

    • Make sure to install this in the proper screw hole.

    FixBotに聞いてみる

    コメントを追加

  64. iPhone 17 Pro LiDAR Module Replacement, Install the rear camera connector cover: 手順 64、 3の画像 1 iPhone 17 Pro LiDAR Module Replacement, Install the rear camera connector cover: 手順 64、 3の画像 2 iPhone 17 Pro LiDAR Module Replacement, Install the rear camera connector cover: 手順 64、 3の画像 3
    • Use tweezers to latch the rear camera connector cover onto the logic board and lay it in place.

    FixBotに聞いてみる

    コメントを追加

  65. iPhone 17 Pro LiDAR Module Replacement: 手順 65、 1の画像 1
    • Use a tri-point Y000 screwdriver to install the 1.0 mm‑long camera connector cover screw.

    FixBotに聞いてみる

    コメントを追加

  66. iPhone 17 Pro LiDAR Module Replacement, Install the battery: 手順 66、 2の画像 1 iPhone 17 Pro LiDAR Module Replacement, Install the battery: 手順 66、 2の画像 2
    • Lay the battery tray in place.

    • Make sure not to trap any cables underneath the tray.

    FixBotに聞いてみる

    コメントを追加

  67. iPhone 17 Pro LiDAR Module Replacement, Install the battery tray screws: 手順 67、 2の画像 1 iPhone 17 Pro LiDAR Module Replacement, Install the battery tray screws: 手順 67、 2の画像 2
    • Use a Torx Plus 4IP screwdriver to install the battery tray screws:

    • One 7.5 mm‑long screw

    • One 5.9 mm‑long screw

    • One 3.4 mm‑long screw

    • One 2.3 mm‑long screw

    • Nine 3.7 mm‑long screws

    • One 3.7 mm‑long screw

    • iPhone models with a physical SIM card won't have this screw.

    FixBotに聞いてみる

    コメントを追加

  68. iPhone 17 Pro LiDAR Module Replacement, Clean the frame: 手順 68、 3の画像 1 iPhone 17 Pro LiDAR Module Replacement, Clean the frame: 手順 68、 3の画像 2 iPhone 17 Pro LiDAR Module Replacement, Clean the frame: 手順 68、 3の画像 3
    この手順で使用する道具:
    Tweezers
    $4.99
    • Work around the fragile grounding clips as you clean the frame. If you bend one out of place, gently bend it back with your fingers or tweezers.

    • Use tweezers or your fingers to remove large pieces of adhesive from the frame perimeter.

    • Use a spudger to scrape the adhesive residue off the frame.

    • If the adhesive feels stubborn, apply some heat using a hair dryer or heat gun and try again.

    FixBotに聞いてみる

    コメントを追加

  69. iPhone 17 Pro LiDAR Module Replacement: 手順 69、 1の画像 1
    • Use a lint-free cloth or a coffee filter to wipe in one direction along the perimeter of the frame to clean the adhesive residue.

    • If the residue feels sticky, apply a few drops of isopropyl alcohol to the cloth and wipe again.

    • Take your time doing this. A clean frame allows replacement adhesive to lay evenly, ensuring a better bond.

    FixBotに聞いてみる

    コメントを追加

  70. iPhone 17 Pro LiDAR Module Replacement, Clean the screen: 手順 70、 1の画像 1
    この手順で使用する道具:
    Microfiber Cleaning Cloths
    $3.99
    • If you're reusing your screen, apply a few drops of highly-concentrated isopropyl alcohol (over 90%) to a microfiber or lint-free cloth and wipe around the perimeter to prepare the surface for new adhesive.

    FixBotに聞いてみる

    コメントを追加

  71. iPhone 17 Pro LiDAR Module Replacement, Orient the replacement adhesive: 手順 71、 2の画像 1 iPhone 17 Pro LiDAR Module Replacement, Orient the replacement adhesive: 手順 71、 2の画像 2
    • Without peeling any liners, lay the adhesive sheet over the frame to determine its proper orientation.

    • Use features such as the camera cutout and notches along the top and bottom edges to visualize how the adhesive will lay in the frame.

    FixBotに聞いてみる

    コメントを追加

  72. iPhone 17 Pro LiDAR Module Replacement, Apply the replacement adhesive: 手順 72、 1の画像 1
    • Grab the tab in the corner of the adhesive sheet and peel the liner to expose a third of the adhesive.

    • The exposed adhesive is very sticky. Don't let it touch anything until you're ready to apply it to the frame.

    • If your adhesive has multiple liners, peel the liner that exposes the side that sticks to the frame.

    FixBotに聞いてみる

    コメントを追加

  73. iPhone 17 Pro LiDAR Module Replacement: 手順 73、 2の画像 1 iPhone 17 Pro LiDAR Module Replacement: 手順 73、 2の画像 2
    • Once the adhesive is pressed into place, you can't reposition it—you'll have to remove it and start over with new adhesive.

    • Carefully align the exposed edge of the adhesive strip with the corresponding edge of the iPhone's frame.

    • When it's correctly aligned, gently press the exposed adhesive strip onto the frame.

    FixBotに聞いてみる

    コメントを追加

  74. iPhone 17 Pro LiDAR Module Replacement: 手順 74、 3の画像 1 iPhone 17 Pro LiDAR Module Replacement: 手順 74、 3の画像 2 iPhone 17 Pro LiDAR Module Replacement: 手順 74、 3の画像 3
    • Continue peeling away the liner from the adhesive, gently pressing the adhesive into place.

    • If you've correctly aligned the adhesive, the edges will fall perfectly into place.

    • If your adhesive is slightly misaligned, gently pull the long edges into alignment with the frame.

    • If the adhesive begins to crease or wrinkle, remove it and start over with fresh adhesive.

    • If you don't have another set of adhesive strips handy, it's okay to temporarily put your iPhone back together and use it normally without any adhesive. Just keep in mind that your iPhone's water resistance will be compromised until you replace the adhesive.

    FixBotに聞いてみる

    コメントを追加

  75. iPhone 17 Pro LiDAR Module Replacement: 手順 75、 2の画像 1 iPhone 17 Pro LiDAR Module Replacement: 手順 75、 2の画像 2
    • Use a spudger to press the adhesive around the entire perimeter of your iPhone.

    • Work around the fragile grounding clips. If you bend one out of place, gently bend it back with your fingers or tweezers.

    • Don't press too hard, or you'll stretch and deform the adhesive.

    FixBotに聞いてみる

    コメントを追加

  76. iPhone 17 Pro LiDAR Module Replacement: 手順 76、 3の画像 1 iPhone 17 Pro LiDAR Module Replacement: 手順 76、 3の画像 2 iPhone 17 Pro LiDAR Module Replacement: 手順 76、 3の画像 3
    • Use the pull tab to peel off the large front liner from the adhesive. The pull tab is often in a corner of the liner.

    • At this point, you'll still have liners covering the perimeter. Don't remove these liners yet—they prevent the adhesive from accidentally sticking while you reassemble your iPhone.

    FixBotに聞いてみる

    コメントを追加

  77. iPhone 17 Pro LiDAR Module Replacement, Connect the screen: 手順 77、 1の画像 1
    • Set the iPhone screen next to the frame such that the screen cables can comfortably reach the logic board.

    FixBotに聞いてみる

    コメントを追加

  78. iPhone 17 Pro LiDAR Module Replacement: 手順 78、 3の画像 1 iPhone 17 Pro LiDAR Module Replacement: 手順 78、 3の画像 2 iPhone 17 Pro LiDAR Module Replacement: 手順 78、 3の画像 3
    • Use your finger or the flat end of a spudger to press and connect the two screen connectors onto the logic board.

    • Don't try to force the connector into place. If you're having trouble, reposition it and try again.

    FixBotに聞いてみる

    コメントを追加

  79. iPhone 17 Pro LiDAR Module Replacement, Connect the battery: 手順 79、 2の画像 1 iPhone 17 Pro LiDAR Module Replacement, Connect the battery: 手順 79、 2の画像 2
    • Use your finger or the flat end of a spudger to press and connect the battery connector onto the logic board.

    FixBotに聞いてみる

    コメントを追加

  80. iPhone 17 Pro LiDAR Module Replacement, Test your repair: 手順 80、 1の画像 1
    • This is a good point to test your repair before sealing up your iPhone. Power on your iPhone and make sure it works as expected. Power it back down and continue reassembly.

    • If your iPhone doesn't turn on, connect it to a power source and try again.

    FixBotに聞いてみる

    コメントを追加

  81. iPhone 17 Pro LiDAR Module Replacement, Install the battery connector cover: 手順 81、 2の画像 1 iPhone 17 Pro LiDAR Module Replacement, Install the battery connector cover: 手順 81、 2の画像 2
    • Tuck the top edge of the battery connector cover under the cutout lip.

    • Make sure both tabs are tucked under the lip.

    • Align the cover by its screw hole and lay it in place.

    FixBotに聞いてみる

    コメントを追加

  82. iPhone 17 Pro LiDAR Module Replacement: 手順 82、 1の画像 1
    • Use a JIS 00 screwdriver to install the 1.2 mm‑long screw to secure the battery connector cover.

    FixBotに聞いてみる

    コメントを追加

  83. iPhone 17 Pro LiDAR Module Replacement, Install the screen connector cover: 手順 83、 3の画像 1 iPhone 17 Pro LiDAR Module Replacement, Install the screen connector cover: 手順 83、 3の画像 2 iPhone 17 Pro LiDAR Module Replacement, Install the screen connector cover: 手順 83、 3の画像 3
    • Tuck the left edge of the screen connector cover under the cutout lip.

    • Align the cover by its screw hole and lay it in place.

    FixBotに聞いてみる

    コメントを追加

  84. iPhone 17 Pro LiDAR Module Replacement: 手順 84、 1の画像 1
    • Use a JIS 00 screwdriver to install the 1.2 mm‑long screw to secure the screen connector cover.

    FixBotに聞いてみる

    コメントを追加

  85. iPhone 17 Pro LiDAR Module Replacement, Remove the final adhesive liners: 手順 85、 3の画像 1 iPhone 17 Pro LiDAR Module Replacement, Remove the final adhesive liners: 手順 85、 3の画像 2 iPhone 17 Pro LiDAR Module Replacement, Remove the final adhesive liners: 手順 85、 3の画像 3
    • With one hand hold the screen steady.

    • Use your fingers or a spudger to peel away all perimeter liners, exposing the adhesive.

    • Make sure nothing touches the exposed adhesive.

    • Check the internals for any stray liners and remove them. There should be no liners remaining.

    FixBotに聞いてみる

    コメントを追加

  86. iPhone 17 Pro LiDAR Module Replacement, Install the screen: 手順 86、 3の画像 1 iPhone 17 Pro LiDAR Module Replacement, Install the screen: 手順 86、 3の画像 2 iPhone 17 Pro LiDAR Module Replacement, Install the screen: 手順 86、 3の画像 3
    • Lower the screen onto the frame, beginning with the top edge.

    • If you feel resistance, a perimeter clip may have bent out of place and is being crushed by the frame. Look at the point of resistance and gently straighten any bent clips.

    • Make sure the screen edge isn't pinching any cables.

    • Press along the edges of the iPhone until the screen sits flush against the frame.

    FixBotに聞いてみる

    コメントを追加

  87. iPhone 17 Pro LiDAR Module Replacement: 手順 87、 2の画像 1 iPhone 17 Pro LiDAR Module Replacement: 手順 87、 2の画像 2
    • Firmly squeeze around the entire perimeter of the iPhone.

    FixBotに聞いてみる

    コメントを追加

  88. iPhone 17 Pro LiDAR Module Replacement, Apply heat to the perimeter: 手順 88、 1の画像 1
    • Use a hair dryer or a heat gun to heat the screen perimeter until it's slightly too hot to touch.

    • The heat softens the adhesive and helps create a better bond.

    FixBotに聞いてみる

    コメントを追加

  89. iPhone 17 Pro LiDAR Module Replacement, Install the pentalobe screws: 手順 89、 1の画像 1
    • Use a P2 pentalobe screwdriver to install the two 7.5 mm‑long screws on either side of the charging port.

    FixBotに聞いてみる

    コメントを追加

終わりに

Take your e-waste to an R2 or e-Stewards certified recycler.

Repair didn’t go as planned? Try some basic troubleshooting, or ask our Answers community for help.

キャンセル: このガイドを終了できませんでした。

Arthur Shi

メンバー登録日: 01/03/18

343,685 ポイント

915のガイドは作成済み

0件のガイドコメント

コメントを追加

統計データ:

過去 24時間: 9

過去 7 日: 49

過去 30 日: 257

今までの合計 1,177