はじめに
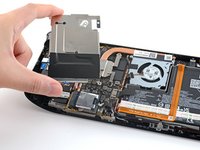
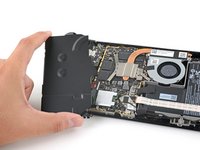
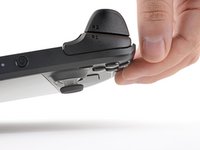
このガイドを使用して、Steam Deck LCDの左側サムスティックを交換します。スティックは完全なモジュールの一部であるため、1 つのユニットとして交換する必要があります。作業は概ね同じですが、右側サムスティックの手順は こちら です。
一般的な静電気放電(ESD)の手順に従うことを忘れないでください。
交換用サムスティックは、正しく起動させるためにキャリブレーションが必要です。その方法についてはこちらのガイドをご覧ください。
注:各スチームデッキには、タイプAまたはタイプBの2種類のサムスティックが同梱されています。どちらのサムスティックが必要かを確認するには、”設定 →システム”を開き、スチームデッキのコントローラIDを確認します。 コントローラIDが”MEDA”で始まる場合、そのデバイスはタイプAのサムスティックを使用し、コントローラIDが”MHDA”で始まる場合、そのデバイスはタイプBのサムスティックを使用します。
必要な工具と部品
ビデオの概要
-
この手順で使用する道具:FixMat$36.95
-
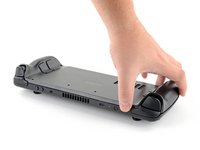
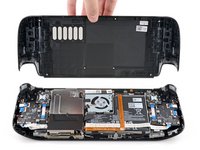
プラスドライバーを使って、バックカバーを固定している8本のネジを外します。
-
長さ9.5mmの粗ネジー4本
-
長さ5.8mmネジー4本
-
-
-
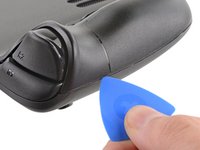
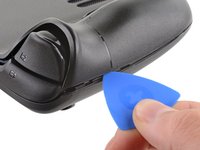
オープニングピックを右側グリップの端に沿って、バックカバーとフロントシェルの間に差し込みます。
-
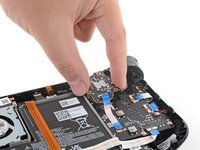
バックカバーをこじ開けると、ロッキングクリップから外れます。
-
-
-
この手順で使用する道具:Tweezers$4.99
-
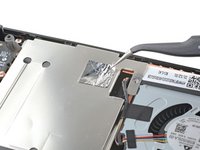
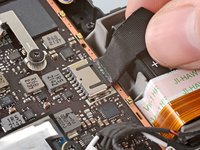
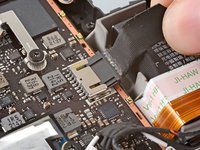
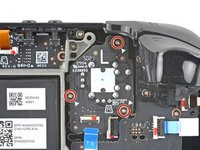
ピンセットを使って、ボードシールド上の隠れたネジを覆っているフォイルテープの一部分を剥がします。
-
-
この手順で使用する道具:Tweezers$4.99
-
-
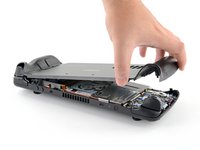
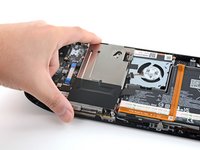
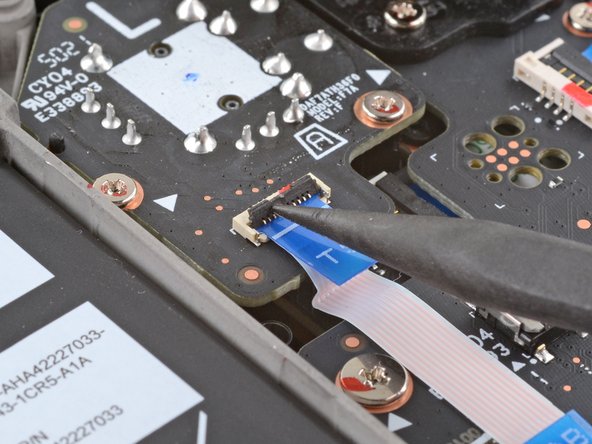
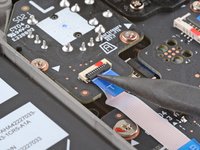
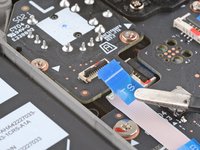
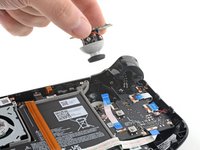
左側のサムスティックを取り出します。
-
どの交換用サムスティックが必要かを確認するには、設定 → システムを開き、Steam Deck Controller IDを確認します。
-


このデバイスを再組み立てするには、インストラクションを逆の順番に従って作業を進めてください。
電子廃棄物(e-waste)は 適切な方法で処分してください。
修理が上手く進みませんか?ベーシックなトラブルシューティングを行うか、 Steam Deckのアンサーコミュニティに尋ねてみましょう。
46 の人々がこのガイドを完成させました。
以下の翻訳者の皆さんにお礼を申し上げます:
100%

これらの翻訳者の方々は世界を修理する私たちのサポートをしてくれています。 あなたも貢献してみませんか?
翻訳を始める ›


14件のガイドコメント
Requires a PH#00 not a #0
NoggleFrap - 返信 共有
#0 worked best on the analog sticks for me. #1 for the external case screws. I've heard to always use the size with the snuggest fit in a screw to prevent striping the heads. Considering I only have these screws and no replacements. I'll opt to use the biggest bit that fits.
Guy_Manley - 返信 共有
You need to start offering the ribbon cables, as they are pretty fragile.
I feel like my steam deck was partially made anti-repair, there was a glue like seal blocking the soldering iron from reaching the solder pad on my left joystick specifically, and the screw hidden by the tape on the shield would not unscrew even though my iFixit screwdriver worker for all the others fine and now I'm pretty sure the head is stripped I even tried a super glue hack a few times and in each case the glue gave before the screw did. I was still able to just barely access the battery connector, but reconnecting it is more work than I'd want.
I wonder if anyone else is seeing odd stuff like this...
Someone should ask valve why their sticks are so clicky. I’ve had multiple sticks all click in in the 6 and 8 positions but only on the left side. I’m tired of it so I’m gonna stop replacing it, after going through 5 sticks if you count my RMA for haptic issues, all left sticks have had this issue.