メインコンテンツにスキップ
Sony Vaio VGN-SZ120P Hard Drive Replacement

Sony Vaio VGN-SZ120P Hard Drive Replacement

Ashley Brooks

Ashley Brooks とその他 10 人の作成者

最終更新日: December 11, 2022

見積もりなし
中レベル
空欄の手順
高画質の画像が必要

If you have not fixed your problem through our Troubleshooting Guide, then you may have to replace your Hard Drive.

Hazards

Keep out of reach of children and pets.

DO NOT attempt to teardown or repair your device under the influence of drugs or alcohol.

DO NOT ingest any parts of the system.

Use the correct tools as stated in the tools section.

DO NOT touch any gold connectors on interior or exterior of the system.

Make sure system is unplugged before performing any maintenance on the system.

NOTICE

Make sure your replacement hard drive is a serial ATA hard drive (SATA). Any other hard drive will be incompatable.

必要な工具と部品

修理キット

キットには、この修理ガイドを完了するために必要な全ての部品とツールが含まれています。

パーツ

ツール

もっと見る

  1. Sony Vaio VGN-SZ120P Hard Drive Replacement, Battery: 手順 1、 1の画像 1
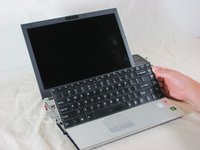
    • Set the computer display-side down.

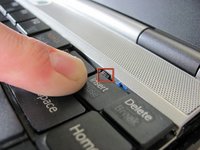
    • Unlock the battery by sliding the port-side latch to the 'unlock' position.

  2. Sony Vaio VGN-SZ120P Hard Drive Replacement: 手順 2、 1の画像 1
    • On the opposite side of the battery, press the release latch and slide the battery away from the main body to remove.

  3. Sony Vaio VGN-SZ120P Hard Drive Replacement, Keyboard: 手順 3、 1の画像 1
    • Ignore the removal of the heat sink and memory panels as depicted. They do not need to be removed for the completion of this guide.

    • Remove the Torx security screw near the center of the battery-side edge.

  4. Sony Vaio VGN-SZ120P Hard Drive Replacement: 手順 4、 2の画像 1 Sony Vaio VGN-SZ120P Hard Drive Replacement: 手順 4、 2の画像 2
    • Press the tabs on each side of the display-side of the keyboard with the flat edge of a spudger.

    • Pull the keyboard toward the mouse pad and gently lift up.

  5. Sony Vaio VGN-SZ120P Hard Drive Replacement: 手順 5、 2の画像 1 Sony Vaio VGN-SZ120P Hard Drive Replacement: 手順 5、 2の画像 2
    • The keyboard is still attached by ribbon cable, don't try to remove the keyboard entirely yet.

    • Disconnect the ribbon cable by pressing the tabs on either side of the connector. Pull the cable out parallel to the connector.

    • Remove the keyboard.

  6. Sony Vaio VGN-SZ120P Hard Drive Replacement, Mouse Assembly: 手順 6、 1の画像 1
    • Turn the laptop upside down.

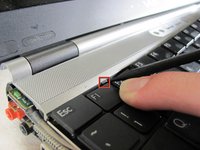
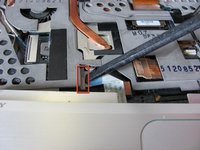
    • Remove the three screws from the front mouse panel located on the bottom of the laptop.

    • Carefully flip the laptop back over. Remove three more screws from the top securing the panel. A ribbon cable will still be attached to the panel when you remove it.

  7. Sony Vaio VGN-SZ120P Hard Drive Replacement: 手順 7、 2の画像 1 Sony Vaio VGN-SZ120P Hard Drive Replacement: 手順 7、 2の画像 2
    • Lift the mouse assembly just enough to access the connecting ribbon cable.

    • Lift the ribbon cable lock to remove the cable.

    • Carefully remove the mouse panel assembly and set aside.

  8. Sony Vaio VGN-SZ120P Hard Drive Replacement, Hard Drive: 手順 8、 1の画像 1
    • This is where your hard drive would be located. The replacement must be a Serial ATA(SATA) hard drive

    • Remove the four hard drive securing screws.

終わりに

To reassemble your device, follow these instructions in reverse order.

20 の人々がこのガイドを完成させました。

作成者

10人の作成者と共同で作成されました。

Ashley Brooks

メンバー登録日: 04/09/10

312 ポイント

4のガイドは作成済み

チーム

Cal Poly, Team 25-89, Amido Spring 2010 Cal Poly, Team 25-89, Amido Spring 2010人のメンバー

CPSU-AMIDO-S10S25G89

4 メンバー

61のガイドは作成済み

3 件のコメント

simple and perfect in every detail

francesco - 返信

como le cambio la pantalla a esta lap

Armand San - 返信

como le puedo cambiar el monitor a este modelo

Armand San - 返信

コメントを追加

統計データ:

過去 24時間: 1

過去 7 日: 11

過去 30 日: 40

今までの合計 40,397