メインコンテンツにスキップ

Samsung Galaxy A40 Charging Board Replacement

必要な工具と部品

ビデオの概要

  1. Samsung Galaxy A40 Charging Board Replacement, Charging Dock / Charging Board: 手順 1、 2の画像 1 Samsung Galaxy A40 Charging Board Replacement, Charging Dock / Charging Board: 手順 1、 2の画像 2
    • The spare part: Daughter board with Charging port, Microphone, Main flex cable connector, display connector, 3G, 4G antennas

  2. Samsung Galaxy A40 Charging Board Replacement, Remove the Back Cover: 手順 2、 3の画像 1 Samsung Galaxy A40 Charging Board Replacement, Remove the Back Cover: 手順 2、 3の画像 2 Samsung Galaxy A40 Charging Board Replacement, Remove the Back Cover: 手順 2、 3の画像 3
    • Turn off the device by pressing and holding the small button on the right side. After a few seconds, press the Power Off button and wait until the device has completely shut off

    • To soften the adhesive, use a heat gun or heating pad to warm up the device.

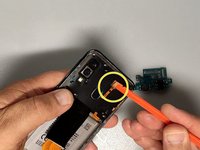
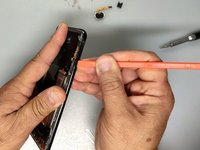
    • Use a Spudger (Or playing card) , Suction Cup, and Isopropyl alcohol to separate the back cover.

  3. Samsung Galaxy A40 Charging Board Replacement, Remove the  Sim Card Tray/Fingerprint Sensor: 手順 3、 3の画像 1 Samsung Galaxy A40 Charging Board Replacement, Remove the  Sim Card Tray/Fingerprint Sensor: 手順 3、 3の画像 2 Samsung Galaxy A40 Charging Board Replacement, Remove the  Sim Card Tray/Fingerprint Sensor: 手順 3、 3の画像 3
    • Be very careful when removing the ribbons in this step! Damaging the ribbons may cause parts of your phone to stop working

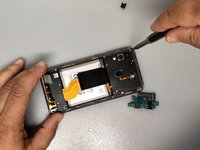
    • Remove the SIM tray.

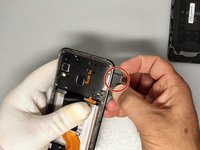
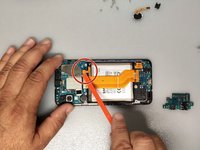
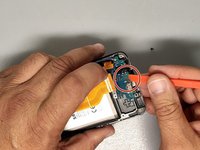
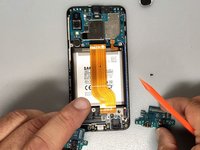
    • Remove the plastic cover that covers the Fingerprint flex connector.

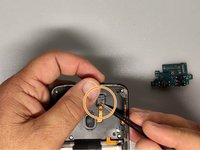
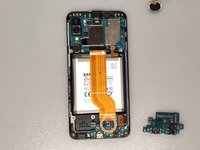
    • Disconnect the Fingerprint Sensor.

  4. Samsung Galaxy A40 Charging Board Replacement: 手順 4、 3の画像 1 Samsung Galaxy A40 Charging Board Replacement: 手順 4、 3の画像 2 Samsung Galaxy A40 Charging Board Replacement: 手順 4、 3の画像 3
    • Remove the 13 screws

    • Remove the back cover

  5. Samsung Galaxy A40 Charging Board Replacement: 手順 5、 2の画像 1 Samsung Galaxy A40 Charging Board Replacement: 手順 5、 2の画像 2
    • Disconnect the Main flex cable, Display flex cable and the Coaxial antenna cable.

    • Remove the black screw securing the charging board.

  6. Samsung Galaxy A40 Charging Board Replacement: 手順 6、 3の画像 1 Samsung Galaxy A40 Charging Board Replacement: 手順 6、 3の画像 2 Samsung Galaxy A40 Charging Board Replacement: 手順 6、 3の画像 3
    • Use Plastic tool to separate the charging board from the frame.

    • Warm the charging board slightly to make it easier to disassemble.

    • Now, install the new board and test the device.

終わりに

To reassemble your device, follow these instructions in reverse order.

ある他の人がこのガイドを完成しました。

作成者

4人の作成者と共同で作成されました。

ZFix

メンバー登録日: 12/09/13

191,308 ポイント

330のガイドは作成済み

チーム

Master Techs Master Techs人のメンバー

Community

322 メンバー

2,535のガイドは作成済み

コメント 1 件

Replaced port but phone now doesn't recognise sim can use WhatsApp though

Ann Sayer - 返信

コメントを追加

統計データ:

過去 24時間: 4

過去 7 日: 27

過去 30 日: 118

今までの合計 5,470