メインコンテンツにスキップ

Packard Bell ms-Hera c Disassembly

必要な工具と部品

  1. Packard Bell ms-Hera c Disassembly, Unscrew the lid: 手順 1、 3の画像 1 Packard Bell ms-Hera c Disassembly, Unscrew the lid: 手順 1、 3の画像 2 Packard Bell ms-Hera c Disassembly, Unscrew the lid: 手順 1、 3の画像 3
    • Remove the battery.

    • Unscrew the red marked screws with a Phillips screwdriver.

    • Remove the DVD reader.

  2. Packard Bell ms-Hera c Disassembly, Disconnect the keyboard: 手順 2、 3の画像 1 Packard Bell ms-Hera c Disassembly, Disconnect the keyboard: 手順 2、 3の画像 2 Packard Bell ms-Hera c Disassembly, Disconnect the keyboard: 手順 2、 3の画像 3
    • Pry in the red marked spots to release the keyboard

    • Unplug the keyboard connector.

  3. Packard Bell ms-Hera c Disassembly, Unplug the cables: 手順 3、 3の画像 1 Packard Bell ms-Hera c Disassembly, Unplug the cables: 手順 3、 3の画像 2 Packard Bell ms-Hera c Disassembly, Unplug the cables: 手順 3、 3の画像 3
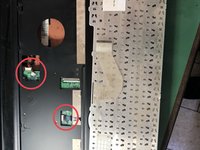
    • Unplug the 3 connectors on the motherboard

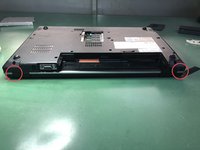
    • Remove the 2 screws holding the display in place

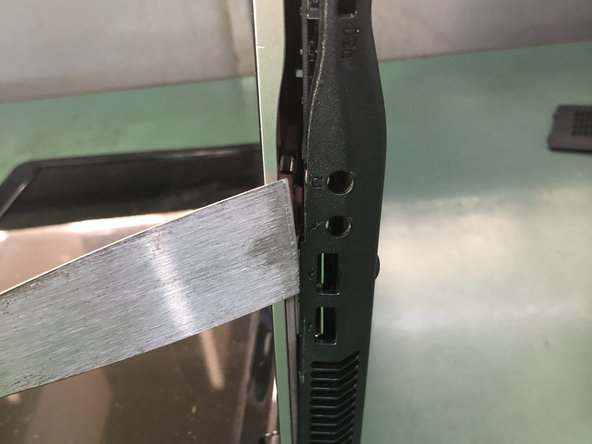
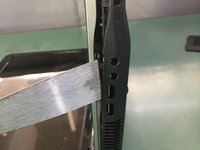
    • Use a thin tool to pry up the back cover of the laptop on the side

  4. Packard Bell ms-Hera c Disassembly, Unscrew the motherboard: 手順 4、 3の画像 1 Packard Bell ms-Hera c Disassembly, Unscrew the motherboard: 手順 4、 3の画像 2 Packard Bell ms-Hera c Disassembly, Unscrew the motherboard: 手順 4、 3の画像 3
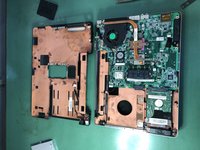
    • Remove the back cover.

    • Remove the HDD.

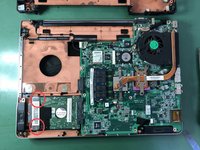
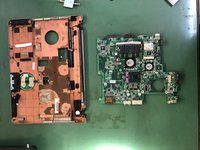
    • Remove the screws that hold the motherboard.

  5. Packard Bell ms-Hera c Disassembly, Remove the display: 手順 5、 3の画像 1 Packard Bell ms-Hera c Disassembly, Remove the display: 手順 5、 3の画像 2 Packard Bell ms-Hera c Disassembly, Remove the display: 手順 5、 3の画像 3
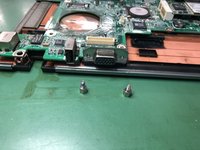
    • Remove the marked screws and connectors.

    • Disconnect the display connector.
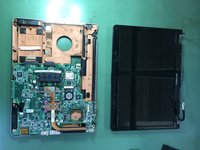
    • Remove the display.

  6. Packard Bell ms-Hera c Disassembly, Remove the heatsink: 手順 6、 3の画像 1 Packard Bell ms-Hera c Disassembly, Remove the heatsink: 手順 6、 3の画像 2 Packard Bell ms-Hera c Disassembly, Remove the heatsink: 手順 6、 3の画像 3
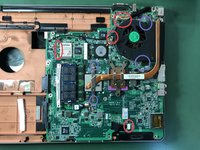
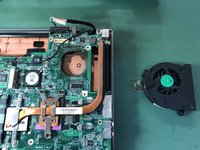
    • Remove the cooling fan.

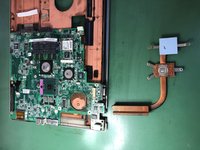
    • Remove the heatsink.

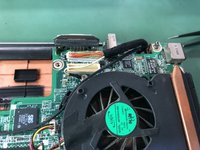
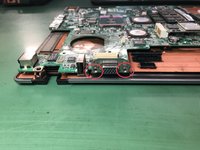
    • Remove the screws on the connector.

  7. Packard Bell ms-Hera c Disassembly, Remove the motherboard: 手順 7、 2の画像 1 Packard Bell ms-Hera c Disassembly, Remove the motherboard: 手順 7、 2の画像 2
    • Remove the screws to remove the motherboard.

終わりに

To reassemble your device, follow these instructions in reverse order.

ある他の人がこのガイドを完成しました。

以下の翻訳者の皆さんにお礼を申し上げます:

it en

100%

これらの翻訳者の方々は世界を修理する私たちのサポートをしてくれています。 あなたも貢献してみませんか?
翻訳を始める ›

作成者

2人の作成者と共同で作成されました。

Smilzo

メンバー登録日: 11/09/13

11,447 ポイント

39のガイドは作成済み

0 件のコメント

コメントを追加

統計データ:

過去 24時間: 0

過去 7 日: 10

過去 30 日: 35

今までの合計 1,181