
Nintendo 3DS XL 2015 サークルパッドの交換
はじめに
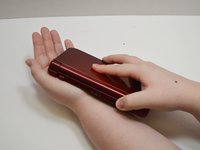
手順 1 に進むこのガイドは、Nintendo 3DS XL 2015の壊れたサークルパッドを交換するための修理ガイドです。サークルパッドが機能しない場合、このガイドを参照してください。修理に必要なものは交換用のサークルパッド、数本のドライバーと忍耐です。これさえあれば、あなたの3DSは元通りになります。


-
-
-
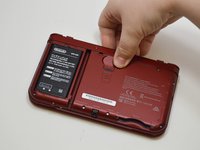
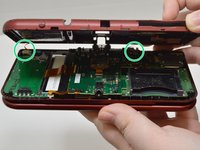
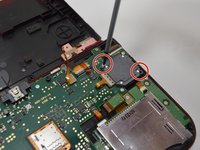
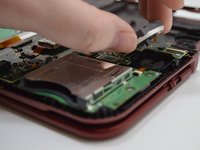
スパッジャーの先端を使って、ZIFコネクタの端を身長に持ち上げて、サークルパッドケーブルを外します。
what am i supposed to do to get the rest of it off? there's a whole part of the circle pad missing in these steps.
-
-
-
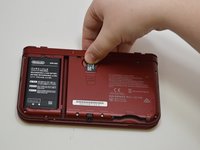
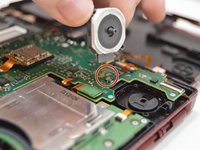
新サークルパッドのアセンブリを準備して、ZIFコネクタにケーブルを挿入して、スパッジャーでコネクタを閉じます。
-
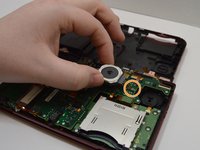
小型ドライバーもしくはスパッジャーで、サークルパッドの内部コンポーネントが正しい位置に装着しているか確認してください。
-
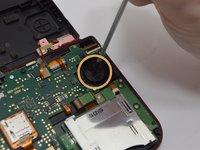
新しいサークルパッドを、正しい位置に取り付けて、ネジで固定します。
No where does this Mention the 3 different sized screws and where they go after disassemble.
Great guide, it could also do with how to replace the rubber top half of the circle pad too. I've also done this. From the photo in step 8, there's a thin split plastic washer underneath the underside of the circle pad still attached to the 3DS. You can carefully slide this washer out through it's split, then you can remove the upper half of the circle pad by carefully sliding one prong of the C shape through the hole, sliding it through going round, then the other prong will side out and it will be removed. To replace, do it in reverse, but it's very fiddly sliding the split washer back into place, but it can be done with tweezers. On all 3DSs I've opened, the notch on the C shape on the underside is facing down towards the bottom, on this photo it's shown facing the top, but I don't know if it makes any difference. This applies to both old and new 3DS XL and I imagine applies to others too.
-


このデバイスを再組み立てするには、インストラクションを逆の順番に従って作業を進めてください。
このデバイスを再組み立てするには、インストラクションを逆の順番に従って作業を進めてください。
23 の人々がこのガイドを完成させました。
以下の翻訳者の皆さんにお礼を申し上げます:
100%

Midori Doiさんは世界中で修理する私たちを助けてくれています! あなたも貢献してみませんか?
翻訳を始める ›
チーム

University of Memphis, Team S5-G2, Baddour Spring 2018 University of Memphis, Team S5-G2, Baddour Spring 2018人のメンバー
UM-BADDOUR-S18S5G2
2 メンバー
6のガイドは作成済み
5 件のコメント
oh my gosh this is the best guide my grand-son and i fixed his sons 3DS he is so happy
Thanks for the guide! I needed to replace the internal component of the circle pad as well, as the rubber pad came off mine. @thirtyninester 's comment on Step 8 helped! Thanks to that comment as well!
Help! I'm stuck on Step 5. Upper leftmost screw refuses to come out and I can't tell whether I've worn down the screwhead or the screwdriver. Removal advice please. Otherwise my only recourse may be to replace the entire system. Just transfer everything datawise and be done with it. It'd be a shame if I had to admit I spent $90+ on parts & tools for nothing just for it to come to this. And I don't even want to think about how much a new unit will cost on the secondhand market. I'll be lucky to find one at it's original MSRP.
Hey,
you could try to use a slightly larger screwdriver and see if the screw comes out. Otherwise you have to drill the screw out which is probably still better/cheaper than replacing everything. Hope this helps!