
Nintendo 2DS のLRボタンの交換
はじめに
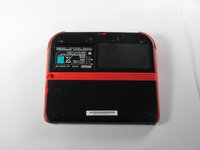
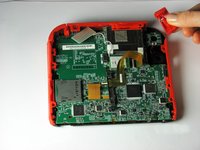
手順 1 に進むNintendo 2DS のこのガイドでは、LRボタンにアクセスして洗浄や交換のために取り出す方法を説明します。
必要な工具と部品

-
-
-
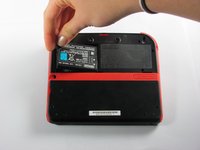
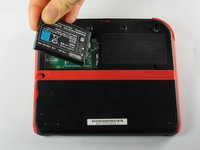
リアパネルに留められたプラスネジを10本外します。
Can't take off the screw top left next to the battery. What type of screwdriver do I use and where can I find some?
Little Mac - 返信
I used a husky with changeable heads, you could probably find one on amazon
The screws are 6.2mm long
god I thought it was because I was repairing a sibling's ds that had something spilled on it (idk maybe that they didn't clean it good when it happened) but continued to struggle even with screws that looked fine... wish I had checked the comments sooner :/ Please like the above, update this guide! It sucks knowing that someone like me is also gonna probably miss this. I didn't get super far but well. I already stripped down some which sucks either way. Ironically, I noticed that using a size slightly smaller gets the job done better. Ironic in that you'd normally avoid that because it's more likely to strip with small bits scrapping the inside. But if you are real careful it can hang on and twist. I'd recommend just getting the JIS but maybe this might work for some- I also want to emphasize SLIGHTLY smaller phillips.
-
-
-
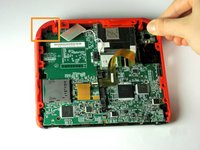
指先やスパッジャーの平らな方の先端を使って、マザーボードに接続されているリボンケーブルが接続されているコネクタをめくり上げます。
-
ケーブルをコネクタから抜いて下さい。
You can also detach the cable from the motherboard safely by flipping up the connector on the motherboard. Just don't forget to reattach. Some will find this tedious but may save time if you know what you're doing with said connectors.
Blackbeard - 返信
I agree, this is what the guide i followed said to do and since I was disconnecting all the other ribbon cables it made perfect sense to do it that way.
Lin -
pay attention: my 2ds dropped it's lens covers at this step
Likewise, I used a tiny drop of glue to put the lens back in place. Take care not to dirty the lens.
The picture you have there has the camera lens ribbon installed upside down. The ribbon needs to be pointing down when you re-attach it not up.
Agreed, ribbon cable looks upside down in picture
-
-
-
LRボタンをデバイスから引き離して取り出します。
Thanks so much for these instructions. My nine year-old son just got Pokemon Sun and Moon on Friday evening. He had been talking about it non-stop for several months. On Saturday, he managed to bend the plastic lip on the base of his 2DS right trigger - the trigger button no longer worked. He was devastated, because we thought he had permanently broken his 2DS. We were afraid he would have to wait until Christmas (over a month away) before we could get him a new one.
I found these instructions via Google, followed them to take apart his 2DS and remove the trigger button. I gently bent the plastic lip of the trigger back with needle nose pliers, reassembled the 2Ds, and the trigger worked perfectly! He now thinks I am the greatest dad in the world.
same situation here
Hi there, does anyone know which type of springs they use in a 2DS? Because I don't really want to pay 7€+15€ shipping just to replace one spring I lost and I could get most sorts and sizes of springs in a hardware store for less than 5€ for 50.
Any help would be very appreciated.
-


デバイスを再組み立てするには、以下の手順を逆の順序で実行してください。
デバイスを再組み立てするには、以下の手順を逆の順序で実行してください。
22 の人々がこのガイドを完成させました。

チーム

Cal Poly, Team 70-1, Forte Winter 2015 Cal Poly, Team 70-1, Forte Winter 2015人のメンバー
CPSU-FORTE-W15S70G1
4 メンバー
35のガイドは作成済み
3 件のコメント
Nice job! My right button was jammed for at least two years. Now I can finally demolish my friends in Mariokart.
Can’t seem to get the second set of screws to budge at all.
Zom baygal - 返信
now what????