Motorola Moto G7 バッテリーの交換
はじめに
手順 1 に進むMotorola Moto G7 は3000 mAhリチウムイオンバッテリーを搭載しています。一年以上このデバイスを使用しているユーザーは、このデバイスは早い速度で充電容量を失っています。バッテリーを交換する必要があります。このガイドを使って、Motorola Moto G7のバッテリーを取り出します。
作業を始める前に、Rescue and Smart Assistantアプリをダウンロードしてデバイスをバックアップし、問題がソフトウェアまたはハードウェアに関連しているかを診断してください。
対応モデルはXT1962-1ですが、XT1962-4とXT1962-5もこの修理ガイドを適用することができます。
作業を始める前に、デバイスの電源が切れて、外付け電源に接続されていないことを確認してください。下に列挙したツールとMotorola Moto G7の交換用バッテリーを準備してください。


-
-
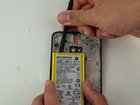
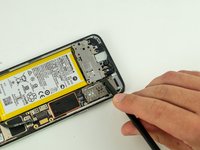
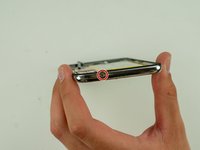
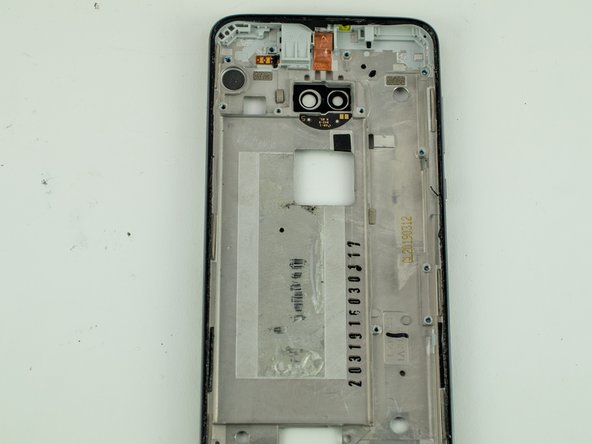
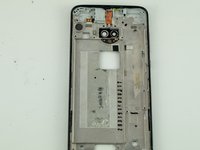
スパッジャーを使って、ネジの側に固定されたメタルピースを慎重に外します。
-
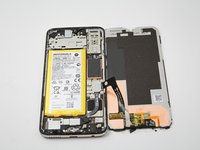
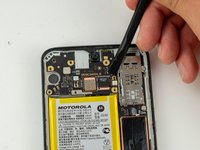
2番目のメタルピースは1番目のメタル下に付いています。スパッジャーを使用して、バンドに接続されているメタルピースの下を軽く引っ張って外すこともできます。
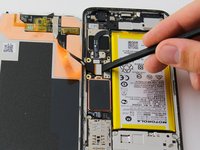
This would also be a good place to disconnect the battery connector, which is right under the display connector.
Daniel Kim - 返信
there is one more piece to remove here. 3 black screws (T3 but longer) and the part visible above the battery on the last image above. Empty space on the top of the image in step 5.
-
-
-
-
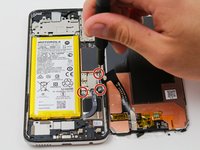
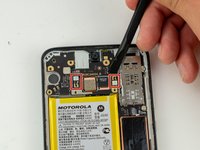
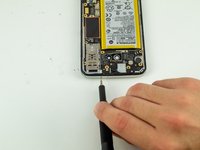
スパッジャーを指紋スキャナーコネクタの角に差し込んで、テコの原理でマザーボードから持ち上げて、コネクタを外します。
The circled part is not the connector, it’s the cable. The connector is just above what the picture shows.
-
-
-
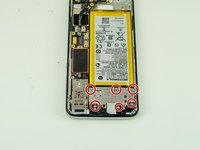
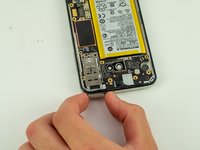
T3トルクスドライバーを使って、デバイスの右下から2.3mmネジを4本外します。
-
-
-
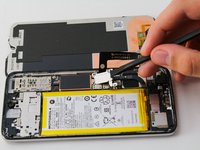
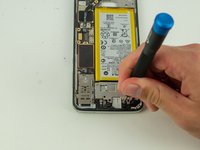
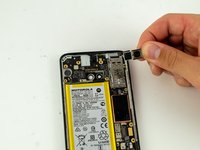
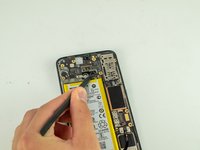
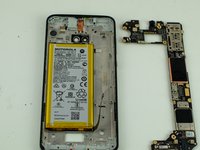
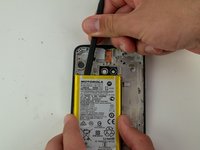
バッテリー上のマザーボードの下にスパッジャーを差し込みます。
-
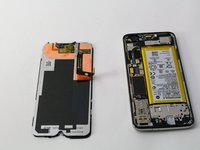
中程度の力で、デバイスのアセンブリ本体からマザーボードをテコの原理で持ち上げて外します。
The microphone/speaker holds the motherboard in. There are no directions here to remove it. It’s still attached in Step 4 but gone in Step 5.
1. In the lower left corner of the phone, there are three black T5 screws that need to be removed.
2. Use your spudger to lift it out of the phone. There are no cables to detach. It has two contacts that press against the motherboard.
3. There is a small white piece of plastic that sits at the edge of the motherboard. The part we just removed holds it in so there should be nothing attaching it to the phone now. Remove it.
(Note: Step 8 of the guide for replacing the motherboard in this phone explains this step.)
-


デバイスを再組み立てする際は、これらの手順を逆の順番に従って作業を進めてください。
デバイスを再組み立てする際は、これらの手順を逆の順番に従って作業を進めてください。
7 の人々がこのガイドを完成させました。
以下の翻訳者の皆さんにお礼を申し上げます:
100%

Midori Doiさんは世界中で修理する私たちを助けてくれています! あなたも貢献してみませんか?
翻訳を始める ›
チーム

Cal Poly, Team S19-G6, White Winter 2020 Cal Poly, Team S19-G6, White Winter 2020人のメンバー
CPSU-WHITE-W20S19G6
4 メンバー
20のガイドは作成済み
16 件のコメント
I don’t know what phone you are replacing a battery on here, but it looks nothing like my Motorola G7, which has a JK50 battery in it. The JK50 is NOT interchangeable with the JG30 you have pictured here and available to order.
The Moto G7 has many variations, including the G7 Play and the G7 Power, which is the model that takes the JK50. These instructions are for the plain vanilla G7.
This is a careless incomplete guide. It skips crucial steps, like removing the speaker subassembly (which the photos clearly show was done but not even mentioned), the buttons connector, and last but not least the battery connector itself. I also have wound up with two mystery rubberized parts which fell out at two separate points in disassembly, which are also never mentioned and which I will now have to black-box to figure out where they came from.
It also glosses over the reassembly, omitting it entirely in fact, thus failing to remind the reader, for instance, not to overlook the fingerprint reader’s connector when reinserting the motherboard and paying heed of the several tabs - and rubber parts which must be considered when reattaching that metal shield over the camera.
Also not mentioned is any suggestion how to replace the original rubberized adhesive “gasket” that attaches the front glass, which is supposed to provide some waterproofness as well as adhesion. In my instance that was compromised before I even started: the battery inflated with gas and bowed the glass front outward. Thank goodness Corning has chosen to evolve Gorilla Glass to be more flexible rather than more scratch-resistant and more brittle, otherwise I’d have had a cracked front. (That battery inflation is now the second occurrence in a second Motorola phone; I am officially spooked of Motorola phones now.)
Yep, about an hour ago my battery and screen just inflated & bowed as well. Should I open it now and disconnect or is it safe to wait till replacement? What adhesive is needed to re apply the screen?
I’m uncertain whether I can obtain a 3rd party replacement for the screen’s gasket, or whether I’m expected to just use some form of gel adhesive. I really don’t want to do the latter, it’s inferior! Since I can’t commit to anything permanent, I’ve literally Scotch-taped the screen for now. :-/
The OLED display began suffering horribly from burn-in less than a year into ownership. That’s a bonus in addition to the battery near-exploding. I’d replace it with a non-Motorola 5G phone, but there’s no money at all to do it.
If I find a replacement for the gasket or conceive another solution, I’ll try to share my decision here. Please do the same if you find something first. If your degree of bowing is substantial already, I’d rush to get a new battery and install it ASAP, before the existing battery gets worse! I bought my battery from Amazon; I’d share a link, but I’m uncertain if that’s encouraged. I’m sure there are plenty of acceptable alternatives. Hopefully you get to avoid duct tape.
How have you progressed with fixing your phone?
This is apparently how you fix the display and front glass back in place: https://www.amazon.com/s?k=2mm+adhesive+.... It’s very narrow 2mm adhesive tape made for the purpose. I’m unsure whether it’s as effective at sealing out water as the original, but it’s not like we have a choice (aside from buying new phones).
Definitely missing a few steps, such as removing the speaker and a little white/red plastic thing, detaching several of the small connectors, and reassembly (especially re-connecting those little connectors).
Inaccurate and misleading. Opening the case was the most difficult step - and - related to it, closing the case did not work. Unlike other phones that just click back the Moto G7 requires an adhesive to stay shut. The adhesive made it very difficult to open and without it, the phone stays partially open. The battery too is held in place with that same tight adhesive making it impossible to remove without bending the battery and risk damaging neighboring structures. I would not recommend replacing the battery on a Moto G7!
I tried one of the many adhesive 1mm tapes offered via Amazon, but it overstated its adhesive properties and it was insufficient to the task: ever since the battery replacement I've been having to repeatedly press down the front glass when it begins to bow itself loose. Recently I finally decided it was time to rectify that and bought some "B-7000" adhesive fluid via Amazon. The plastic tube has a syringe-needle-like applicator tip which should make it rather easy to apply it to the inner frame edge and hopefully reseal it finally.
Regarding the battery, yes, it's secured with very strong adhesive tape, but you CAN remove the battery with considerable care. I did it. That was not one of my several complaints about this poorly scripted guide.
Guide worked great for me. I only had to remove the three screws for the battery connector and the six screws for the camera, and removing the camera was only really needed to make space for tools to pry out the battery. Mine was glued in like a MFer, and the tip about applying heat once I got a bit of a gap really made all the difference, my wife's hair dryer on low heat was plenty good enough.
There are a mind numbing number of variations of the Moto G(7) getting the exact model number from settings is crucial to getting the correct battery and instructions.
Phone booted right up, battery initially was like 15% after it booted, charged up to 100% while we were relaxing in the hot tub, now its off the charger. Battery vendor says it needs a few "cycles" to get full capacity, we'll see.
The factory battery was swelled up enough that opening the case had pretty much already happened, so far $23 for a battery sure beats $250+ for a new phone, this one still meets all my wife's needs. No issues closing it, the case helps alleviate the need for replacing the glue.
Try Loctite Go2. You then should be able to use a little heat if opening is needed in the future.
Loctite 480 might be a better choice.
I just destroyed my screen by dividing it in two parts. You have to be extra careful to dig deep enough in the first step, so you lift the entire screen unit!
Michael - 返信
Thanks... I almost did just that!
Carlisle “Mike” Wick - 返信
I didn't have a problem seperating the screen on my moto G7 or moto Gplay (2021) because the battery "expanded" after 2 years and caused a partial clean separation of the screen and main unit.
The expansion is due to excessive charging mot claims on their support website.
jeff lee - 返信