メインコンテンツにスキップ
Motorola Atrix 4G Top Speaker Replacement

Motorola Atrix 4G Top Speaker Replacement

Derek Walker

Derek Walker とその他 6 人の作成者

最終更新日: February 16, 2022

見積もりなし
中レベル
作成中の学生
テキストが不明瞭

To remove the speaker you will first need to remove the battery, open the phone and remove the motherboard. Be ready to use a plastic opening tool, T5 Torx Screwdriver, spudger and head gun or hair dryer.

必要な工具と部品

ツール

  • iFixit Opening Tool
    iFixit Opening Tool
  • Spudger
    Spudger
  • T5 Torx Screwdriver
    T5 Torx Screwdriver

もっと見る

  1. Motorola Atrix 4G Top Speaker Replacement, Battery: 手順 1、 1の画像 1
    • Pry the back cover off the back of the phone.

  2. Motorola Atrix 4G Top Speaker Replacement: 手順 2、 2の画像 1 Motorola Atrix 4G Top Speaker Replacement: 手順 2、 2の画像 2
    この手順で使用する道具:
    Spudger
    $3.99
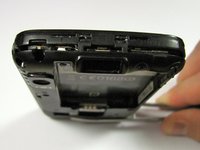
    • Insert a spudger into the small notch at the base of the battery.

    • Lift the battery out of the phone.

  3. Motorola Atrix 4G Top Speaker Replacement, Antenna: 手順 3、 2の画像 1 Motorola Atrix 4G Top Speaker Replacement, Antenna: 手順 3、 2の画像 2
    この手順で使用する道具:
    T5 Torx Screwdriver
    $5.49
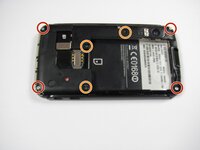
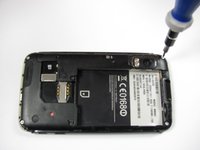
    • Remove the four 5.0 mm T5 Torx screws using a T5 Torx Screwdriver.

    • Remove the three 5.5 mm T5 Torx screws using a T5 Torx Screwdriver.

    • Use gentle force while unscrewing to avoid stripping the screws.

  4. Motorola Atrix 4G Top Speaker Replacement: 手順 4、 1の画像 1
    この手順で使用する道具:
    iFixit Opening Tool
    $1.99
  5. Motorola Atrix 4G Top Speaker Replacement: 手順 5、 2の画像 1 Motorola Atrix 4G Top Speaker Replacement: 手順 5、 2の画像 2
    この手順で使用する道具:
    iFixit Opening Tool
    $1.99
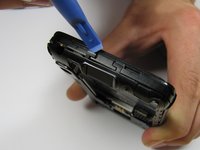
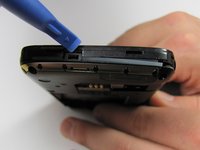
    • Gently lift the tabs located at the top of the phone using an opening tool.

    • Gently lift the tab located at the bottom of the phone with the same tool.

    • Use an opening tool, not your fingers, because the plastic tabs are easily broken.

  6. Motorola Atrix 4G Top Speaker Replacement: 手順 6、 2の画像 1 Motorola Atrix 4G Top Speaker Replacement: 手順 6、 2の画像 2
    この手順で使用する道具:
    iFixit Opening Tool
    $1.99
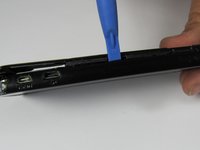
    • Insert an opening tool between the front and back of the case.

    • Slide the tool down the side of the phone.

    • Repeat the same process for the other side.

    • There should be a noticeable gap between the front and back cases. If not, repeat this step.

  7. Motorola Atrix 4G Top Speaker Replacement: 手順 7、 1の画像 1
    • Carefully lift the back case off the phone.

    • Do not completely separate the back case from the phone. The antenna is connected to both cases.

  8. Motorola Atrix 4G Top Speaker Replacement: 手順 8、 1の画像 1
    この手順で使用する道具:
    iFixit Opening Tool
    $1.99
    • Slide an opening tool beneath the antenna and lift straight up from the motherboard.

    • Lift straight upwards, not at an angle, to avoid damaging the socket underneath.

  9. Motorola Atrix 4G Top Speaker Replacement: 手順 9、 1の画像 1
    • Ease the antenna from out of its guide along the side of the phone

    • Remove the back case and the antenna from the phone.

    • The antenna is soldered to the back case. When reassembling, do not pull it with too much force.

  10. Motorola Atrix 4G Top Speaker Replacement, Motherboard: 手順 10、 2の画像 1 Motorola Atrix 4G Top Speaker Replacement, Motherboard: 手順 10、 2の画像 2
    この手順で使用する道具:
    Spudger
    $3.99
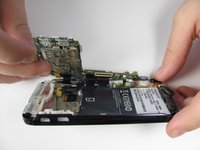
    • Insert a spudger between the black plastic and the motherboard.

    • Lift upwards with the spudger to dislodge the board.

    • The motherboard should lift up easily. If the white rubber piece shifts, move it back to its original place.

  11. Motorola Atrix 4G Top Speaker Replacement: 手順 11、 1の画像 1
    この手順で使用する道具:
    Spudger
    $3.99
    • Disconnect the press connectors using a spudger.

    • If you are unfamiliar with using connectors, consult this guide.

  12. Motorola Atrix 4G Top Speaker Replacement: 手順 12、 1の画像 1
    この手順で使用する道具:
    Spudger
    $3.99
    • Lift the white latch on the ZIF connector using a spudger.

    • Gently pull the black ribbon down and away from the latch.

  13. Motorola Atrix 4G Top Speaker Replacement: 手順 13、 1の画像 1
    • There should be five distinct parts of the phone: the back cover, the back case, the front case, the battery, and the motherboard.

  14. Motorola Atrix 4G Top Speaker Replacement, Top Speaker: 手順 14、 1の画像 1
    • In order to get to the top speaker, first remove the rubber cover located directly over the speaker.

    • The orange adhesive strip needs to be peeled off in order to remove the top speaker. This can be done using fingernails or the spudger tool.

  15. Motorola Atrix 4G Top Speaker Replacement: 手順 15、 1の画像 1
    • Using the spudger, lift up from under the top speaker and it should slide easily out of place.

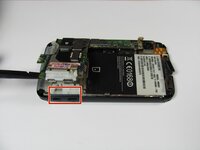
    • Be careful when removing top speaker out of its housing because it is still connected to the phone. You must undo the connection indicated with the orange circle before complete removal.

    • To undo the connector lift the black flap up - edge closest to the speaker - then the cable slides out

終わりに

To reassemble your device, follow these instructions in reverse order.

9 の人々がこのガイドを完成させました。

作成者

6人の作成者と共同で作成されました。

Derek Walker

メンバー登録日: 04/19/12

297 ポイント

4のガイドは作成済み

チーム

Cal Poly, Team 9-42, Regan Spring 2012 Cal Poly, Team 9-42, Regan Spring 2012人のメンバー

CPSU-REGAN-S12S9G42

6 メンバー

15のガイドは作成済み

0 件のコメント

コメントを追加

統計データ:

過去 24時間: 6

過去 7 日: 10

過去 30 日: 10

今までの合計 5,588