
MacBook Unibody Model A1278 Upper Case Replacement

はじめに
手順 1 に進むUse this guide to replace your upper case. The end of this guide details how to transfer the trackpad to your new upper case.


-
-
With the case closed, place the Unibody top-side down on a flat surface.
-
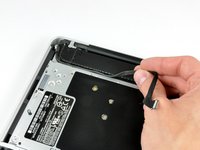
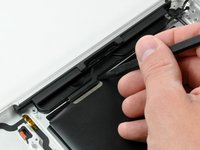
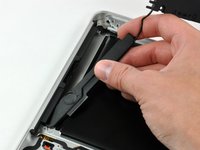
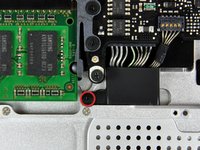
Depress the grooved side of the access door release latch enough to grab the free end. Lift the release latch until it is vertical.
-
-
-
Remove the following eight screws securing the lower case to the chassis:
-
One 3 mm Phillips screw.
-
Three 13.5 mm Phillips screws.
-
Four 3.5 mm Phillips screws.
-
-
-
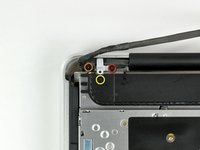
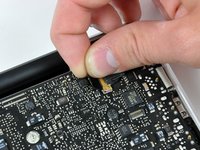
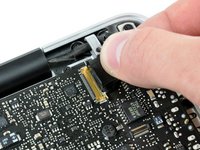
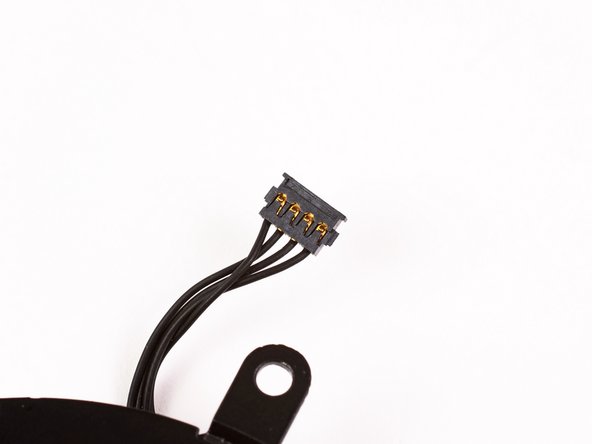
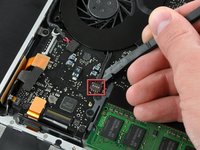
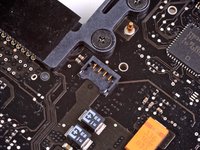
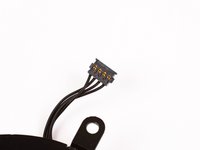
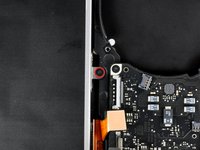
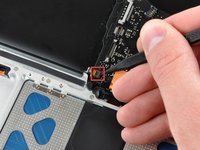
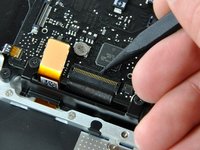
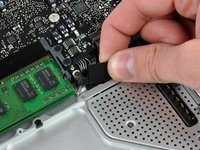
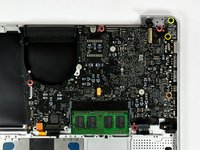
Disconnect the camera cable by pulling the male end straight away from its socket.
-
-
-
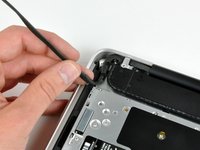
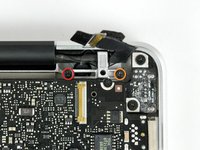
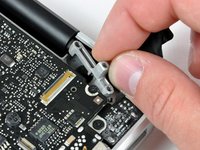
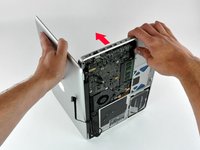
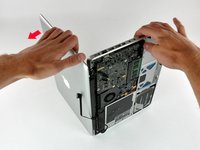
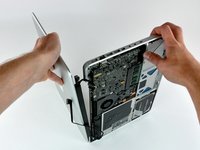
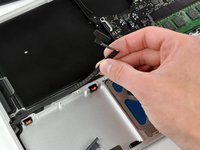
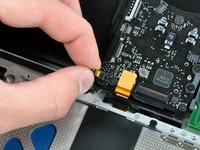
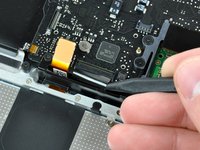
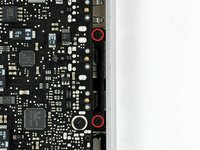
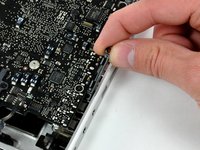
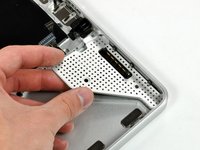
Grab the upper case with your right hand and rotate it slightly toward the top of the display so the upper display bracket clears the edge of the upper case.
-
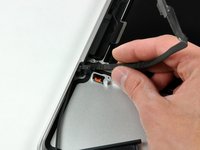
Rotate the display slightly away from the upper case.
-
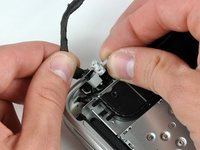
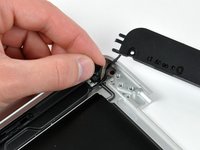
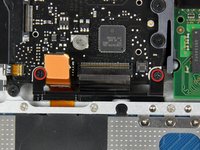
Lift the display away from the upper case, minding any brackets or cables that may get caught.
-
-
-
-
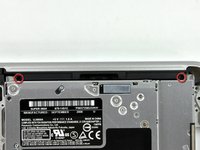
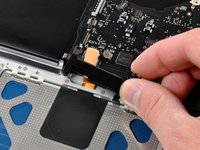
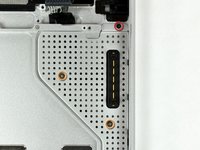
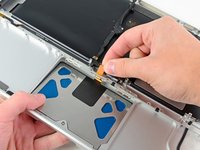
Remove the six 1.4 mm Y0 Tri-wing screws securing the trackpad to the upper case.
-
-
-
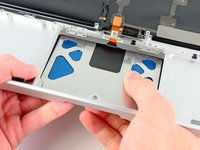
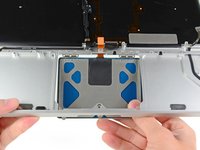
Carefully insert the cable from your old trackpad through its slot cut into your new upper case.
-
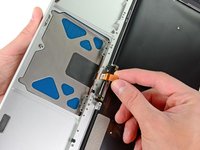
Use one hand to hold the trackpad cable in place as you insert the two retaining tabs on the outer edge of the trackpad under the lip on the upper case.
-
Pull the trackpad cable as you seat the trackpad into its void in your new upper case.
-
-
-
Tighten the outer two screws along the inner edge of the trackpad and check the alignment of it on the outer side of the upper case.
-
If its alignment looks good, install the rest of the Y0 Tri-wing screws along the inner edge of the trackpad.
-
Before reassembling your machine, verify that the set screw is still installed in a position so the mouse will click correctly.
-


To reassemble your device, follow these instructions in reverse order.
To reassemble your device, follow these instructions in reverse order.
36 の人々がこのガイドを完成させました。

12 件のコメント
On steps 50 and 53, be VERY careful to stop tightening the small, weak Y0 screws when you meet even just a little resistance. I made the mistake of tightening them too hard, and broke the tops off of two of them! Luckily I was able to remove one of the screws, but now one of them is stuck in one of the trackpad holes, unable to be removed.
seanheff17 - 返信
i did upgrade to backlit keyboard by adding the backlight to my keyboard. All works well thanks to this guide. Just try to keep all the screws in theyr place coz you can mistake them very easy and screwing the wrong screw in the wrong holle you may endup damaging the body(i hope it make sense). Good Luck
Actually I was looking for a way to remove only the keyboard to clean it, but since there is no guide I followed this one for most of the steps. No need to remove the display assembly and trackpad. But beware that after you remove the logic board and optical drive, you have to remove 3 layers (black, transparent and white) of foil covering the back of the keyboard and then there are like 50 absurdly tiny screws holding the keyboard to the frame. Also there are 2 screws in the upper left corner holding the power button which is connected to the keyboard through a small ribbon cable. After that you can lift the keyboard out easily.
cheers mate thats the info i needed.
communit -
Tips: Label Screws by guide step number and size as you go. That way you can easily backtrack and any divergences between your machine's screws and the guide's will be a non-issue.
Also, be careful when removing and tightening screws. I stripped one of my screws and almost needed to call in the pros.
Use common sense throughout your fix. Nothing should be forced. Take breaks and return with a clear head.
Good luck!