
Mac mini Mid 2010 ハードドライブ

はじめに
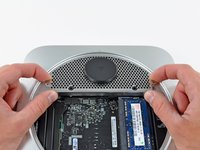
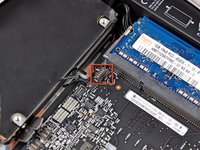
手順 1 に進むこのガイドを参照して、Miniのハードドライブ の交換をしましょう。このガイドを完了するには、ラバーセメントを古いサーマルセンサーに装着してください。
必要な工具と部品
修理キット
キットには、この修理ガイドを完了するために必要な全ての部品とツールが含まれています。


パーツ


ツール


もっと見る
-
-
-
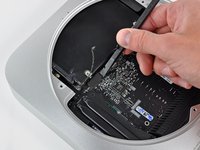
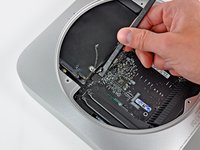
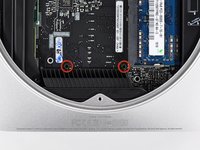
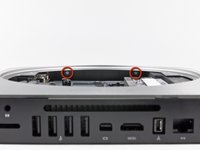
次の3本のネジを外します。
-
5.0 mm T8トルクス、もしくは2.0 mm六角ネジー1本
-
16.2 mm T6トルクスネジー1本
-
26 mm T6トルクススタンドオフー1本
-


のデバイスを再組み立てするには、インストラクションを逆の順番に従って作業を進めてください。
のデバイスを再組み立てするには、インストラクションを逆の順番に従って作業を進めてください。
425 の人々がこのガイドを完成させました。
以下の翻訳者の皆さんにお礼を申し上げます:
100%

Midori Doiさんは世界中で修理する私たちを助けてくれています! あなたも貢献してみませんか?
翻訳を始める ›

38 件のコメント
These instructions and a little common sense can also be used to replace the lower hard drive in the server version of the Mac Mini. Luckily that was the drive that had failed in my case. Replacing the upper drive looks like a tougher proposition.
Fantastic guide, thank you very much Mr. Bookholt!
As with the above commenter, I accidentally mistook the fan's standoff for a screw and removed it while removing the fan. Also the top right fan screw's standoff came out along with it. I edited the guide with a note on this.
While replacing the antenna, it wasn't immediately clear why the screws weren't lining up, until I realized that two of the screws were in the (otherwise free-floating but for the back grommets) hard drive, I also added a note on that.
Jon Bailey - 返信
STEP 15: If you don't have the time to purchase the Mac Mini Logic Board Removal Tool, the round stock on a large binder clip is PERFECT for the job. It requires a little bending and cutting but it worked perfectly!!
And as jon jon stated, it works like a lever - not a pull. You can feel it kind of click in to the lever points below.
Bravo to ifixit.com for the easy to follow instruction!!
Hey, what about the 2nd harddrive? how does that come out?
This was a superb guide. Thank you very, very much.
Ok, just did here. 1 tera HD working fine. Thanks iFixit, for repacking my tools because the Brazilian mail lost them. So, for those who want to do the same, just have in mind that not ALL things happen just like the how-to. I have to figure out What to do with the logic board removal tool... And, no, I did not fuss with those initial thermal stuff, because they are impossible to unplug. I only fuss with the HD thermal.