メインコンテンツにスキップ
MSI MS-1782 Battery Replacement

MSI MS-1782 Battery Replacement

Enmanuel Mota

Enmanuel Mota とその他 2 人の作成者

最終更新日: June 1, 2023

25分
中レベル

This guide will show you the steps necessary to replace the battery in the MSI MS-1782 laptop. The battery may need to be replaced if your laptop does not retain any charge, or if it does not charge at all. Check the troubleshooting page for more information.

必要な工具と部品

ツール

  1. MSI MS-1782 Battery Replacement, Back Cover: 手順 1、 1の画像 1
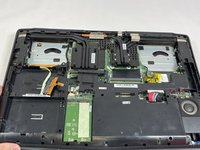
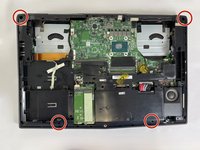
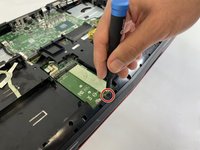
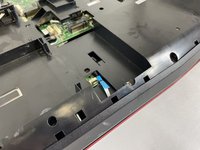
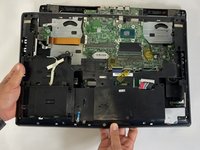
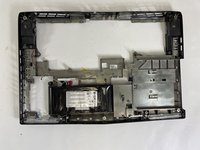
    • Remove five 6.6 mm screws from the edges of the bottom cover using a JIS #1 screwdriver.

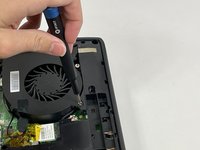
    • Remove one 5.6 mm screw from the center of the bottom cover using a JIS #1 screwdriver.

  2. MSI MS-1782 Battery Replacement: 手順 2、 3の画像 1 MSI MS-1782 Battery Replacement: 手順 2、 3の画像 2 MSI MS-1782 Battery Replacement: 手順 2、 3の画像 3
    • Use an iFixit opening pick to unclip the bottom cover.

    • It is ok to run the picks along the edges since there is nothing connected to the bottom cover. It is easier to start from the sides and then work your way forward.

    • After unclipping the bottom case, pull from the back of the laptop upwards using the lip of the bottom case as a handle.

  3. MSI MS-1782 Battery Replacement, Cooling Assembly: 手順 3、 3の画像 1 MSI MS-1782 Battery Replacement, Cooling Assembly: 手順 3、 3の画像 2 MSI MS-1782 Battery Replacement, Cooling Assembly: 手順 3、 3の画像 3
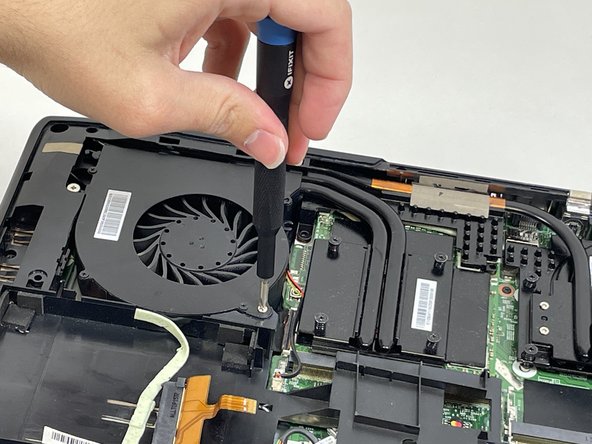
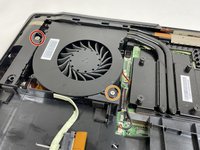
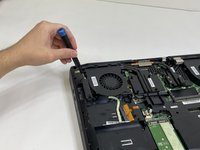
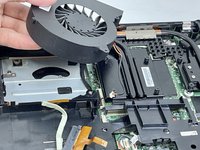
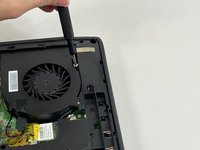
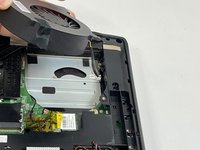
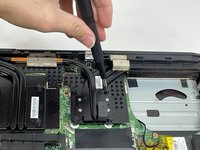
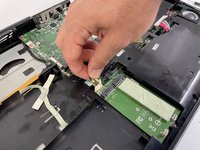
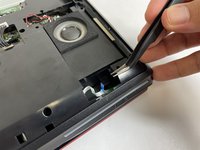
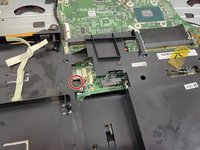
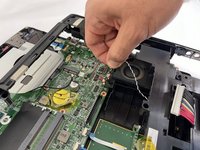
    • Loosen the captive screw on the left side of the left fan using a JIS #2 screwdriver.

    • Remove the 5.1 mm screw on the right side of the left fan using a JIS #2 screwdriver.

  4. MSI MS-1782 Battery Replacement: 手順 4、 3の画像 1 MSI MS-1782 Battery Replacement: 手順 4、 3の画像 2 MSI MS-1782 Battery Replacement: 手順 4、 3の画像 3
    • Gently detach the fan connector.

    • Remove the fan by lifting it out of its housing.

    • Be sure to handle the wire delicately; if not it will break.

  5. MSI MS-1782 Battery Replacement: 手順 5、 3の画像 1 MSI MS-1782 Battery Replacement: 手順 5、 3の画像 2 MSI MS-1782 Battery Replacement: 手順 5、 3の画像 3
    • Loosen the captive screw on the top of the right fan using a JIS #2 screwdriver.

    • Remove the 3.6 mm screw on the bottom of the right fan using a JIS #2 screwdriver.

  6. MSI MS-1782 Battery Replacement: 手順 6、 3の画像 1 MSI MS-1782 Battery Replacement: 手順 6、 3の画像 2 MSI MS-1782 Battery Replacement: 手順 6、 3の画像 3
    • Gently detach the fan connector.

    • Remove the fan by lifting it out of its housing.

    • Be sure to handle the wire delicately; if not it will break.

  7. MSI MS-1782 Battery Replacement: 手順 7、 3の画像 1 MSI MS-1782 Battery Replacement: 手順 7、 3の画像 2 MSI MS-1782 Battery Replacement: 手順 7、 3の画像 3
    • Loosen the eight captive screws holding the heat sink in place using a JIS #2 screwdriver.

    • Be sure to follow the numbers that are next to the screws on the heatsink. This evenly removes pressure on the components when removing the heatsink.

  8. MSI MS-1782 Battery Replacement: 手順 8、 3の画像 1 MSI MS-1782 Battery Replacement: 手順 8、 3の画像 2 MSI MS-1782 Battery Replacement: 手順 8、 3の画像 3
    • Gently lift the heat sink and then pull forwards towards you.

  9. MSI MS-1782 Battery Replacement, Battery: 手順 9、 3の画像 1 MSI MS-1782 Battery Replacement, Battery: 手順 9、 3の画像 2 MSI MS-1782 Battery Replacement, Battery: 手順 9、 3の画像 3
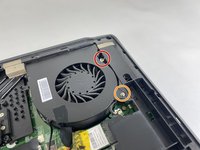
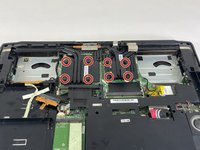
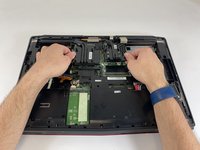
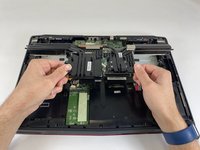
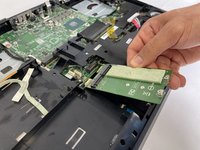
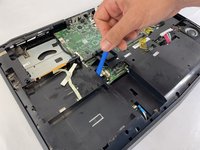
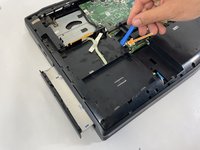
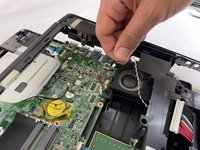
    • Remove the four 5.5 mm screws holding the battery frame in place using a JIS #1 screwdriver.

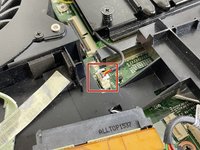
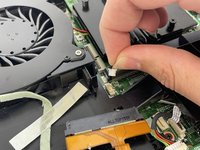
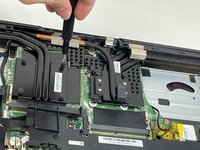
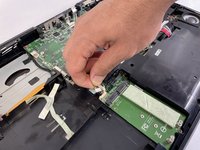
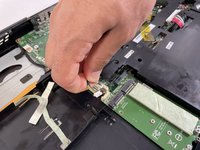
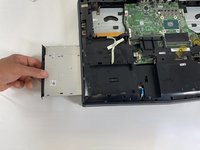
    • Gently disconnect the cable connecting the M.2 caddy to the motherboard.

  10. MSI MS-1782 Battery Replacement: 手順 10、 3の画像 1 MSI MS-1782 Battery Replacement: 手順 10、 3の画像 2 MSI MS-1782 Battery Replacement: 手順 10、 3の画像 3
    • Remove the 3.6 mm screw holding the M.2 caddy in place using a JIS #1 screwdriver.

  11. MSI MS-1782 Battery Replacement: 手順 11、 3の画像 1 MSI MS-1782 Battery Replacement: 手順 11、 3の画像 2 MSI MS-1782 Battery Replacement: 手順 11、 3の画像 3
    • Gently disconnect the two blue ribbons.

  12. MSI MS-1782 Battery Replacement: 手順 12、 3の画像 1 MSI MS-1782 Battery Replacement: 手順 12、 3の画像 2 MSI MS-1782 Battery Replacement: 手順 12、 3の画像 3
    • Remove the 5.1 mm screw holding in the disk reader using a JIS #1 screwdriver.

    • Use an iFixit opening tool to push the back of the disk reader to push it out of the laptop's chassis.

  13. MSI MS-1782 Battery Replacement: 手順 13、 3の画像 1 MSI MS-1782 Battery Replacement: 手順 13、 3の画像 2 MSI MS-1782 Battery Replacement: 手順 13、 3の画像 3
    • Gently pull the disc reader out of the laptop.

    • Lift the plastic cover and disconnect the cable connected next to the speaker.

  14. MSI MS-1782 Battery Replacement: 手順 14、 1の画像 1
    • Remove the five 5 mm screws holding the frame in place using a JIS #1 screwdriver.

  15. MSI MS-1782 Battery Replacement: 手順 15、 3の画像 1 MSI MS-1782 Battery Replacement: 手順 15、 3の画像 2 MSI MS-1782 Battery Replacement: 手順 15、 3の画像 3
    • Pry up on the battery frame with an opening tool and unclip from the main chassis, working your way around the laptop.

    • To remove the battery, pry up on it to unstick the adhesive.

    • A little Isopropyl alcohol under the battery can help unstick it from the frame.

終わりに

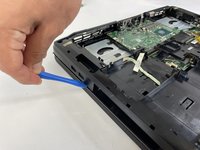
To reassemble your device, follow these instructions in reverse order.

作成者

2人の作成者と共同で作成されました。

Enmanuel Mota

メンバー登録日: 03/08/23

229 ポイント

2のガイドは作成済み

チーム

University of New Orleans, Team 4-4, McDonald Spring 2023 University of New Orleans, Team 4-4, McDonald Spring 2023人のメンバー

UNO-MCDONALD-S23S4G4

3 メンバー

7のガイドは作成済み

0 件のコメント

コメントを追加

統計データ:

過去 24時間: 6

過去 7 日: 21

過去 30 日: 43

今までの合計 713