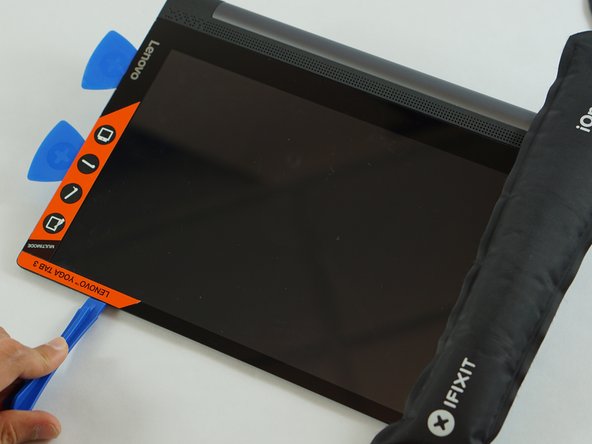
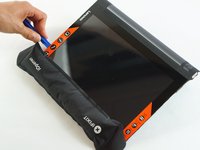
メインコンテンツにスキップ

Lenovo Yoga Tab 3 10 LCD Replacement

必要な工具と部品

  1. Lenovo Yoga Tab 3 10 LCD Replacement, Back Cover: 手順 1、 1の画像 1
    • Open the built-in kickstand.

  2. Lenovo Yoga Tab 3 10 LCD Replacement: 手順 2、 3の画像 1 Lenovo Yoga Tab 3 10 LCD Replacement: 手順 2、 3の画像 2 Lenovo Yoga Tab 3 10 LCD Replacement: 手順 2、 3の画像 3
    • Remove the sticker located directly under the the built-in kickstand to reveal two 0.75 mm screws.

    • Remove the microSD card slot cover. Remove any microSD card (if inserted).

    • Using a Phillips head screwdriver, remove the three 0.75 mm screws.

  3. Lenovo Yoga Tab 3 10 LCD Replacement: 手順 3、 3の画像 1 Lenovo Yoga Tab 3 10 LCD Replacement: 手順 3、 3の画像 2 Lenovo Yoga Tab 3 10 LCD Replacement: 手順 3、 3の画像 3
    • Orient the device so the screen is facing you.

    • Carefully insert the spudger along the seam between the screen and back cover and gently separate the back cover from the device frame.

    • Continue to detach the backplate from the frame by moving the spudger around the perimeter.

    • Some force will be required to detach the small plastic braces securing the backplate to the device.

  4. Lenovo Yoga Tab 3 10 LCD Replacement, LCD: 手順 4、 3の画像 1 Lenovo Yoga Tab 3 10 LCD Replacement, LCD: 手順 4、 3の画像 2 Lenovo Yoga Tab 3 10 LCD Replacement, LCD: 手順 4、 3の画像 3
    • Before detaching the LCD and digitiser connectors, remove the two small screws at the top left (red bordered area in photo). Remove the metal shield and disconnect the battery wire.

  5. Lenovo Yoga Tab 3 10 LCD Replacement: 手順 5、 3の画像 1 Lenovo Yoga Tab 3 10 LCD Replacement: 手順 5、 3の画像 2 Lenovo Yoga Tab 3 10 LCD Replacement: 手順 5、 3の画像 3
    • With tweezers, lift the locking flaps and detach the connected ribbon cables for both the LCD and digitizer (blue bordered areas in previous step photo)

    • Using a spudger lift the gold- colored base up away from the adhesive.

    • This particularly ribbon connection will likely be difficult to detach from the casing. Proceed with patience and caution during removal process.

    • Check your replacement LCD to see if it includes a new ribbon cable (black one in second photo). If not, you'll need to peel up the tape securing it, and disconnect it at the LCD end instead of the motherboard end.

  6. Lenovo Yoga Tab 3 10 LCD Replacement: 手順 6、 1の画像 1
    • Using the iOpener place it along the edges of the device to weaken the adhesive.

    • The applied heat is strictly to loosen the adhesive portion around the perimeter and should not come in contact with the LCD.

    • Wear safety glasses to protect your eyes, and be careful not to damage the LCD screen.

  7. Lenovo Yoga Tab 3 10 LCD Replacement: 手順 7、 3の画像 1 Lenovo Yoga Tab 3 10 LCD Replacement: 手順 7、 3の画像 2 Lenovo Yoga Tab 3 10 LCD Replacement: 手順 7、 3の画像 3
    • Using the plastic opening tools separate the screen from the device.

    • Proceed with patience. Applying too much pressure and force here can result in damage to the delicate glass panel or underlying LCD.

  8. Lenovo Yoga Tab 3 10 LCD Replacement: 手順 8、 1の画像 1
    • Lift the screen gently from the device.

    • Make sure the cable ribbon is pulled through safely.

    • Some adhesive may still be connected so be patient when removing the screen.

終わりに

To reassemble your device, follow these instructions in reverse order.

18 の人々がこのガイドを完成させました。

作成者

9人の作成者と共同で作成されました。

Phanudej

メンバー登録日: 02/20/17

1,184 ポイント

5のガイドは作成済み

チーム

USF Tampa, Team S3-G2, Sullivan Spring 2017 USF Tampa, Team S3-G2, Sullivan Spring 2017人のメンバー

USFT-SULLIVAN-S17S3G2

4 メンバー

18のガイドは作成済み

9 件のコメント

Hello where can I find a replacement screen and digitizer please?

Hend Farid - 返信

Decir ahaepwjw098

monic119 - 返信

how can i change digitizer only?

Fernando Benitez - 返信

Isn’t this about changing the glass screen instead of the LCD as the title says?

Mohamed hemsas - 返信

コメントを追加

統計データ:

過去 24時間: 4

過去 7 日: 20

過去 30 日: 103

今までの合計 30,522