
Kindle Paperwhite 1st Generation Screen Replacement
必要な工具と部品
パーツ

ツール


もっと見る
-
-
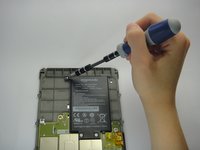
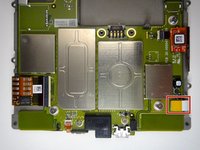
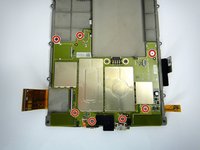
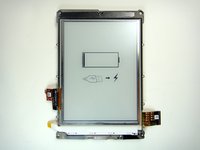
Turn over the midframe to locate the battery.
-
Remove the three Phillips 3.0 mm screws securing the battery to the midframe.
-
-
-
-
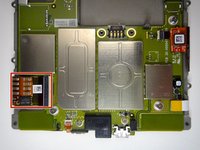
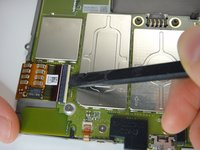
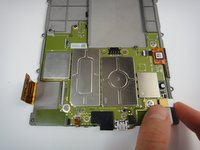
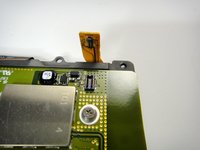
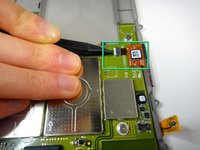
Use a spudger to lift up the retaining flap on the large ZIF connector at the bottom left of the motherboard.
-
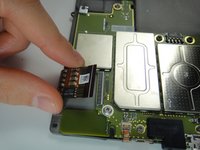
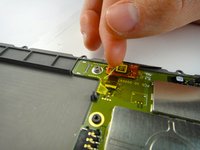
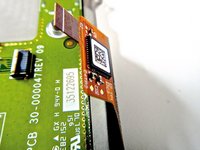
Gently pull the large ribbon cable out of the ZIF connector.
-


To reassemble your device, follow these instructions in reverse order.
To reassemble your device, follow these instructions in reverse order.
25 の人々がこのガイドを完成させました。
チーム

Cal Poly, Team 3-33, Amido Winter 2013 Cal Poly, Team 3-33, Amido Winter 2013人のメンバー
CPSU-AMIDO-W13S3G33
4 メンバー
17のガイドは作成済み
17 件のコメント
A few points.
1 could be clearer as to which particular model is being used in this dis-assembly (is this the wifi version?).
2 could do with showing the removal of MB from system (not hard but incomplete without it).
3Can you either go further by demonstrating how to remove screen from mid frame and or identify a supplier of the midframe and lcd combined? This would be particularly helpful as the screen appears to be completely glued to the midframe with no obvious way to remove it.
It’s the wifi version. I’ve just fitted a screen to the 3G version.
Difference is that (if you look at the top of the picture in step 8), there’s a populated SIM card slot on the board, above that a modem daughter board you can unscrew, and plugged into this antenna leads that go to an antenna mounted on the top of the main frame.
Only difference in repair would be that you’d have to unscrew the modem and pop off the MMCX connector the antenna uses.
One problem I did have is that on my Kindle there seems to be an antenna-tape-thing at the top of the frame (https://youtu.be/-SEG4NDb2JY?t=58s - on frame directly above the top of the screen).
When I pried off the bezel, (in my case) this stuck to the bezel not the frame, so it ripped. Might be worth heating the top of the bezel before peeling it off - but apart from that don’t see what you could do.
Anyway, my kindle is all back together again and 3G both seem to be working - so not too worried.
Whilst this is a lovely example on how to get to the point when you remove the screen best you all be beware the the original Paperwhite (The one I took apart) screen is bonded glass to metal and is practically impossible to clean off. After a great deal of scraping I got to the point where I could fit my replacement screen. Alas all my work has been wasted so far because the replacement screen is not up to scratch. Personally, after attempting replacing the screen I'd pay the £60 to get someone else to replace it.
My replacement screen didn’t come with a frame, so I had to separate old screen from the frame.
I heated the screen and managed to lever it out, but edges of the screen crumbled to glass dust as I pried the screen.
Shot of contact cleaner seemed to allow me to get the crumbled glass out of the glue layer on the frame.
Pretty sure it’s not possible to remove a screen from a frame and not destroy it.
Maybe you guys can help me:
I have a paperwhite 1st-gen that doesn't charge via usb anymore, but the screen is perfect. At first i wanted to replace the usb jack, buti then I found a paperwhite 2nd-gen with a defect screen.
So I decided to dissasemble both of them and assemble them to one working device. I used the 1st-gen-screen and the 2nd-gen-board. But when I switch it on and do a reset i get the error: "INVALID BATTERY: -22".