
HP Stream x360 11-p015wm Battery Replacement
見積もりなし
中レベル
不一致の必要条件
より良い紹介部分
詳細が不足
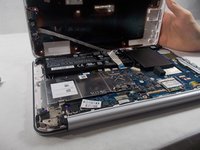
必要な工具と部品


-
-
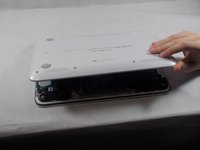
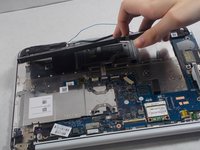
Orient the laptop to have the back cover facing upwards.
-
Remove the four rubber pads located in each corner.
-
-


もう少しです!
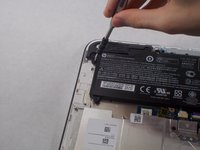
To reassemble your device, follow these instructions in reverse order.
終わりに
To reassemble your device, follow these instructions in reverse order.
チーム

UMass Dartmouth, Team S1-G2, Valliere Fall 2018 UMass Dartmouth, Team S1-G2, Valliere Fall 2018人のメンバー
UMASSD-VALLIERE-F18S1G2
4 メンバー
6のガイドは作成済み