
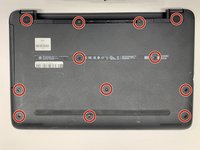
HP Pavilion 15-ba003ds RAM Replacement

はじめに
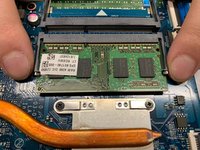
手順 1 に進むThis guide will detail how to replace the RAM modules in your HP Pavilion 15-ba003ds. You can use this guide if you’re having troubles with RAM, would like to upgrade the amount of RAM in your system, or have problems with blue screens as your RAM modules may be faulty.


-
-
Unplug the AC adapter from the corresponding socket in the laptop.
-
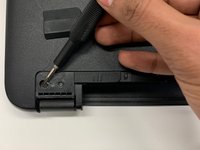
Use your fingers to push the slider located just under the battery on either side to unlock the battery from the laptop.
-
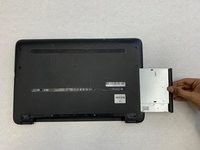
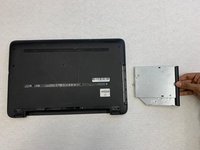
Carefully slide the battery out of the laptop frame and place it somewhere safe.
-
-


To reassemble your device, follow these instructions in reverse order.
To reassemble your device, follow these instructions in reverse order.

チーム

York University, Team S1-G9, Woodhouse Winter 2020 York University, Team S1-G9, Woodhouse Winter 2020人のメンバー
YORK-WOODHOUSE-W20S1G9
3 メンバー
8のガイドは作成済み