メインコンテンツにスキップ
HP EliteBook x360 830 G6 SSD Replacement

HP EliteBook x360 830 G6 SSD Replacement

Clay Eickemeyer

Clay Eickemeyer とその他 3 人の作成者

最終更新日: February 15, 2023

15 - 30 分
中レベル

Use this guide to remove and replace the Solid State Drive (SSD) in your HP EliteBook x360 830 G6.

Before you perform this repair, back up your existing SSD if possible. If you’re replacing the SSD where your operating system is installed, familiarize yourself with a disk cloning utility so you’ll be ready to migrate your data to the new SSD.

必要な工具と部品

修理キット

キットには、この修理ガイドを完了するために必要な全ての部品とツールが含まれています。

パーツ

ツール

もっと見る

  1. HP EliteBook x360 830 G6 SSD Replacement, Unfasten the back cover: 手順 1、 1の画像 1
    • For your safety, discharge the battery below 25% and power down your device before disassembly.

    • Use a Torx T5 screwdriver to loosen the five captive screws holding the back cover.

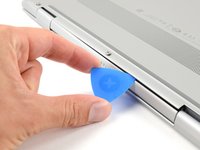
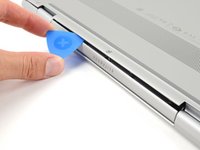
  2. HP EliteBook x360 830 G6 SSD Replacement, Release the clips: 手順 2、 2の画像 1 HP EliteBook x360 830 G6 SSD Replacement, Release the clips: 手順 2、 2の画像 2
    • Insert an opening pick between a corner of the back corner and the chassis, near a hinge.

    • Pry upward to release the retaining clips.

    • These clips will make an audible click when they release.

    • Repeat this process for the opposite corner.

  3. HP EliteBook x360 830 G6 SSD Replacement, Release the remaining clips: 手順 3、 2の画像 1 HP EliteBook x360 830 G6 SSD Replacement, Release the remaining clips: 手順 3、 2の画像 2
    • Insert your opening pick between the back cover and chassis, along the edge of the cover between the hinges.

    • Pry up to release the additional retaining clips.

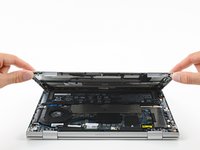
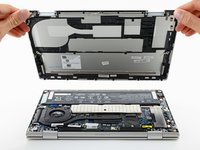
  4. HP EliteBook x360 830 G6 SSD Replacement, Remove the back cover: 手順 4、 3の画像 1 HP EliteBook x360 830 G6 SSD Replacement, Remove the back cover: 手順 4、 3の画像 2 HP EliteBook x360 830 G6 SSD Replacement, Remove the back cover: 手順 4、 3の画像 3
    • Grab the cover by the corners next to the hinges.

    • Swing the cover open and away from you.

    • If the back cover feels stuck to the chassis, use an opening pick to release remaining clips around the perimeter of the back cover.

    • Lift and remove the back cover from the laptop body.

  5. HP EliteBook x360 830 G6 SSD Replacement, Disconnect the battery: 手順 5、 3の画像 1 HP EliteBook x360 830 G6 SSD Replacement, Disconnect the battery: 手順 5、 3の画像 2 HP EliteBook x360 830 G6 SSD Replacement, Disconnect the battery: 手順 5、 3の画像 3
    • Use the point of a spudger to push the sides of the battery connector out of its socket.

    • Push on alternate sides to "walk" the connector out.

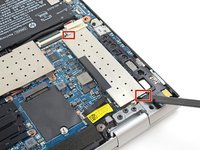
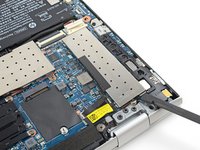
  6. HP EliteBook x360 830 G6 SSD Replacement, Disconnect the SSD cover: 手順 6、 3の画像 1 HP EliteBook x360 830 G6 SSD Replacement, Disconnect the SSD cover: 手順 6、 3の画像 2 HP EliteBook x360 830 G6 SSD Replacement, Disconnect the SSD cover: 手順 6、 3の画像 3
    • With your spudger, pry up on the tabs at the top and bottom of the SSD cover.

    • This will loosen the SSD cover enough for it to pop out from its tension clips.

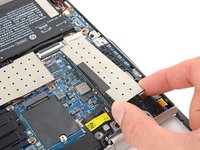
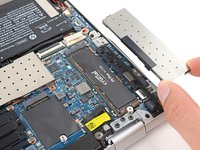
  7. HP EliteBook x360 830 G6 SSD Replacement, Remove the SSD cover: 手順 7、 2の画像 1 HP EliteBook x360 830 G6 SSD Replacement, Remove the SSD cover: 手順 7、 2の画像 2
    • Lift the SSD cover off the SSD and remove it.

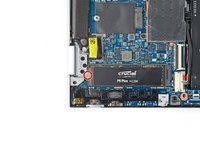
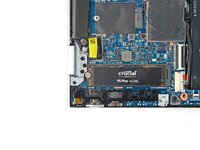
  8. HP EliteBook x360 830 G6 SSD Replacement, Unfasten the SSD: 手順 8、 2の画像 1 HP EliteBook x360 830 G6 SSD Replacement, Unfasten the SSD: 手順 8、 2の画像 2
    • Use your Phillips screwdriver to remove the 2.4 mm-long screw from the SSD.

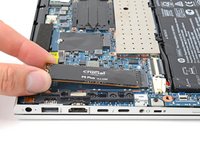
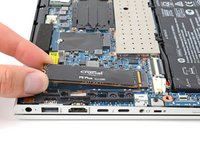
  9. HP EliteBook x360 830 G6 SSD Replacement, Remove the SSD: 手順 9、 3の画像 1 HP EliteBook x360 830 G6 SSD Replacement, Remove the SSD: 手順 9、 3の画像 2 HP EliteBook x360 830 G6 SSD Replacement, Remove the SSD: 手順 9、 3の画像 3
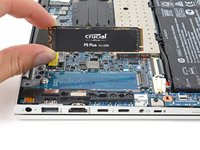
    • Grip the edges if the SSD near the screw indent.

    • Pull the SSD straight out of its socket and remove it.

    • If the SSD feels stuck, wiggle it side to side as you pull.

終わりに

To reassemble your device, follow these instructions in reverse order.

Take your e-waste to an R2 or e-Stewards certified recycler.

Repair didn’t go as planned? Try some basic troubleshooting, or ask our HP EliteBook community for help.

ある他の人がこのガイドを完成しました。

作成者

3人の作成者と共同で作成されました。
Clay Eickemeyer

メンバー登録日: 09/19/22

82,111 ポイント

455のガイドは作成済み

チーム

Guide Team Guide Team人のメンバー

Staff

9 メンバー

11,442のガイドは作成済み

0 件のコメント

コメントを追加

統計データ:

過去 24時間: 2

過去 7 日: 23

過去 30 日: 130

今までの合計 2,964