メインコンテンツにスキップ

Google Pixel Watch Battery Replacement

必要な工具と部品

  1. Google Pixel Watch Battery Replacement, Remove the watch band: 手順 1、 3の画像 1 Google Pixel Watch Battery Replacement, Remove the watch band: 手順 1、 3の画像 2 Google Pixel Watch Battery Replacement, Remove the watch band: 手順 1、 3の画像 3
    • Before starting repairs, turn off your watch and take it off the charger.

    • Remove the watch band by pressing the band release button and sliding the band over the button while pulling it away from the watch.

    • Repeat for the other watch band.

  2. Google Pixel Watch Battery Replacement, Loosen the screen adhesive: 手順 2、 1の画像 1
    • Heat an iOpener and apply it to the screen for about two minutes to soften the adhesive securing the screen.

    • A hair dryer, heat gun, or hot plate may also be used, but be careful not to overheat the watch—the screen and internal battery are both susceptible to heat damage.

  3. Google Pixel Watch Battery Replacement, Insert an iFlex: 手順 3、 2の画像 1 Google Pixel Watch Battery Replacement, Insert an iFlex: 手順 3、 2の画像 2
    この手順で使用する道具:
    iFlex Opening Tool
    $11.99
    購入する
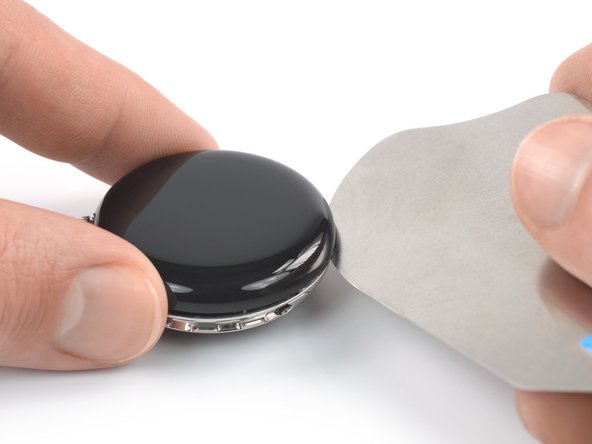
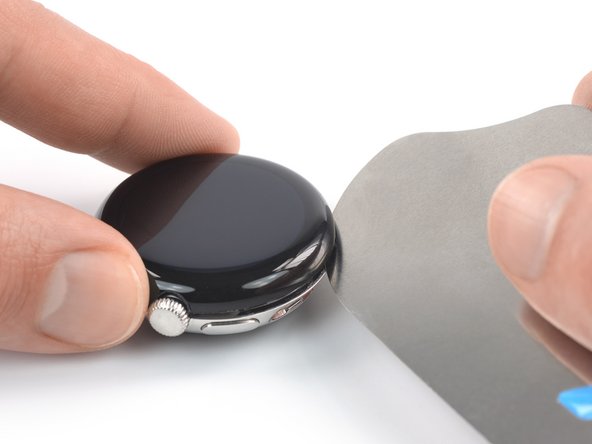
    • The thin seam between the frame and screen requires a thin metal tool—take your time and work carefully to avoid scraping or gouging the watch body or glass.

    • Insert an iFlex into the thin gap between the screen and frame, left of the digital crown.

  4. Google Pixel Watch Battery Replacement, Slice the screen adhesive: 手順 4、 3の画像 1 Google Pixel Watch Battery Replacement, Slice the screen adhesive: 手順 4、 3の画像 2 Google Pixel Watch Battery Replacement, Slice the screen adhesive: 手順 4、 3の画像 3
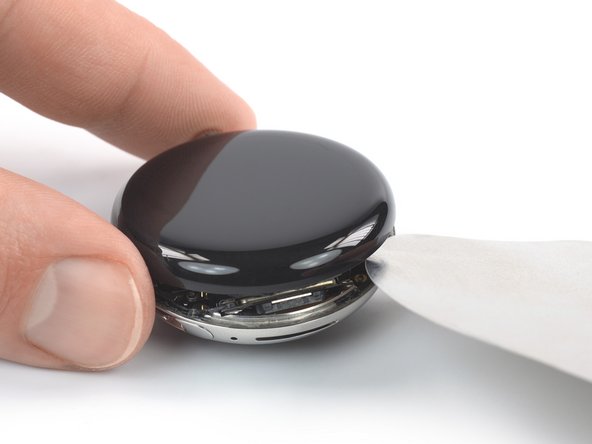
    • When slicing the screen adhesive, insert the iFlex no deeper than 3 mm to prevent damaging internal components.

    • Slide the iFlex around the entire perimeter of the watch to slice all of the screen adhesive.

  5. Google Pixel Watch Battery Replacement, Pry up the screen: 手順 5、 2の画像 1 Google Pixel Watch Battery Replacement, Pry up the screen: 手順 5、 2の画像 2
    • Remove the iFlex and reinsert it under the screen, to the right of the speaker grille.

    • Twist the iFlex to pry the screen up.

    • Don't try to fully remove the screen just yet, as it‘s still connected to the watch assembly by a delicate cable.

  6. Google Pixel Watch Battery Replacement, Swing open the screen: 手順 6、 3の画像 1 Google Pixel Watch Battery Replacement, Swing open the screen: 手順 6、 3の画像 2 Google Pixel Watch Battery Replacement, Swing open the screen: 手順 6、 3の画像 3
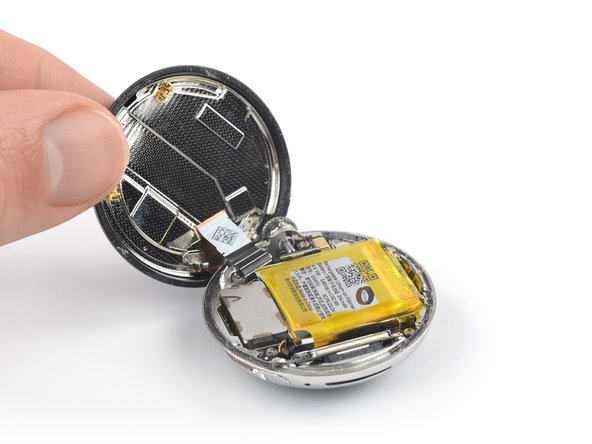
    • Be careful not to strain the screen assembly cable when you open the display.

    • Swing the screen open to an upright position.

    • During reassembly, this is a good point to power on your device and test all functions before sealing it up. Be sure to power it back down completely before you continue working.

  7. Google Pixel Watch Battery Replacement, Unfasten the speaker bracket: 手順 7、 2の画像 1 Google Pixel Watch Battery Replacement, Unfasten the speaker bracket: 手順 7、 2の画像 2
    この手順で使用する道具:
    FixMat
    $36.95
    購入する
    • Throughout this repair, keep track of each screw and make sure it goes back exactly where it came from.

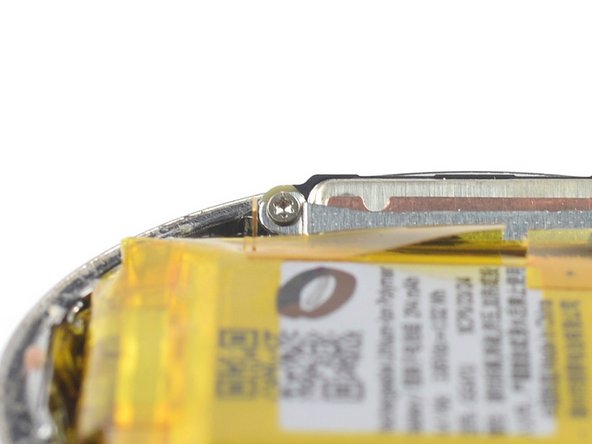
    • Use a Torx T2 screwdriver to remove the 2.1 mm-long screw securing the speaker bracket.

  8. Google Pixel Watch Battery Replacement, Remove the speaker bracket: 手順 8、 3の画像 1 Google Pixel Watch Battery Replacement, Remove the speaker bracket: 手順 8、 3の画像 2 Google Pixel Watch Battery Replacement, Remove the speaker bracket: 手順 8、 3の画像 3
    この手順で使用する道具:
    Tweezers
    $4.99
    購入する
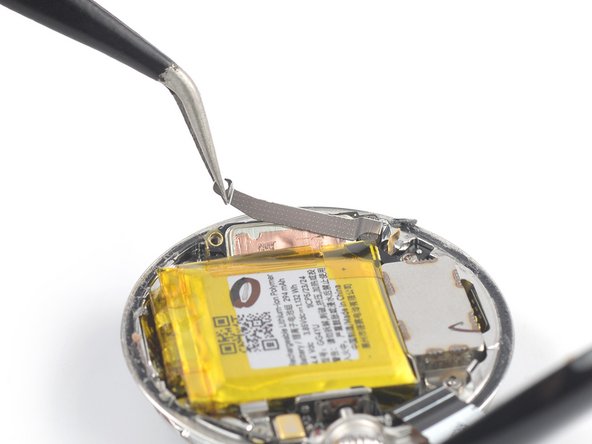
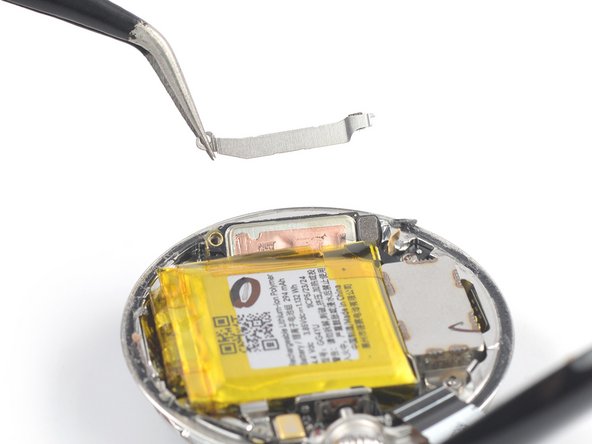
    • Take care not to puncture or bend the battery with sharp tools—it can leak dangerous chemicals or catch fire.

    • Use a pair of tweezers to remove the speaker bracket.

  9. Google Pixel Watch Battery Replacement, Disconnect the vibration motor: 手順 9、 2の画像 1 Google Pixel Watch Battery Replacement, Disconnect the vibration motor: 手順 9、 2の画像 2
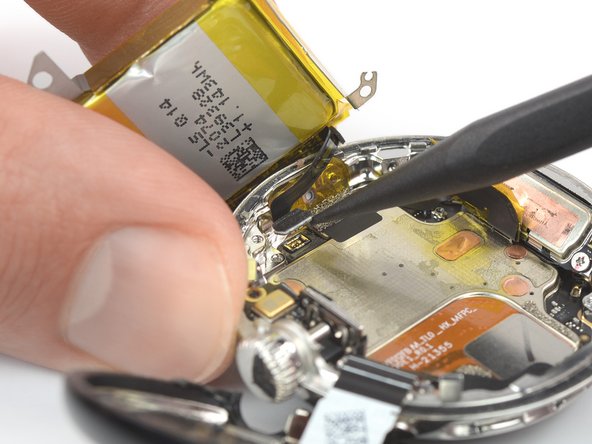
    • Use the point of a spudger to pry up and disconnect the vibration motor‘s press connector.

    • To re-attach press connectors like this one, carefully align and press down on one side until it clicks into place, then repeat on the other side. Do not press down in the middle. If the connector is misaligned, the pins can bend and cause permanent damage.

  10. Google Pixel Watch Battery Replacement, Loosen the vibration motor cable: 手順 10、 2の画像 1 Google Pixel Watch Battery Replacement, Loosen the vibration motor cable: 手順 10、 2の画像 2
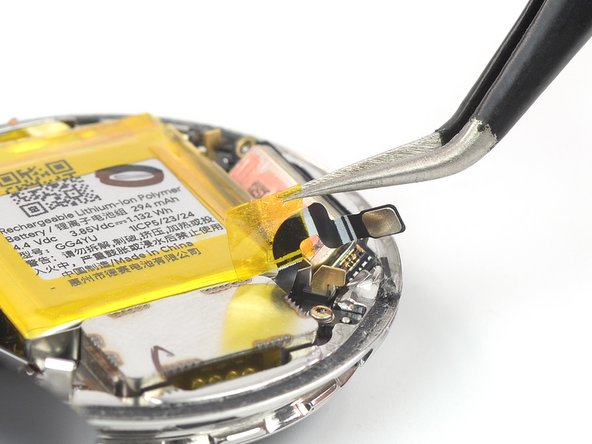
    • Be careful with sharp tools around the battery.

    • Use tweezers to peel up the yellow tape securing the vibration motor cable to the battery.

  11. Google Pixel Watch Battery Replacement, Unfasten the vibration motor: 手順 11、 1の画像 1
    • Use a Torx T2 screwdriver to remove the two screws securing the vibration motor:

    • One 1.8 mm-long screw

    • One 2.8 mm-long screw

  12. Google Pixel Watch Battery Replacement, Remove the grounding bracket: 手順 12、 3の画像 1 Google Pixel Watch Battery Replacement, Remove the grounding bracket: 手順 12、 3の画像 2 Google Pixel Watch Battery Replacement, Remove the grounding bracket: 手順 12、 3の画像 3
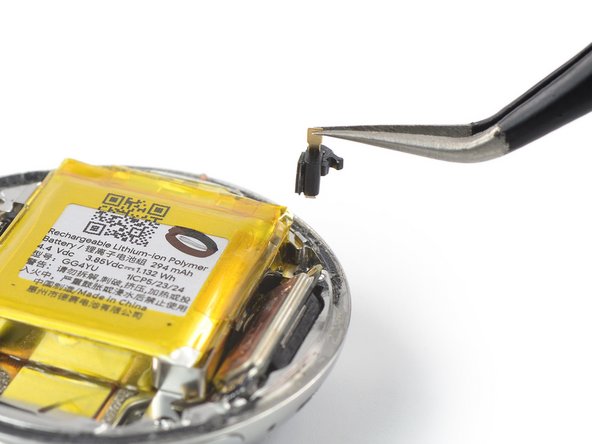
    • Use tweezers to lift the grounding bracket out of its recess and remove it.

  13. Google Pixel Watch Battery Replacement, Remove the vibration motor: 手順 13、 2の画像 1 Google Pixel Watch Battery Replacement, Remove the vibration motor: 手順 13、 2の画像 2
    • Remove the vibration motor.

  14. Google Pixel Watch Battery Replacement, Unfasten the battery bracket: 手順 14、 1の画像 1
    • Use a Torx T2 screwdriver to remove the two 3 mm-long screws securing the battery bracket.

  15. Google Pixel Watch Battery Replacement, Remove the grounding bracket: 手順 15、 3の画像 1 Google Pixel Watch Battery Replacement, Remove the grounding bracket: 手順 15、 3の画像 2 Google Pixel Watch Battery Replacement, Remove the grounding bracket: 手順 15、 3の画像 3
    この手順で使用する道具:
    Tweezers
    $4.99
    購入する
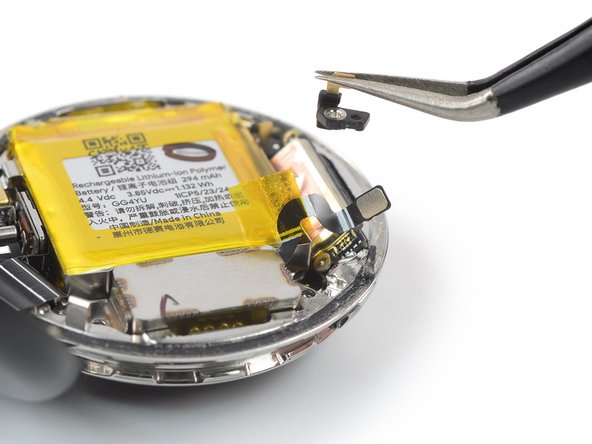
    • Use tweezers to lift the grounding bracket out of its recess and remove it.

  16. Google Pixel Watch Battery Replacement, Loosen the battery tape: 手順 16、 2の画像 1 Google Pixel Watch Battery Replacement, Loosen the battery tape: 手順 16、 2の画像 2
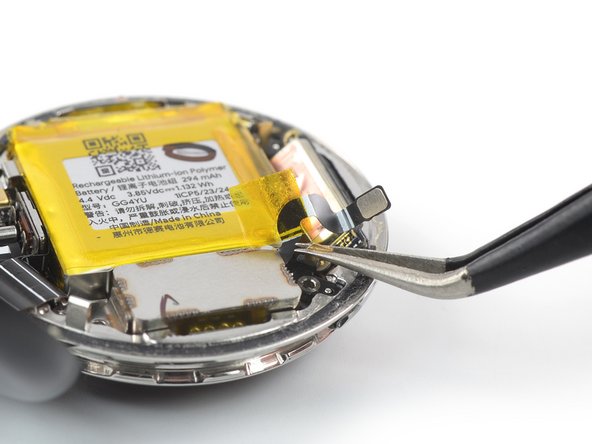
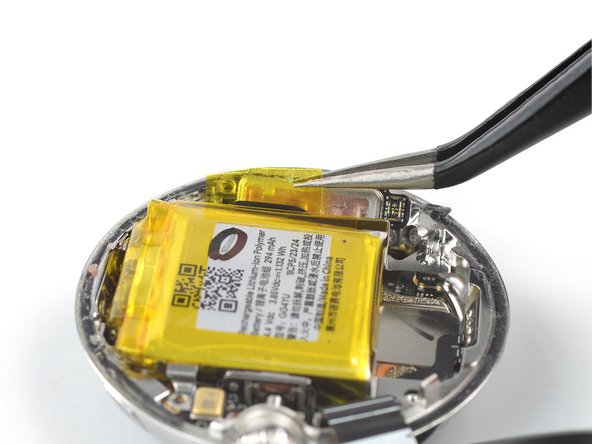
    • Take care not to puncture or bend the battery with sharp tools—it can leak dangerous chemicals or catch fire.

    • Use tweezers to peel up the yellow tape from the edge of the battery, next to the speaker.

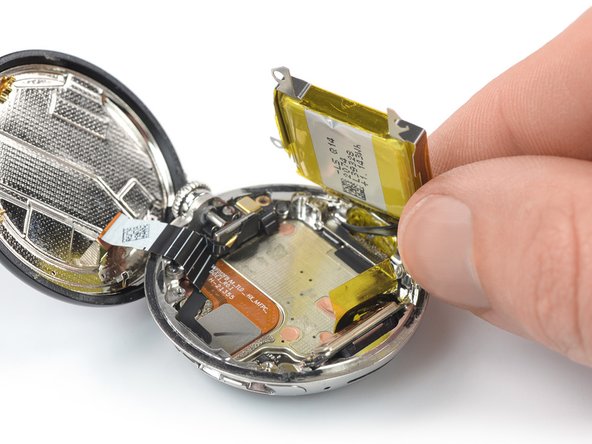
  17. Google Pixel Watch Battery Replacement, Pry up the battery: 手順 17、 2の画像 1 Google Pixel Watch Battery Replacement, Pry up the battery: 手順 17、 2の画像 2
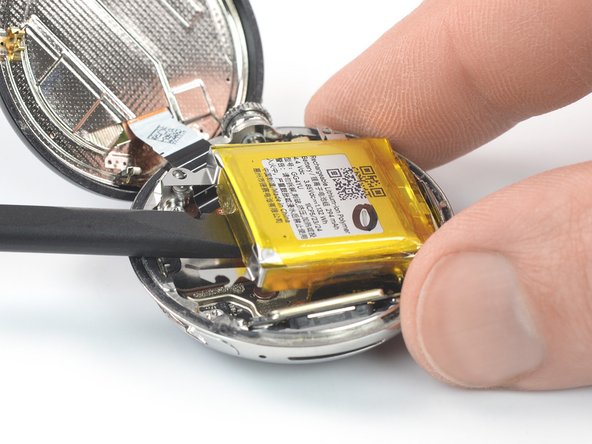
    • Slide the flat end of a spudger under the edge of the battery where the vibration motor was.

    • Pry up the battery until you can grip it with your fingers.

    • The battery is held in place by mild adhesive. If you're struggling to pry up the battery, apply a heated iOpener to the bottom of the watch for about 2 minutes to loosen the adhesive. Don't apply the iOpener directly to the battery.

    • Don't try to remove the battery all the way yet, as it‘s still connected to the watch assembly by a delicate cable.

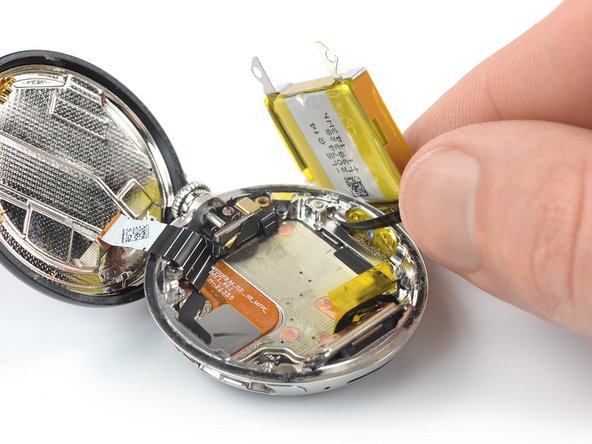
  18. Google Pixel Watch Battery Replacement, Reposition the battery: 手順 18、 3の画像 1 Google Pixel Watch Battery Replacement, Reposition the battery: 手順 18、 3の画像 2 Google Pixel Watch Battery Replacement, Reposition the battery: 手順 18、 3の画像 3
    • Avoid straining or tearing the battery cable when moving the battery.

    • Carefully place the battery next to the watch to access the battery connector bracket.

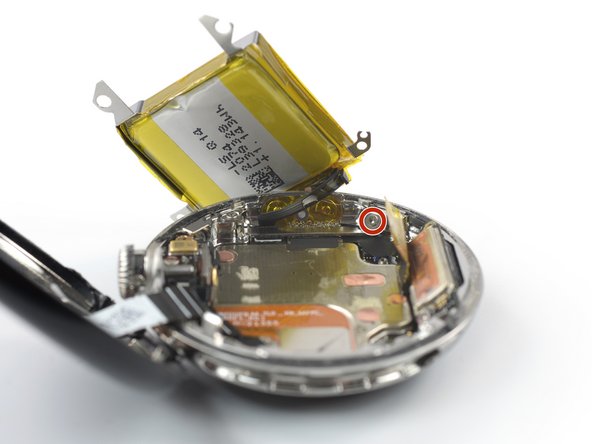
  19. Google Pixel Watch Battery Replacement, Unfasten the battery connector bracket: 手順 19、 2の画像 1 Google Pixel Watch Battery Replacement, Unfasten the battery connector bracket: 手順 19、 2の画像 2
    • Use a Torx T2 screwdriver to remove the two 1.5 mm-long screws securing the battery connector bracket.

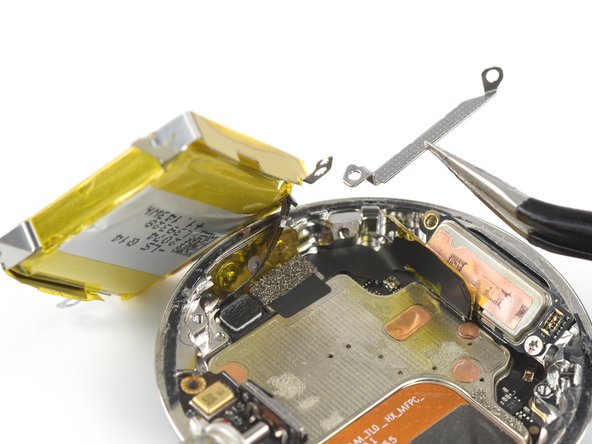
  20. Google Pixel Watch Battery Replacement, Remove the battery connector bracket: 手順 20、 2の画像 1 Google Pixel Watch Battery Replacement, Remove the battery connector bracket: 手順 20、 2の画像 2
    • Use tweezers to remove the battery connector bracket.

  21. Google Pixel Watch Battery Replacement, Disconnect the battery cable: 手順 21、 2の画像 1 Google Pixel Watch Battery Replacement, Disconnect the battery cable: 手順 21、 2の画像 2
    • Use the point of a spudger to disconnect the battery cable by prying the connector straight up from its socket.

  22. Google Pixel Watch Battery Replacement, Remove the battery: 手順 22、 1の画像 1
    • Remove the battery.

    • Never reuse a deformed or damaged battery—it's a fire hazard. Replace it with a new battery.

終わりに

To reassemble your device, follow these instructions in reverse order.

During reassembly, apply new adhesive where it's necessary after cleaning the relevant areas with isopropyl alcohol (>90%).

For optimal performance, calibrate your newly installed battery after completing this guide.

Take your e-waste to an R2 or e-Stewards certified recycler.

Repair didn’t go as planned? Try some basic troubleshooting, or ask our Answers community for help.

ある他の人がこのガイドを完成しました。

作成者

2人の作成者と共同で作成されました。
Dominik Schnabelrauch

メンバー登録日: 11/23/16

204,902 ポイント

682のガイドは作成済み

チーム

iFixit iFixit人のメンバー

Staff

136 メンバー

17,420のガイドは作成済み

3 件のコメント

Where do I get a new battery?

Jorge Loza - 返信

где можно приобрести новую батарею?

Михаил Черноусов - 返信

Amazing photos!

EvilRSA - 返信

コメントを追加

統計データ:

過去 24時間: 16

過去 7 日: 108

過去 30 日: 484

今までの合計 3,802