この翻訳は、ソースガイドの最新の更新を反映していない可能性があります。 翻訳の更新に協力してください。 または ソースガイドを参照してください。
はじめに
この修理ガイドはiFixitのテックライティングスタッフによって執筆されたもので、Googleによって承認されたものではありません。iFixitの修理ガイドのクオリティーについては、 こちらを参照してしてください。
このガイドを参照してGoogle Pixel 4aのバッテリーを交換します。
安全上のためデバイスを解体する前に、バッテリーの残量を25%以下まで放電してください。アクシデントでバッテリーにダメージを与えてしまった場合は、サーマル事故を防ぐことができます。バッテリーが膨張している場合、
Pixel 4a 5Gの補強されていないディスプレイパネルは破損しやすいためご注意ください。 スクリーンを再利用する際は、特にオープニンング作業の注意書きをよく確認してください。
必要な工具と部品
-
-
SIMエジェクトツール、ビットもしくは先端を伸ばしたクリップの先端を、SIMカードトレイ上にある小さな穴にまっすぐ差し込みます。
-
しっかりと押し込んで、SIMカードトレイを取り出します。
-
SIMカードトレイを取り出します。
-
-
-
デバイスの側面にある2つのシーム(継ぎ目)にご注意ください。
-
スクリーン側のシーム: このシームはデバイス全体とスクリーンを乖離するものです。この部分をこじ開けてください。
-
フレーム側のシーム: これはバックカバーがプラスチックと合わさる箇所です。ネジで固定されています。このシームをこじ開けないでください。
-
作業を始める前に、スクリーンの次のエリアにご注目ください。
-
スクリーンのフレックスケーブル: 表記された以上深くまで、開口ピックを押し込まないでください。このケーブルを破損するリスクがあります。
-
周囲の接着剤: ピックを斜めに挿入しない状態で、この細い接着剤エリアを越えて、こじ開けないでください。OLEDパネルを破損してしまいます。
-
-
-
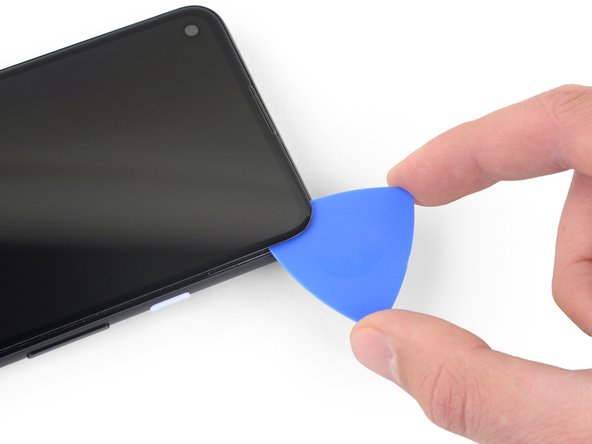
吸盤カップをスクリーンの右端に近い位置に装着します。
-
吸盤カップを一定の強い力で引き上げます。
-
開口ピックの先端を、スクリーンのシームから1mm以上差し込まないでください。
For a very cracked screen, I placed clear packing tape on top of the screen to use the suction cup at all. Also had to suction cup and pry/pick at multiple sides of the screen. Small fragments of broken glass won't pry up, so had to use tweezers to pull at glass fragments to release them from the adhesive underneath.
-
-
-
隙間にピックの先端を1mm差し込んだら、鋭利な角度で上向きに開口ピックを、てこのようにして持ち手を上向きにします。
-
鋭利な角度で、ピックの先端をゆっくりと6mm程度隙間に差し込みます。ピックはOLEDパネルの下側にスライドします。
If only the battery needs to be replaced, be sure to pay attention to the angle at which the pick is moved. Even the slightest deviation and the display is crap. I followed the instructions, but obviously I got to the display somewhere. Unfortunately the display now remains black and I have a flashing green bar at the top. So be careful.
-
-
-
ピックをスクリーンの右端に沿ってスライドして、接着剤を切開します。
-
接着剤の再装着を防ぐため、デバイス右上コーナーに、開口ピックを差し込んだまま、次の作業に移ります。
-
-
-
2枚目の開口ピックを、デバイス右端に沿ってピックを隙間ができている箇所に差し込みます。OLEDパネルを破損しないようにご注意ください。
-
開口ピックをデバイス下部周辺にスライドして、接着剤を切開します。
-
接着剤の再装着を防ぐために、デバイス下部端に開口ピックを残します。
The corners seems particularly tricky with the adhesive. Make sure to reapply heat in the corners. I cracked my screen while detaching the corners.
-
-
-
開口ピックをディスプレイの左下コーナー周辺とデバイス下部をスライドして、接着剤を切開します。
-
スクリーンのフレックスケーブルとデジタイザ付近の接着剤を切開していることを念頭に置いてください。
-
-
-
-
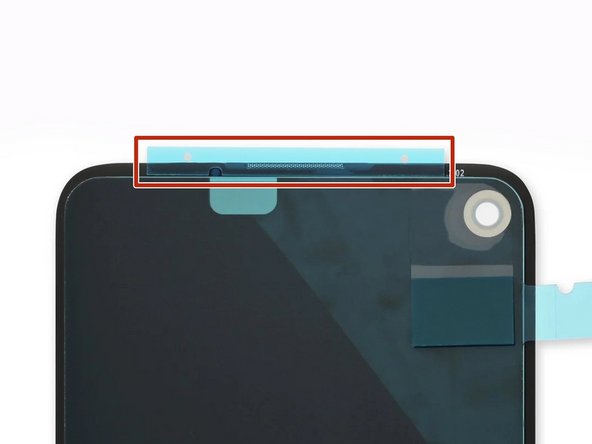
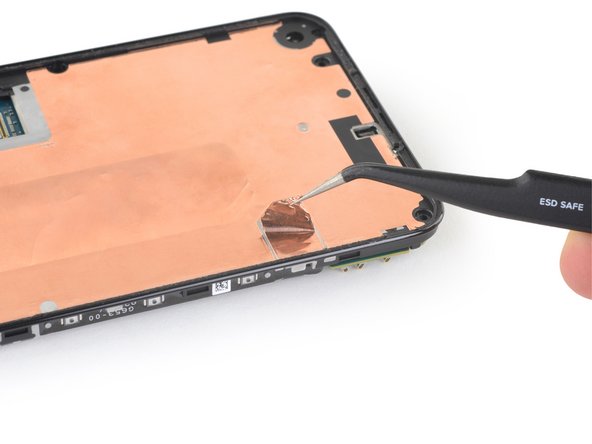
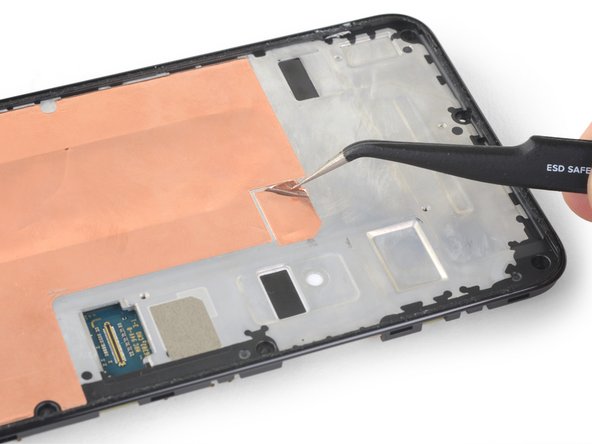
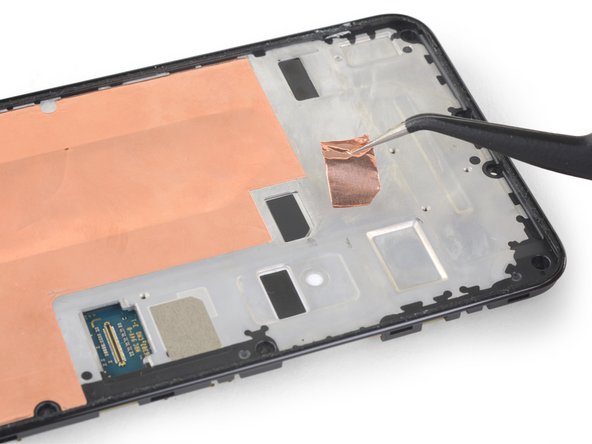
ピンセットもしくは爪先を使って、スクリーンコネクタを覆っている黒いテープカバーを慎重に剥がします。
-
-
There are four adhesives provided in the current kit provided by ifixit. They have a blue and clear backing with a thin black strip, as shown on here. The adhesives instructions provided in this general guide are not very clear and I messed up my first one, which made the other three useless leading me to just buy a b-7000 adhesive instead. However, for anyone wanting to correctly use the ifixit adhesives, first line up the black strip on the edge of your phone where the screen will rest and peel off the first clear portion. Then peel off the blue portion and you will be left with a thin black adhesive strip. Do this for all four pieces in the configuration shown on the page linked above and then place your screen on, press down gently, then turn the phone screen down and place some books on to provide stronger contact between the adhesive and the new screen. Good luck!
thanks a lot!
Zurdits -
-
-
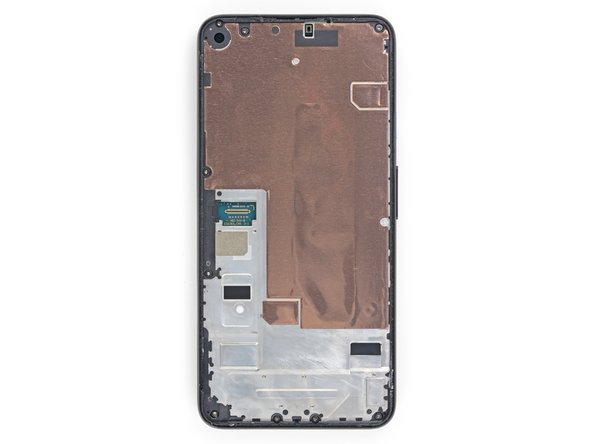
T3トルクスドライバーを使って、ミッドフレームにバックカバーを固定している4.4mmネジを9本外します。
-
この修理の間、 各ネジの位置情報を記録し 、元の場所に正確に戻しているか確認してください。
I found 2 extra screws in mine. FYI. (From America)
I also have 11x T3 in a US model. And the two at the bottom near the USB-C port are shorter by ~1mm than the others.
-
-
-
SIMカードスロットすぐ上のバックカバーとミッドフレームとバックカバーの間のシームに、開口ピックを差し込みます。
-
開口ピックをデバイス下部端に沿ってスライドして、ミッドフレームにバックカバーを固定しているプラスチッククリップを外します。
-
-
-
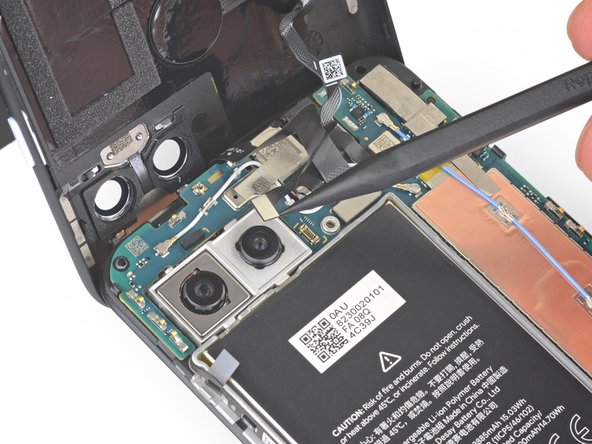
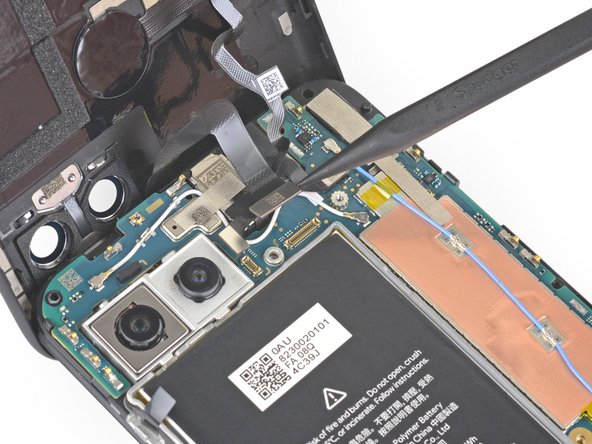
T3トルクスドライバーを使って、マザーボードブラケットを固定している7本のネジを外します。
-
4.0mm 長ネジー4本
-
201mm 長ネジー3本
Hi. Thank you for the great Tuto! Do you know where can I find a replacement battery?
-
-
-
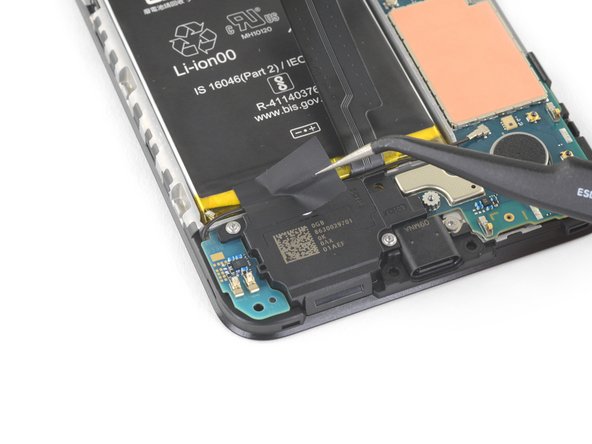
スパッジャーの平面側先端を使って、バッテリーケーブルの接続をマザーボードから外します。
-
-
-
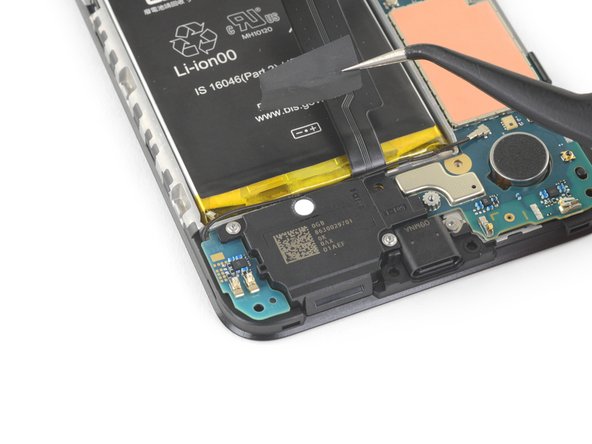
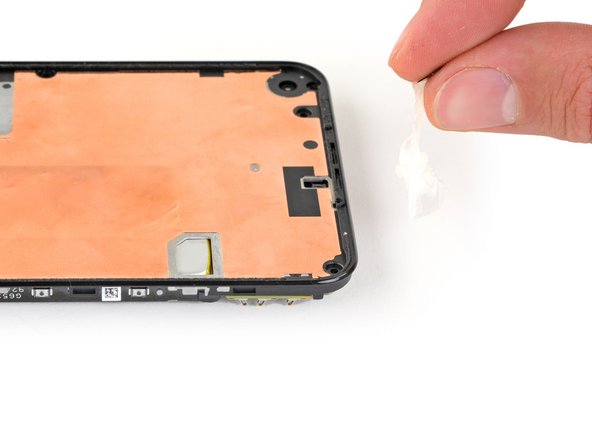
スパッジャーの平面側先端を使って、バッテリーの接着プルタブを取り出します。指でプルタブを摘んでください。
-
1本のバッテリー接着タブをデババイス下部側に向かってゆっくりと引き離します。
-
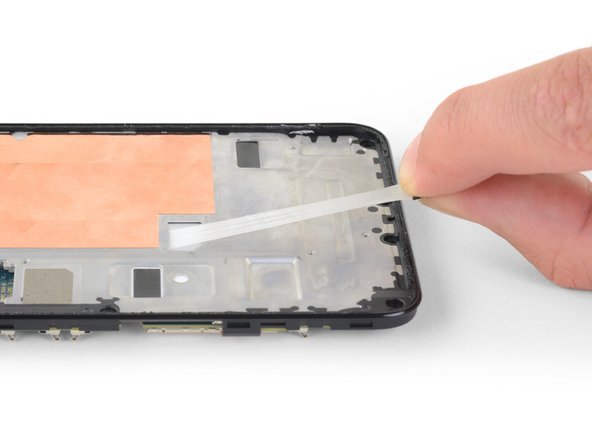
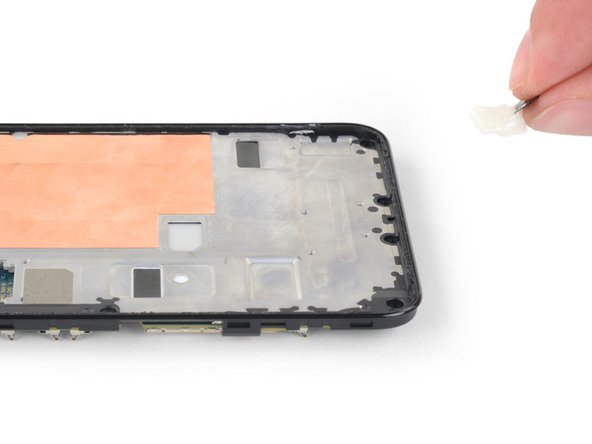
バッテリーとミッドフレームの間からストリップが外れるまで、一定の力を維持しながら、しっかりと引っ張ります。一番良い方法は、ストリップをできるだけ低い角度で引っ張ってください。
-
取り外しの作業中、バッテリーの接着剤タブが壊れた場合は、指または鈍利でないピンセットを使用して残りの接着ストリップを取り出し、引っ張り続けます。
-
-
-
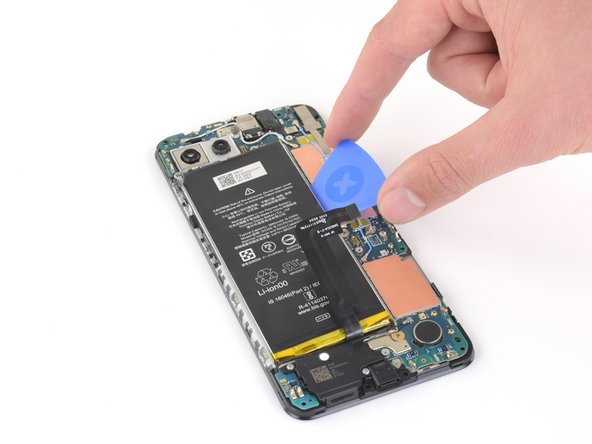
開口ピックをバッテリーの長辺側端に開口ピックを差し込んで、バッテリーの溝に沿ってスライドします。
-
バッテリーを上向きにこじ開けて、バッテリーの溝から取り出します。
-
アルコールが接着剤を柔らかくするまで1分待機した後、開口ピックを使用して、長辺側からバッテリーをこじ開けます。
My 4a 5g had additional flex cable that appeared to be for the side grip sensors i had to remove.
-


このデバイスを再組み立てするには、インストラクションを逆の順番に従って作業を進めてください。
e-wasteを処理する場合は、認可済みリサイクルセンターR2を通じて廃棄してください。
修理が上手く進みませんか?ベーシックなトラブルシューティングのページを参照するか、このモデルのアンサーコミュニティに尋ねてみましょう。
このデバイスを再組み立てするには、インストラクションを逆の順番に従って作業を進めてください。
e-wasteを処理する場合は、認可済みリサイクルセンターR2を通じて廃棄してください。
修理が上手く進みませんか?ベーシックなトラブルシューティングのページを参照するか、このモデルのアンサーコミュニティに尋ねてみましょう。
12 の人々がこのガイドを完成させました。
以下の翻訳者の皆さんにお礼を申し上げます:
92%

Midori Doiさんは世界中で修理する私たちを助けてくれています! あなたも貢献してみませんか?
翻訳を始める ›

10 件のコメント
Hi Sam,
Do you know where to actually buy battery replacements for the 4a 5g? It doesn’t seem like it’s available just doing a Google search, and just wondering if you know something I don’t.
Thanks,
Sally
Hi Sally,
Not right now, unfortunately. It’s likely a matter of time before they are available, but it’s difficult to predict exactly when—especially with impacted global supply chains. Keep an eye on iFixit and eBay, and check with any repair shops if you haven’t already.
Best of luck,
Sam
Hi! This guide worked excellently for removing my battery. But I was hoping you could give me a bit of advice.
I disassembled my phone because I got water in it, and I wanted it to dry more effectively. Because my battery is not damaged I was planning on putting it back in now, but your guide warns against this. Is that because there is no more adhesive? Or potentially something else that I could work around?
Thanks! -Ben
Ben Hilton - 返信
Hi Ben!
We warn against reusing batteries because they are usually deformed during removal, which increases the chances of a "thermal event" happening in the future. If you were able to remove yours without deforming it at all, then you should be fine to reuse it.
That being said, with internal water exposure a battery replacement is almost always necessary. It depends on the level of contamination. If it were my phone, I would buy a new one. They are not too expensive.
Hi :)
I have an Ifixit essential toolkit. The guide is excellent but once i read step 22 it states that I need to use a T3 Torx in order to remove the motherboard. Unfortunately my IFIXT includes only Torx T4 and T5, so I was wondering whether i'll be able to unscrew it anyways using what I have or will I necessarily have to buy another kit?
thank you!
Marco
The guide is much appreciated. I'll take better care of this new battery lol
I forgot to put the tab and tape back on the screen connector though, and I don't want to pull the screen back off, so I just have to live in constant fear of it coming out. FAFO.
Where can I get this process done? I don't feel I can do it myself. Jim in PHX...
This tutorial was very good. Very thorough.
It's worth noting that the "adhesive" which holds the screen to the body is double sided tape. I didn't have to heat it to get it to release. I used my nail to pierce it before using a pick because my nail seems to be stronger and finer than picks are. I could see the OLED pannel was stressed as I rounded into the corners. Be careful getting around the corners.
If you're re-using the screen (and manage not to break it) do you just put it back with the old adhesive strips and does that stick ok? What are the chances or bricking the screen as a first-time ifixer? Anyone care to guesstimate?
Al Skratch - 返信