メインコンテンツにスキップ

Google Pixel 4a 5Gヘッドホンジャックの交換

英語
日本語

手順 4を翻訳中

手順4
Google Pixel 4a 5G Battery Replacement, Remove the stretch-release adhesive: 手順 0、 3の画像 1 Google Pixel 4a 5G Battery Replacement, Remove the stretch-release adhesive: 手順 0、 3の画像 2 Google Pixel 4a 5G Battery Replacement, Remove the stretch-release adhesive: 手順 0、 3の画像 3
Remove the stretch-release adhesive
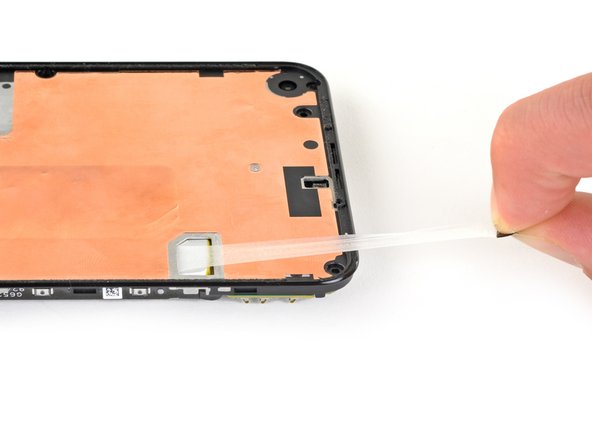
  • Use the flat end of a spudger to lift up the battery adhesive pull tab so that you can reach it with your fingers.

  • Try to keep the adhesive strips flat and unwrinkled during this procedure; twisted or wrinkled strips will stick together and break instead of pulling out cleanly.

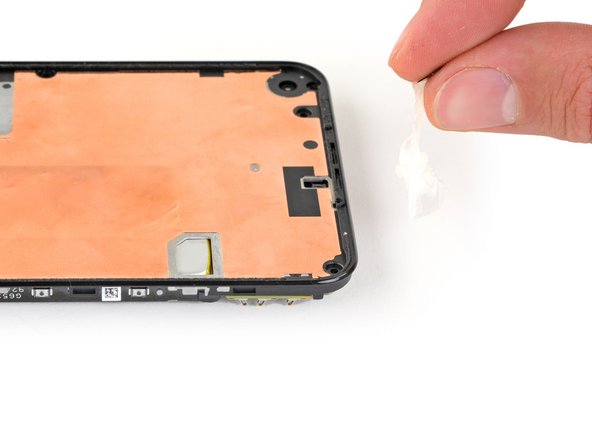
  • Slowly pull one battery adhesive tab away from the battery, towards the bottom of the phone.

  • Pull steadily, maintaining constant tension on the strip until it slips out from between the battery and the midframe. For best results, pull the strip at as low of an angle as possible.

  • The strip will stretch to many times its original length. Continue pulling and re-grab the strip near the battery if necessary.

  • If the battery adhesive tabs break during the removal process, use your fingers or blunt tweezers to retrieve the remaining length of adhesive, and continue pulling.

スパッジャーの平面側先端を使って、バッテリーの接着プルタブを取り出します。指でプルタブを摘んでください。

この作業中、接着ストリップを平らにし、しわが寄らないようにしてください。 ねじれたり、しわの寄ったストリップは、きれいに引き抜けず、くっついて壊れてしまいます。

1本のバッテリー接着タブをデババイス下部側に向かってゆっくりと引き離します。

バッテリーとミッドフレームの間からストリップが外れるまで、一定の力を維持しながら、しっかりと引っ張ります。一番良い方法は、ストリップをできるだけ低い角度で引っ張ってください

ストリップは元の長さの何倍にも伸びます。 必要に応じて、バッテリーの近くでストリップを持ち替えて、引っ張り続ます。

取り外しの作業中、バッテリーの接着剤タブが壊れた場合は、指または鈍利でないピンセットを使用して残りの接着ストリップを取り出し、引っ張り続けます。

クリエイティブコモンズのオープンソース著作権のもと、あなたの投稿は著作権の対象となります