
Giant Talon 29er Chainring Replacement

はじめに
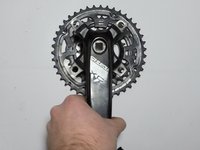
手順 1 に進むThis guide will show how to remove, disassemble, and replace the chainrings from the crank arm on a Giant Talon 29er bicycle. The chainrings should be replaced when the chain starts to skip teeth while riding.
必要な工具と部品
パーツ

ツール
もっと見る
-
-
Push the chain tensioner towards the front of the bicycle to release the tension on the chain.
-
Unroute the chain from the chainrings.
-
-


Reassemble your bicycle with the new chainrings by following these instructions in reverse order.
Reassemble your bicycle with the new chainrings by following these instructions in reverse order.
ある他の人がこのガイドを完成しました。

チーム

Michigan Tech, Team 1-7, Lauer Spring 2016 Michigan Tech, Team 1-7, Lauer Spring 2016人のメンバー
MTU-LAUER-S16S1G7
1 メンバー
1のガイドは作成済み